Open post

mendocino farms menu pdf

Mendocino Farms is a fast-casual restaurant chain known for its chef-driven sandwiches, fresh salads, and high-quality ingredients sourced from local farms. Founded in 2005 in California, the brand blends gourmet flavors with a casual dining experience. Their menu emphasizes seasonal ingredients, sustainable farming practices, and creative dishes like The Farm Club sandwich and Avocado & Quinoa Superfood Ensalada. The Mendocino Farms menu PDF offers a detailed look at their offerings, including catering options and dietary accommodations, making it a go-to resource for foodies and event planners alike.

Overview of Mendocino Farms

Mendocino Farms is a fast-casual restaurant chain renowned for its chef-driven menu, featuring gourmet sandwiches, fresh salads, and high-quality ingredients sourced from local farms. Founded in 2005 in California, the brand has grown to become a favorite for food enthusiasts. The restaurant prides itself on its commitment to sustainable farming practices and supporting the Slow Food movement. With locations across California and beyond, Mendocino Farms offers a welcoming atmosphere that blends casual dining with elevated flavors. Their dedication to using seasonal and locally sourced ingredients has earned them a loyal following. Whether it’s for lunch, takeout, or catering, Mendocino Farms continues to be a go-to destination for those seeking fresh, flavorful, and responsibly sourced meals.

Importance of the Mendocino Farms Menu PDF

The Mendocino Farms menu PDF is a valuable resource for customers, providing a detailed overview of their offerings, including sandwiches, salads, and seasonal specials. It highlights key ingredients, nutritional information, and pricing, making it easier for diners to make informed choices. The PDF also outlines catering options and dietary accommodations, such as gluten-free and vegan alternatives. For those planning events or meals, the menu PDF serves as a convenient guide to explore options and customize orders. Additionally, it showcases Mendocino Farms’ commitment to transparency and sustainability, aligning with their mission to enrich lives through food. Regular updates ensure the PDF reflects the latest menu additions and seasonal creations, keeping customers informed and engaged with the brand’s culinary offerings.

Menu Philosophy and Key Features

Mendocino Farms emphasizes quality, freshness, and creativity, sourcing ingredients from local farms. Their chef-driven menu features seasonal dishes, artisanal sandwiches, and vibrant salads, blending gourmet flavors with approachable dining.

Commitment to Quality and Fresh Ingredients

Mendocino Farms is dedicated to serving high-quality dishes made with fresh, locally sourced ingredients. Their menu reflects a commitment to seasonal produce and sustainable farming practices, ensuring each ingredient is carefully selected for maximum flavor and nutrition. By collaborating with local farmers, the restaurant maintains a focus on reducing environmental impact while delivering exceptional taste. This dedication to quality is evident in every sandwich, salad, and soup, making Mendocino Farms a leader in the fast-casual dining scene. Their passion for fresh, wholesome ingredients creates a culinary experience that aligns with their mission to enrich lives through food.

Sustainable Farming and Local Sourcing Practices

Mendocino Farms is deeply committed to sustainable farming and local sourcing, aligning with the Slow Food movement to promote eco-friendly practices. By partnering with local farmers, the restaurant ensures its ingredients are fresh, seasonal, and responsibly sourced. This dedication not only supports the local economy but also reduces the environmental impact of transportation. Their menu often highlights dishes crafted with ingredients from nearby farms, such as the Farm Club sandwich, which showcases locally sourced turkey, avocado, and bacon. This approach guarantees that every bite contributes to a healthier planet while delivering exceptional flavor and quality. Mendocino Farms’ sustainable practices are a cornerstone of their culinary philosophy, making them a leader in ethical and environmentally conscious dining.

Popular Menu Items at Mendocino Farms

Mendocino Farms’ popular menu items include The Farm Club, Chicken Pesto Caprese, and Avocado & Quinoa Superfood Ensalada, offering fresh, flavorful, and innovative dining options crafted with locally sourced ingredients.

Signature Sandwiches

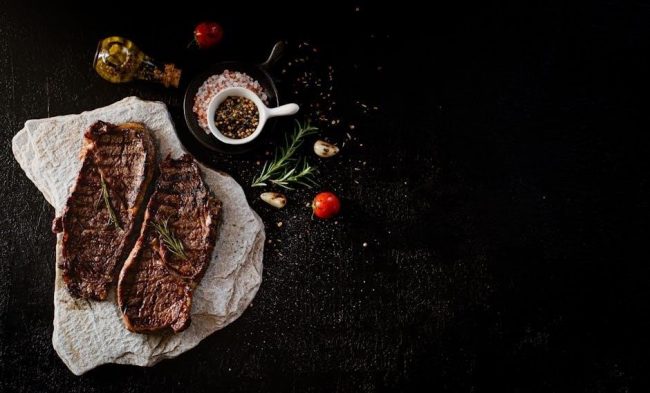
Mendocino Farms is renowned for its signature sandwiches, crafted with premium ingredients and creative flavors. The Farm Club stands out, featuring shaved turkey, avocado, nitrate-free bacon, and herb aioli on fresh bread. Another favorite is the Chicken Pesto Caprese, combining roasted chicken, mozzarella, and basil pesto. The Peruvian Steak sandwich offers a bold twist with chimichurri and grilled steak. Each sandwich is made with locally sourced, seasonal ingredients, ensuring freshness and flavor. These dishes exemplify Mendocino Farms’ commitment to quality and innovation, making their sandwiches a highlight of the menu. The menu PDF provides detailed descriptions, allowing diners to explore these signature offerings at home or in-store.

Salads and Vegan Options

Mendocino Farms offers a variety of fresh, vibrant salads and vegan options, catering to diverse dietary preferences. The Avocado & Quinoa Superfood Ensalada is a standout, featuring nutrient-rich ingredients like quinoa, avocado, and mixed greens. Vegan dishes are thoughtfully crafted, such as the Vegan Caesar, made with plant-based dressing and crispy chickpeas. The menu also includes gluten-free and dairy-free options, ensuring inclusivity for all diners. These offerings reflect Mendocino Farms’ dedication to using locally sourced, seasonal ingredients while providing innovative, flavorful plant-based choices. The menu PDF highlights these options, making it easy for guests to explore and enjoy these creative, wholesome dishes.

Seasonal and Limited-Time Offerings

Mendocino Farms excels at offering seasonal and limited-time dishes, showcasing fresh, locally sourced ingredients. The Hot Honey Peach & Prosciutto Sandwich and Chimichurri Steak & Bacon Sandwich are examples of their creative, chef-driven specials. These offerings are crafted to highlight the best of each season, ensuring a dynamic and exciting menu. Limited-time options are often featured in their catering packages, making them ideal for events. The menu PDF is regularly updated to reflect these seasonal additions, allowing customers to discover new flavors. Whether it’s a summer salad or a hearty winter sandwich, Mendocino Farms’ seasonal offerings provide a unique dining experience that keeps guests coming back for more. These specials are available for both dine-in and takeout, making them a convenient and delicious choice.

Catering and Special Menu Options

Mendocino Farms offers catering packages featuring their popular sandwiches and salads, perfect for events. The menu PDF includes options for special dietary needs, ensuring everyone is accommodated.

Catering Packages and Options

Mendocino Farms offers customizable catering packages perfect for events and gatherings. Their menu features a selection of popular sandwiches, salads, and soups, all made with fresh, high-quality ingredients. Popular catering items include The Farm Club, Chicken Pesto Caprese, and the Avocado & Quinoa Superfood Ensalada. The menu PDF provides detailed options, including gluten-free and vegan choices, ensuring dietary preferences are accommodated. For flexibility, they offer half-sandwich pairings with sides or soups, ideal for varied appetites. With a focus on seasonal and locally sourced ingredients, Mendocino Farms catering brings a gourmet touch to any occasion. Their packages are designed to be easy to order and serve, making them a convenient choice for both small and large events.

Special Dietary Options and Allergen Information

Mendocino Farms offers a variety of special dietary options to accommodate different needs. Their menu includes vegetarian (VEGAN), dairy-free (DF), and gluten-free options, with clear labels to guide guests. The Avocado & Quinoa Superfood Ensalada and Not So Fried Chicken are popular vegan and gluten-free choices. Additionally, sandwiches can be adapted by substituting gluten-free bread for a small fee.

The menu PDF also highlights allergen information, noting that items may contain traces of peanuts, tree nuts, milk, eggs, sesame seeds, fish, shellfish, soy, and wheat. Guests with allergies are encouraged to inform staff to ensure safety. This transparency makes Mendocino Farms a welcoming choice for diners with dietary restrictions, providing both delicious and safe options for all.

Mendocino Farms’ menu PDF showcases their commitment to quality, sustainability, and diverse options, offering a guide for foodies and planners seeking fresh, chef-driven dishes with allergen transparency.

Final Thoughts on the Mendocino Farms Menu

Mendocino Farms’ menu PDF exemplifies their dedication to quality, creativity, and sustainability, offering a wide range of options for every palate and dietary preference. From signature sandwiches like The Farm Club to vibrant salads and seasonal specials, their dishes are crafted with fresh, locally sourced ingredients. The menu’s emphasis on transparency, including allergen information, makes it inclusive for all diners. Whether you’re planning a casual meal or a catered event, Mendocino Farms’ menu provides a seamless blend of gourmet flavors and approachable dining. Their commitment to sustainable farming and chef-driven innovation ensures a memorable culinary experience. The menu PDF is a valuable resource for exploring their offerings and discovering new favorites, solidifying Mendocino Farms as a leader in the fast-casual dining scene.

Open post

contraindications for manual lymph drainage

Manual Lymph Drainage (MLD) is a gentle‚ non-invasive technique promoting lymph flow. Understanding its contraindications is crucial for safe practice‚ ensuring it benefits patients without causing harm.

Overview of Manual Lymph Drainage (MLD)

Manual Lymph Drainage (MLD) is a gentle‚ non-invasive therapeutic technique that involves light‚ rhythmic hand movements to stimulate the lymphatic system. It aims to enhance the natural drainage of lymph fluid‚ particularly in areas where lymph nodes have been damaged or removed. MLD is commonly used to treat lymphedema‚ a condition characterized by chronic swelling due to impaired lymph flow. The technique focuses on specific regions‚ such as the neck‚ axillary‚ and inguinal areas‚ where lymph fluid returns to the bloodstream. By promoting proper lymph circulation‚ MLD helps reduce swelling‚ alleviate discomfort‚ and improve overall well-being.

MLD is often performed as part of Complex Decongestive Therapy (CDT)‚ which also includes compression bandaging‚ exercise‚ and skin care. It is particularly beneficial for individuals who have undergone cancer treatment or experienced trauma affecting the lymphatic system. The technique is applied with minimal pressure‚ making it suitable for sensitive or fragile patients. MLD is widely recognized for its effectiveness in managing lymphedema and other conditions related to lymphatic dysfunction.

The Importance of Understanding Contraindications

Understanding the contraindications for Manual Lymph Drainage (MLD) is essential to ensure safe and effective treatment. MLD‚ while beneficial for lymphedema and other conditions‚ can worsen certain health issues if not applied appropriately. Conditions like acute infections‚ active cancer‚ and severe cardiovascular problems may contraindicate MLD‚ as they can lead to complications such as pathogen spread or fluid overload. Recognizing these contraindications prevents harm and ensures therapy is tailored to individual needs. Healthcare providers must evaluate patients thoroughly to avoid adverse effects. Proper understanding and adherence to contraindications safeguard patient well-being and maintain the integrity of MLD as a therapeutic intervention.

  • Prevents complications from worsening conditions.
  • Ensures therapy is safe and personalized.
  • Highlights the role of medical clearance.

Absolute Contraindications for Manual Lymph Drainage

Conditions like acute infections‚ active cancer‚ or severe heart failure are absolute contraindications for MLD‚ as they may lead to serious health complications or worsen existing conditions.

  • Acute infections or inflammation.
  • Active malignant conditions or metastatic cancer.
  • Severe cardiovascular issues‚ such as congestive heart failure.

Acute Inflammation Caused by Infections

Acute inflammation caused by infections‚ such as bacterial‚ viral‚ or fungal infections‚ is a significant contraindication for Manual Lymph Drainage (MLD). This is because MLD can inadvertently spread pathogens through the lymphatic system‚ worsening the infection or leading to systemic complications. Conditions like acute cellulitis‚ erysipelas‚ or active infections in the affected area should be avoided to prevent further progression. MLD may exacerbate inflammation by increasing lymph flow to infected regions‚ potentially overwhelming the body’s immune response. It is essential to wait until the infection is fully resolved or under control before considering lymphatic drainage. Additionally‚ any fever or signs of systemic infection‚ such as sepsis‚ make MLD unsafe. Always consult a healthcare provider before proceeding with MLD in such cases to ensure patient safety and avoid adverse outcomes.

Active Malignant Conditions or Metastatic Cancer

Active malignant conditions or metastatic cancer are absolute contraindications for Manual Lymph Drainage (MLD). MLD can potentially disperse cancer cells through the lymphatic system‚ leading to tumor progression or spreading to other areas. This risk is particularly high in cases of systemic malignancy or when cancer is actively progressing. Additionally‚ areas directly affected by cancer‚ such as tumor sites or regions with metastatic involvement‚ should not be treated with MLD to avoid promoting further cancer spread. Healthcare providers must carefully evaluate the risks and benefits before considering MLD in patients with a history of cancer‚ ensuring that the cancer is stable and not actively progressing. Always prioritize medical clearance to safeguard patient health and prevent adverse outcomes.

Severe Cardiovascular Issues‚ Including Congestive Heart Failure

Severe cardiovascular issues‚ such as congestive heart failure‚ are absolute contraindications for Manual Lymph Drainage (MLD). MLD can increase lymphatic flow‚ potentially overwhelming the heart and worsening fluid retention. Conditions like unstable angina‚ severe hypertension‚ or aortic aneurysms also pose risks‚ as MLD may exacerbate fluid redistribution and strain the cardiovascular system. Patients with these conditions require careful medical evaluation to avoid complications. MLD should not be performed without prior medical clearance‚ especially in cases of acute or unstable cardiovascular disease. The therapy could inadvertently increase the workload on the heart‚ leading to serious health consequences. Thus‚ it is critical to prioritize patient safety and avoid MLD in these situations to prevent potential harm.

Relative Contraindications for Manual Lymph Drainage

Relative contraindications include chronic inflammatory conditions‚ uncontrolled hypertension‚ diabetes mellitus in decompensation‚ and severe respiratory issues like bronchial asthma‚ requiring cautious assessment and medical guidance before treatment.

Chronic Inflammatory Conditions

Chronic inflammatory conditions‚ such as rheumatoid arthritis‚ Crohn’s disease‚ or ulcerative colitis‚ are considered relative contraindications for Manual Lymph Drainage (MLD). While MLD can help reduce swelling‚ it may exacerbate inflammation in active or severe cases. Conditions like Crohn’s disease or ulcerative colitis involve inflammation in the abdominal cavity‚ where MLD could potentially worsen symptoms. Similarly‚ chronic inflammatory arthritis may require cautious assessment to avoid triggering flare-ups. In such cases‚ treatment should only proceed with medical clearance and under the guidance of a qualified healthcare provider. The goal is to ensure that MLD does not aggravate the underlying condition while still addressing lymphatic concerns.

Uncontrolled Hypertension

Uncontrolled hypertension is a relative contraindication for Manual Lymph Drainage (MLD). While MLD is generally safe‚ it may increase venous return and potentially exacerbate cardiovascular strain in individuals with elevated blood pressure. The technique can temporarily alter fluid dynamics‚ which may pose risks for those with unmanaged hypertension. It is crucial to avoid MLD if blood pressure is not stabilized‚ as it could lead to cardiovascular complications. Patients with hypertension should consult their healthcare provider before undergoing MLD to ensure it is safe and appropriate for their condition. Proper medical clearance and monitoring are essential to minimize risks and ensure the therapy is administered safely.

Diabetes Mellitus in Decompensation

Diabetes mellitus in decompensation is a relative contraindication for Manual Lymph Drainage (MLD). In this state‚ the body experiences severe metabolic imbalances‚ often accompanied by fluid retention and electrolyte disturbances. MLD may exacerbate edema due to increased fluid mobilization‚ potentially worsening the condition. Additionally‚ the therapy could interfere with blood sugar regulation‚ complicating management. It is essential to avoid MLD until the condition is stabilized with appropriate medical treatment. Healthcare providers should assess the patient’s overall health and ensure blood sugar levels are under control before considering MLD. Proper medical clearance is critical to prevent complications and ensure safe practice.

Bronchial Asthma and Severe Respiratory Issues

Bronchial asthma and severe respiratory issues are relative contraindications for Manual Lymph Drainage (MLD). During asthma attacks or severe respiratory distress‚ MLD may exacerbate symptoms by increasing pressure in the chest or disrupting breathing patterns. Patients with unstable asthma or chronic respiratory conditions should avoid MLD unless cleared by their healthcare provider. The gentle pressure applied during MLD could potentially irritate the respiratory system further‚ complicating management. It is crucial to prioritize the patient’s respiratory stability before considering MLD. In cases of severe respiratory compromise‚ alternative therapies may be more appropriate. Always consult with a healthcare provider to assess suitability and ensure safe practice.

Precautions and Special Considerations

MLD requires careful assessment of each patient’s condition. Special considerations include avoiding areas of active infection‚ unstable medical conditions‚ or recent surgeries. Always prioritize medical clearance and monitoring.

General Precautions for MLD

General precautions for Manual Lymph Drainage (MLD) involve careful patient assessment to avoid complications. It is essential to avoid areas of active infection‚ acute inflammation‚ or unstable medical conditions. Patients with severe cardiovascular issues‚ such as congestive heart failure‚ require extra caution. Additionally‚ MLD should not be performed over areas with active cancer‚ recent scars‚ or fragile skin. Monitoring for any signs of discomfort or adverse reactions is crucial. Practitioners must also ensure proper hygiene and use gentle‚ light strokes to prevent overwhelming the lymphatic system. Overall‚ these precautions help ensure the safety and effectiveness of MLD treatments‚ minimizing risks and maximizing therapeutic benefits for patients.

Contraindications Specific to Certain Medical Conditions

Manual Lymph Drainage (MLD) has specific contraindications tied to certain medical conditions. Conditions like Crohn’s disease‚ radiation colitis‚ or abdominal aortic aneurysm require caution due to potential complications. Patients with active cancer or metastatic disease should avoid MLD to prevent spreading malignant cells. Additionally‚ individuals with severe cardiovascular issues‚ such as congestive heart failure‚ or those with uncontrolled hypertension‚ are at higher risk. MLD is also contraindicated in cases of acute deep venous thrombosis (DVT) or unstable medical conditions like decompensated diabetes. Practitioners must carefully assess these conditions to ensure safe and effective treatment‚ often requiring medical clearance before proceeding with MLD.

Importance of Medical Clearance Before Treatment

Obtaining medical clearance is essential before initiating Manual Lymph Drainage (MLD) to ensure patient safety and prevent complications. This is particularly crucial for individuals with severe or unstable medical conditions‚ such as congestive heart failure‚ acute infections‚ or active cancer. Healthcare providers must evaluate the patient’s overall health to confirm that MLD is appropriate and will not exacerbate their condition. For example‚ patients with severe cardiovascular issues or decompensated diabetes require special consideration. Medical clearance also helps identify any underlying contraindications that may not be immediately apparent. By consulting with a healthcare provider‚ practitioners can tailor the treatment plan to the patient’s needs‚ minimizing risks and maximizing benefits. This step ensures that MLD is applied safely and effectively.

Manual Lymph Drainage is beneficial but requires awareness of contraindications to ensure safe practice‚ emphasizing proper precautions and medical guidance for optimal therapeutic outcomes.

The Role of Healthcare Providers in Determining Suitability

Healthcare providers play a critical role in assessing patient suitability for Manual Lymph Drainage (MLD). They must evaluate medical history‚ current conditions‚ and potential contraindications to ensure safe treatment. For instance‚ patients with acute infections‚ malignant conditions‚ or severe cardiovascular issues require careful consideration. Providers should conduct thorough physical exams‚ review diagnostic tests‚ and consult relevant guidelines to determine appropriateness. Obtaining medical clearance is essential when contraindications are present or uncertain; This ensures that MLD is applied responsibly‚ minimizing risks and maximizing benefits. Collaborating with specialists‚ such as oncologists or cardiologists‚ may also be necessary for complex cases. Ultimately‚ healthcare providers are responsible for balancing therapeutic potential with patient safety‚ making their judgment indispensable in MLD practice.

Final Thoughts on Safe and Effective MLD Practice

Safe and effective Manual Lymph Drainage (MLD) practice hinges on understanding contraindications and tailoring treatments to individual needs. While MLD offers significant benefits for lymphatic health‚ its application must be cautious and patient-specific. Healthcare providers should always prioritize medical clearance‚ especially for those with severe or unstable conditions. Balancing therapeutic goals with safety ensures optimal outcomes. By adhering to established guidelines and avoiding contraindicated scenarios‚ practitioners can minimize risks and enhance the efficacy of MLD. This approach fosters trust and delivers meaningful relief for patients seeking lymphatic care.

Open post

itouch wearables manual

iTouch Wearables offer cutting-edge smart devices designed to enhance your daily life with health tracking, notification alerts, and seamless app integration. Experience a user-friendly, customizable wearable that combines style and functionality.

1.1 Overview of iTouch Wearables

iTouch Wearables are innovative smart devices designed to seamlessly integrate into your daily life. These devices offer a range of features, including fitness tracking, notification management, and music control. With a sleek design and user-friendly interface, iTouch Wearables provide a perfect blend of style and functionality, making them an essential accessory for modern users seeking convenience and connectivity.

1.2 Key Features and Benefits

iTouch Wearables boast a range of impressive features, including heart rate monitoring, step tracking, and customizable watch faces. They also provide smartphone notifications and music control. The devices are water-resistant, ensuring durability, and offer long battery life for uninterrupted use. These benefits make iTouch Wearables a versatile and practical choice for health-conscious individuals and tech enthusiasts alike.

Compatibility and System Requirements

iTouch Wearables are compatible with iOS and Android devices, supporting Bluetooth connectivity. They function with smartphones and tablets, requiring minimum software versions like iOS 10 and Android 5. Ensure stable internet for updates.

2.1 Compatible Devices and Operating Systems

iTouch Wearables seamlessly integrate with a variety of devices, including iOS and Android smartphones, tablets, and select smart devices. They are compatible with iOS versions 10 and above, as well as Android 5.0 and later. The device supports Bluetooth 4.0 or higher for reliable connectivity, ensuring smooth functionality across compatible platforms and operating systems.

2.2 Software and Hardware Requirements

The iTouch Wearables require the iTouch Wearables App, compatible with iOS 10+ and Android 5.0+. A minimum of 512 MB RAM and 1.2 GHz processor is recommended. Ensure a stable internet connection for seamless updates and feature functionality. The device supports Bluetooth 4.0 or higher for pairing with smartphones or tablets, ensuring optimal performance across all supported platforms.

Installation and Setup

Installation and setup of iTouch Wearables involve unboxing, charging, and syncing with compatible devices. Download the iTouch app, pair via Bluetooth, and follow in-app instructions for a smooth setup.

3.1 Unboxing and Initial Setup

Unbox your iTouch Wearable carefully, ensuring all components are included. Gently remove the device from packaging, inspect for damage, and locate the charger and manual. Insert the strap or band, adjusting for a secure fit. Power on the device by holding the side button until the logo appears. Follow on-screen prompts to select language and connect to Wi-Fi. Ensure no force is applied to avoid damage.

3.2 Charging the Device

Connect the iTouch Wearable to its USB charger, ensuring the port aligns correctly; Plug the charger into a power source and wait for the battery icon to appear. Charging typically takes 1-2 hours for a full charge. Avoid using damaged cables or ports to prevent damage. Keep the device away from water during charging for safety.

3.3 Syncing with a Smartphone or Tablet

Open the iTouch Wearables app on your smartphone or tablet. Enable Bluetooth and ensure both devices are within range. Select your wearable from the available devices list. Follow the on-screen instructions to complete the pairing process. Once synced, you can receive notifications, track data, and control media playback seamlessly between your devices.

Navigating the iTouch Wearables Interface

The intuitive interface allows easy navigation via touchscreen gestures. Swipe left or right to access apps, and tap to select options. Customize the layout for convenience.

4.1 Understanding the Touchscreen Controls

The iTouch Wearables feature a responsive touchscreen interface. Use taps to select options, swipes to navigate between screens, and long presses to access additional menus. Double-tapping can wake the screen or return to the home screen. Rotate your wrist to view more information or switch between apps seamlessly. Customize gestures in settings for a personalized experience.

4.2 Customizing the Home Screen

Personalize your iTouch Wearable’s home screen by selecting from various watch faces or adding shortcuts to frequently used apps. Access the settings app, navigate to the “Display” or “Customization” section, and choose your preferred watch face. You can also long-press the home screen to enter edit mode, where you can rearrange app icons or add widgets for a cleaner, more functional layout.

Core Features of iTouch Wearables

iTouch Wearables offer health tracking, notifications, and music control. Monitor heart rate, steps, and receive alerts. Control playlists and manage calls directly from your wrist.

5.1 Health and Fitness Tracking

iTouch Wearables provide comprehensive health monitoring, including heart rate, sleep patterns, and step counting. Track daily activities, set fitness goals, and receive detailed insights to improve your wellness. The device also supports various exercise modes, allowing you to monitor progress and maintain a healthy lifestyle effortlessly. Stay connected to your fitness journey with real-time data at your fingertips.

5.2 Notifications and Alerts

iTouch Wearables deliver real-time notifications for texts, emails, and app alerts, keeping you informed without needing your phone; Customize alert settings to prioritize important updates and minimize distractions. The device vibrates or displays alerts, ensuring you stay connected and up-to-date on essential information throughout the day, enhancing productivity and convenience.

5.3 Music and Media Control

iTouch Wearables allow seamless music and media management. Control playlists, skip tracks, and adjust volume directly from your wrist. Stream music, podcasts, or audiobooks effortlessly. The device syncs with your smartphone or tablet, enabling convenient media playback without needing your phone nearby. Enjoy an enhanced listening experience with intuitive controls and wireless freedom.

Managing Apps on iTouch Wearables

Easily download, organize, and delete apps on your iTouch Wearable. Customize your home screen for quick access to favorite apps, ensuring a streamlined and efficient user experience.

6.1 Downloading and Installing Apps

To download and install apps on your iTouch Wearable, access the app store via your paired smartphone or directly on the device. Browse categories or search for specific apps. Select an app, review its details, and click “Install.” The app will download and install automatically. Once installed, it will appear on your apps list for easy access and management.

6.2 Organizing and Deleting Apps

Organize apps on your iTouch Wearable by creating folders or rearranging icons. Long-press an app to enter edit mode. To delete an app, select it and confirm removal; This helps maintain a clutter-free interface and optimizes performance. Regularly deleting unused apps ensures your device runs smoothly and efficiently, preserving storage and battery life for essential functions.

Troubleshooting Common Issues

Identify symptoms, restart your device, and check connections. Most issues resolve with basic steps. For persistent problems, refer to the user manual or contact support.

7.1 Resolving Connectivity Problems

To resolve connectivity issues, restart your iTouch device and ensure Bluetooth is enabled on both the wearable and paired smartphone. Check for software updates, as outdated versions can cause connection problems. If issues persist, reset the device by holding the power button for 10 seconds. This often restores proper connectivity and functionality to your iTouch wearable.

7.2 Fixing Battery Life Issues

To improve battery life, reduce screen brightness, disable unused features like GPS and heart rate monitoring, and ensure the device is running the latest software. Avoid extreme temperatures and charge the wearable regularly. If issues persist, reset the device or contact support for further assistance to optimize your iTouch wearable’s battery performance effectively.

Customizing and Personalizing Your Device

Personalize your iTouch wearable with customizable watch faces, app layouts, and settings. Adjust features to suit your lifestyle, enhancing both functionality and style for a tailored experience.

8.1 Changing Watch Faces

Easily customize your iTouch wearable with diverse watch faces. Access the settings menu, select “Watch Faces,” and browse through various designs. Choose from analog, digital, fitness-focused, or themed options to match your style. Sync your choice, and the new face will display, offering a fresh look for every occasion or mood.

8.2 Adjusting Settings for Optimal Performance

Optimize your iTouch wearable’s performance by tweaking key settings. Navigate to the device settings, adjust brightness and screen timeout for battery efficiency. Enable or disable notifications selectively to minimize interruptions. Sync your wearable regularly to ensure all features function smoothly. Customize gesture controls and app permissions to enhance user experience and maintain peak performance.

Maintenance and Care

Regularly clean your iTouch wearable with a soft cloth and avoid harsh chemicals. Protect the screen with a scratch-resistant cover. Update software regularly for optimal performance and security.

9.1 Cleaning and Protecting the Device

Use a soft, dry cloth to gently wipe the iTouch wearable, avoiding harsh chemicals or abrasive materials. For tougher marks, lightly dampen the cloth with water, but ensure no moisture enters the device. Regular cleaning prevents dirt buildup and maintains functionality. Apply a screen protector to shield against scratches and daily wear.

9.2 Updating Software and Firmware

Regular software and firmware updates ensure your iTouch wearable performs optimally. Connect your device to a computer or sync it with your smartphone via the iTouch app. Follow on-screen instructions to download and install the latest version. Updates enhance security, fix bugs, and add new features for a smoother user experience. Always backup data before updating.

Mastering your iTouch wearable enhances your lifestyle with innovative features. For further support, visit the official iTouch website or contact customer service for personalized assistance and updates.

10.1 Tips for Getting the Most Out of Your iTouch Wearable

Regularly update your device’s software to access new features and improved performance. Customize watch faces to match your style and optimize battery life by adjusting screen brightness and activity tracking settings. Explore compatible apps to enhance functionality, ensuring seamless integration with your lifestyle for a personalized experience.

10.2 Where to Find More Support and Information

Visit the official iTouch Wearables website for comprehensive guides, FAQs, and troubleshooting tips. Refer to the provided user manual for detailed instructions. For further assistance, contact customer support or explore online forums and social media channels for community-driven solutions and updates.

Open post

adinkra symbols and meanings pdf

Adinkra symbols are visual representations of proverbs, concepts, and philosophies in Akan culture, originating from the Gyaman people of Ghana and Côte d’Ivoire. Traditionally printed on cloth for royal ceremonies, these symbols have gained global significance, now used in logos, textiles, and art. Their meanings, ranging from strength to wisdom, are preserved in PDF resources and online platforms, making them accessible for cultural and educational purposes worldwide.

Overview of Adinkra Symbols and Their Importance

Adinkra symbols are visual representations of proverbs, concepts, and philosophies rooted in Akan culture, offering insights into African wisdom and heritage. Originating from the Gyaman people of Ghana and Côte d’Ivoire, these symbols convey meanings such as strength, unity, and resilience. They are deeply intertwined with Akan traditions, serving as tools for storytelling and moral guidance. Their importance extends beyond cultural identity, as they inspire global audiences through their universal themes. Available in PDF resources, Adinkra symbols provide accessible knowledge, bridging tradition and modernity. They are not only aesthetic elements but also carriers of historical and philosophical significance, making them invaluable for education, art, and cultural preservation.

Origins and History of Adinkra Symbols

Adinkra symbols originated among the Gyaman people of Ghana and Côte d’Ivoire, with their name linked to King Nan Kofi Adinkra, a historical figure in Akan legend.

The Gyaman People and the Birth of Adinkra

The Gyaman people, originating from Ghana and Côte d’Ivoire, are credited with the creation of Adinkra symbols. These visual representations of proverbs and concepts were initially used on royal cloth, worn during ceremonies. The name “Adinkra” is linked to King Nan Kofi Adinkra, a historical figure in Akan legend, who was defeated in battle by the Asante people. Following his defeat, the Asante adopted and refined the symbols, integrating them into their culture. Over time, Adinkra symbols became a cornerstone of Akan cultural identity, symbolizing values like strength, wisdom, and leadership. Their meanings and designs have been preserved in PDF resources, ensuring their legacy endures in modern times.

Historical Significance in Akan Culture

Adinkra symbols hold profound historical significance in Akan culture, serving as visual representations of proverbs, wisdom, and cultural values. Originating from the Gyaman people, these symbols were later adopted by the Asante, who integrated them into their royal and spiritual practices. Adinkra cloth, adorned with these symbols, was reserved for kings and queens, signifying their status and connection to ancestral wisdom. Each symbol conveyed messages about leadership, morality, and community, making them integral to Akan identity. Their historical importance is documented in various PDF resources, preserving their meanings for future generations and ensuring their continued relevance in both traditional and contemporary contexts.

Cultural Significance of Adinkra Symbols

Adinkra symbols embody the rich cultural heritage of the Akan people, representing proverbs, wisdom, and moral values. They are deeply rooted in Akan philosophy, serving as visual guides for ethical behavior and community unity. Traditionally used on royal cloth, these symbols reflect the history, spirituality, and social norms of the Akan, preserving their cultural identity and promoting timeless wisdom.

Adinkra in Akan Proverbs and Philosophy

Adinkra symbols are deeply intertwined with Akan proverbs and philosophy, serving as visual representations of timeless wisdom. Each symbol encapsulates a moral lesson, drawn from Akan oral traditions, reinforcing values like wisdom, strength, and unity. Proverbs such as “Se wo were fi na wosan kofa a yenkyiri” (“It is not taboo to go back for what you forgot”) are linked to symbols like Sankofa, emphasizing the importance of learning from the past. These symbols act as teaching tools, transmitting cultural values and ethical principles across generations. Their integration into daily life and ceremonies underscores their role in preserving Akan philosophy and guiding communal behavior.

Role of Adinkra in Ceremonies and Royalty

Adinkra symbols play a significant role in Akan ceremonies and royalty, reflecting their cultural and historical importance. Traditionally, Adinkra cloth, adorned with these symbols, was worn by royals during important ceremonies to convey their status, wisdom, and authority. The intricate designs told stories of proverbs and values, serving as a visual language understood by the community. Symbols like Akofena (sword of war) and Adinkrahene (leadership) emphasize courage and authority, while others like Sankofa (learning from the past) highlight wisdom. The use of Adinkra in royal regalia and ceremonies underscores their role in preserving cultural heritage and reinforcing the values of Akan leadership and tradition.

Modern Use of Adinkra in Global Contexts

Adinkra symbols have transcended their traditional roots, gaining global recognition for their cultural and aesthetic value. Today, they are widely used in fashion, branding, and art, symbolizing African heritage and identity. Designers incorporate Adinkra motifs into clothing, textiles, and accessories, while companies adopt them in logos to convey cultural authenticity. In architecture and art, these symbols inspire contemporary designs, blending tradition with modernity. Their universal appeal lies in their ability to represent timeless values like wisdom, strength, and unity. As a result, Adinkra symbols are now a popular choice for global audiences seeking meaningful and culturally rich designs, ensuring their legacy endures beyond their origins.

Popular Adinkra Symbols and Their Meanings

Adinkra symbols, like Sankofa and Adinkrahene, represent timeless concepts such as wisdom, leadership, and resilience. Their meanings continue to inspire contemporary designs globally.

Sankofa: The Symbol of Learning from the Past

Sankofa, one of the most revered Adinkra symbols, embodies the wisdom of learning from the past to build a better future. Its name, derived from the Akan language, translates to “go back and fetch it,” reflecting the importance of retrieving lost knowledge or heritage. Sankofa is visually represented by a bird turning its head backward, symbolizing introspection and remembrance. Rooted in the Akan proverb, Se wo were fi na wosan kofa a yenkyiri (“It is not taboo to go back for what you forgot”), Sankofa encourages embracing history to guide present actions. This symbol is widely recognized in African diasporic cultures, serving as a powerful reminder of the value of cultural heritage and the need to honor ancestral wisdom.

Adinkrahene: Leadership and Authority

Adinkrahene, meaning “king of Adinkra symbols,” represents leadership, authority, and charisma. It symbolizes the qualities associated with kingship, such as wisdom, strength, and vision. This symbol is often seen as the inspiration for other Adinkra motifs, emphasizing its central role in Akan culture. Adinkrahene is linked to the proverbial ideals of a just ruler, highlighting the importance of moral integrity and visionary leadership. Its presence in traditional and contemporary designs underscores the enduring relevance of strong, ethical governance in both historical and modern contexts, making it a revered emblem of authority and leadership.

Dwennimmen: Strength and Wisdom

Dwennimmen, symbolized by ram’s horns, embodies strength, humility, wisdom, and learning. It represents mental, physical, and spiritual resilience, reflecting the Akan philosophy of balanced virtue. This symbol, often associated with leadership and intellectual prowess, encourages individuals to cultivate wisdom and humility in their pursuits. Dwennimmen is prominently featured in the logo of the University of Ghana, highlighting its significance in education and cultural heritage. Its profound meaning transcends traditional contexts, inspiring modern applications in art, literature, and personal growth. By honoring the fusion of strength and wisdom, Dwennimmen serves as a timeless guide for individuals seeking to embody these virtues in their lives.

Adinkra Symbols in Contemporary Design

Adinkra symbols are now widely used in modern design, from fashion and textiles to architecture and branding, blending cultural heritage with contemporary aesthetics for global appeal.

Adinkra in Fashion and Textiles

Adinkra symbols have become a vibrant element in modern fashion and textiles, blending traditional African heritage with contemporary style. Originally printed on ceremonial cloth, these symbols are now mass-produced in bright colors, adorning fabrics, clothing, and accessories. Designers worldwide incorporate Adinkra motifs into their collections, creating a global appeal while preserving their cultural significance. The symbols, such as Sankofa and Adinkrahene, convey deep meanings, making each piece not just attire but a narrative of Akan philosophy. This fusion of history and fashion ensures that Adinkra continues to inspire and educate, making it a cherished part of both traditional and modern wardrobes.

Use of Adinkra in Logos and Branding

Adinkra symbols have become a popular choice in logo design and branding due to their rich cultural and philosophical meanings. Many organizations, especially in Ghana, incorporate these symbols to convey values such as leadership, wisdom, and unity. For instance, the University of Ghana features the Dwennimmen symbol in its logo, representing strength and wisdom. Adinkra motifs are also used in corporate branding to evoke a sense of African heritage and global appeal. Their visual appeal and deep symbolism make them ideal for embodying brand values. This practice not only promotes cultural identity but also connects brands to a broader audience, fostering recognition and appreciation of African traditions worldwide.

Adinkra-Inspired Architecture and Art

Adinkra symbols have inspired architectural designs and artistic creations, blending cultural heritage with modern aesthetics. Architects incorporate these symbols into building facades, sculptures, and decorative motifs, reflecting Akan philosophical values. In art, Adinkra motifs are used in paintings, sculptures, and installations to convey themes like resilience, unity, and wisdom. Contemporary artists often merge traditional Adinkra imagery with modern techniques, creating pieces that honor African heritage while appealing to global audiences. These designs not only beautify spaces but also preserve cultural knowledge, making Adinkra a vibrant link between tradition and innovation in the art and architectural worlds.

Accessing Adinkra Symbols and Meanings

Adinkra symbols and their meanings are widely accessible through PDF resources and online platforms, offering detailed insights into their cultural significance and visual representations for educational purposes.

PDF Resources for Adinkra Symbols

PDF resources on Adinkra symbols provide comprehensive guides to their meanings and cultural significance. These documents often include detailed tables listing symbols alongside their Twi names, literal translations, and symbolic interpretations. Many PDFs also feature visual representations, making them invaluable for educational purposes. Topics range from historical origins to modern applications, offering insights into how Adinkra symbols like Sankofa and Dwennimmen embody values such as learning from the past and strength combined with wisdom. These resources are widely available online, catering to both scholars and enthusiasts interested in Akan culture. They serve as accessible tools for understanding the depth and richness of Adinkra symbolism.

Online Platforms and Websites

Online platforms and websites offer extensive resources for exploring Adinkra symbols and their meanings. Websites like adinkrasymbols.org provide detailed explanations of each symbol, including their cultural significance and proverbial connections. These platforms often feature visual representations, making it easier to understand and identify the symbols. Many sites also offer downloadable PDFs, which catalog Adinkra symbols alongside their meanings, proverbs, and historical contexts. Additionally, online resources highlight the modern use of Adinkra in global design, from fashion to architecture. These platforms serve as valuable tools for both educational purposes and creative projects, ensuring the preservation and global accessibility of Akan cultural heritage.

Open post

when you pray bible study pdf

Prayer is a foundational element in the Bible, fostering a deep connection with God. The ‘When You Pray’ Bible study PDF offers guidance on effective, faith-filled prayer, enhancing spiritual growth and fostering intimacy with Him.

Understanding the Role of Prayer in Christian Life

Prayer is a vital component of Christian life, serving as a direct line of communication with God. It fosters intimacy, guidance, and strength, enabling believers to navigate life’s challenges. Through prayer, Christians express gratitude, seek forgiveness, and align their wills with God’s purpose. The Bible emphasizes prayer as a means to deepen faith and trust in divine providence. The “When You Pray” Bible study PDF highlights this, offering insights into effective prayer practices and their transformative power in personal and communal spiritual journeys. It encourages believers to embrace prayer as a cornerstone of their relationship with God.

Overview of the “When You Pray” Bible Study PDF

The “When You Pray” Bible Study PDF, authored by Kelly Minter, is a comprehensive guide designed to deepen understanding of prayer through biblical teachings. This 7-session study explores six significant prayers in the Bible, offering insights into effective communication with God. It includes video teaching sessions, discussion prompts, and practical applications to enhance personal and group study. The guide emphasizes faith, forgiveness, and persistence in prayer, aligning with Jesus’ teachings in the Lord’s Prayer. It equips believers to cultivate a meaningful prayer life, fostering intimacy with God and transforming their spiritual journeys.

The Importance of Believing Prayer

Prayer is a vital spiritual practice in Christianity, fostering a personal relationship with God. It guides believers in seeking guidance, expressing gratitude, and navigating life’s challenges with faith and hope.

What the Bible Teaches About Faith in Prayer

The Bible emphasizes faith as a cornerstone of effective prayer. Jesus taught that believing prayer is essential, as seen in Mark 11:24, where He encourages praying with confidence. The ‘When You Pray’ study guide highlights how faith strengthens communication with God, aligning prayers with His will. Biblical examples, like the persistent widow, illustrate the power of trusting God’s timing and promises. Faith in prayer is not about doubting but trusting God’s sovereignty, even when outcomes are unclear. This foundational teaching transforms prayer from a ritual into a dynamic, faith-filled dialogue with God.

Effective Prayer Through Faith

Effective prayer is rooted in unwavering faith, as highlighted in the ‘When You Pray’ Bible study. Kelly Minter emphasizes aligning prayers with God’s will, trusting His sovereignty. Biblical teachings remind us that faith is not about doubting but trusting God’s plan. The study guide provides practical steps to deepen faith, transforming prayer into a powerful, purposeful conversation with God. By focusing on His promises, believers can pray with confidence, knowing their prayers are heard. This approach shifts prayer from a ritual to a meaningful dialogue, fostering spiritual growth and intimacy with God.

The Lord’s Prayer as a Model for Christian Prayer

The Lord’s Prayer, found in Matthew 6:10, serves as a timeless model for prayer, offering simplicity and depth. It guides believers in worship, confession, and requests, aligning prayers with God’s will.

Understanding the Structure of the Lord’s Prayer

The Lord’s Prayer, as taught by Jesus in Matthew 6:9-13, is a structured guide for prayer. It begins with worship, addressing God as “Our Father in heaven,” acknowledging His holiness. Next, it seeks God’s will, praying “Your Kingdom come, Your will be done.” It then requests daily needs, “Give us today our daily bread,” and asks for forgiveness, “as we also have forgiven our debtors.” Finally, it seeks protection from temptation and deliverance from evil, concluding with a declaration of God’s eternal glory. This structure provides a balanced approach to prayer, encompassing adoration, submission, petition, confession, and trust.

Applying the Lord’s Prayer in Modern-Day Prayers

The Lord’s Prayer serves as a timeless template for modern prayer. It teaches us to start with worship, align with God’s will, and seek provision. In today’s context, this structure helps believers focus on what truly matters. The “When You Pray” Bible study PDF highlights how Jesus’ teachings remain relevant, encouraging believers to pray with sincerity and purpose. By applying the Lord’s Prayer, Christians can deepen their relationship with God, foster forgiveness, and trust in His sovereignty, making prayer a powerful tool for navigating life’s challenges while staying aligned with God’s eternal purposes.

Prayer in the Bible: Key Principles and Examples

Prayer is vital for communication with God, as seen in biblical examples. The “When You Pray” study highlights key principles, showing how prayer strengthens faith and transforms lives.

Prayer as a Means of Communication with God

Prayer is a profound means of communication with God, fostering intimacy and understanding. Through prayer, believers express gratitude, seek guidance, and align their hearts with God’s will. The “When You Pray” study emphasizes that prayer is not one-sided but a dynamic dialogue where God speaks and listens. It involves both speaking and listening, creating a deeper connection with Him. This communication strengthens faith, provides comfort, and equips believers to navigate life’s challenges. By prioritizing prayer, Christians experience God’s presence and transformative power in their lives, as taught in the Bible and explored in the study.

Biblical Examples of Powerful Prayers

The Bible is filled with powerful prayers that demonstrate God’s faithfulness and transformative power. Elijah’s prayer for rain during a drought (1 Kings 18:41-46) shows unwavering faith. Hannah’s heartfelt prayer for a child (1 Samuel 1:10-18) highlights persistence and surrender. Paul’s prayers, such as his request for the removal of a thorn (2 Corinthians 12:7-10), illustrate alignment with God’s will. These examples, explored in the “When You Pray” study, reveal how prayer can move mountains, bring comfort, and deepen one’s relationship with God. They inspire believers to pray boldly and trust in His sovereignty.

The Power of Persistent Prayer

Persistent prayer is a recurring theme in the Bible, emphasizing faith and perseverance. Jesus taught the parable of the persistent widow (Luke 18:1-8), urging believers to pray without giving up. The “When You Pray” study highlights how persistent prayer reflects trust in God’s timing and sovereignty. It encourages believers to pray continually, even when answers seem delayed, as seen in Hannah’s prayers for a child (1 Samuel 1:10-18) and Paul’s unwavering prayers for the churches (2 Corinthians 12:7-10); Persistent prayer deepens intimacy with God and aligns our hearts with His will, fostering spiritual growth and trust.

The Role of Forgiveness in Prayer

Forgiveness is vital in prayer, as seen in Matthew 6:14-15, where Jesus teaches that unforgiveness hinders God’s forgiveness. Letting go of grudges aligns our hearts with His grace.

Forgiving Others to Be Forgiven

Forgiving others is a divine mandate for believers, as Jesus emphasized in the Lord’s Prayer. Unforgiveness creates spiritual barriers, while forgiveness opens the door to God’s grace and healing. The Bible teaches that our willingness to forgive others directly impacts how God forgives us. By letting go of resentment and choosing mercy, we align ourselves with God’s nature, fostering a deeper relationship with Him. This principle is central to effective prayer and living a life that reflects Christ’s love and compassion. Forgiveness is not optional but essential for spiritual freedom and growth.

Practical Steps to Cultivate Forgiveness

Cultivating forgiveness begins with acknowledging the hurt and choosing to release bitterness. Reflect on God’s mercy toward you, as this inspires compassion for others. Pray for those who have wronged you, asking God to heal emotional wounds and grant you the grace to forgive. Let go of the need for justice or revenge, trusting God to handle all situations. Forgiveness is a process, so be patient with yourself and others. Surround yourself with supportive community and seek guidance from Scripture to deepen your understanding of God’s forgiveness and how to extend it to others.

When You Pray: A Study of Six Prayers in the Bible

When You Pray: A Study of Six Prayers in the Bible is a 7-session study exploring six powerful prayers, offering insights into their significance and application, helping deepen your prayer life.

Overview of the Six Prayers Analyzed

The When You Pray Bible study examines six significant prayers from the Bible, each offering unique insights into communication with God. These prayers, selected for their depth and relevance, include examples from Jesus, Paul, and other biblical figures. Through these prayers, participants explore themes like gratitude, intercession, and surrender. The study highlights how each prayer reflects a personal relationship with God and demonstrates the power of prayer in real-life situations. By analyzing these prayers, learners gain practical wisdom for their own prayer lives, discovering how to pray with authenticity, faith, and purpose. This section provides a biblical foundation for meaningful prayer.

Lessons Learned from Biblical Prayers

Biblical prayers offer timeless lessons, emphasizing faith, persistence, and humility. Jesus’s prayers reveal intimacy with God, while Paul’s prayers highlight intercession and thanksgiving. These examples teach believers to align their desires with God’s will, trust His sovereignty, and seek His glory. The prayers also illustrate the importance of forgiveness, love, and community. By studying these prayers, participants learn to approach God authentically, deepen their relationship with Him, and apply His teachings in their lives. These lessons provide a roadmap for effective, Spirit-led prayer, enriching both personal and communal worship experiences. The study encourages applying these principles in daily life.

Using the “When You Pray” Bible Study Guide

The guide features video sessions, workbooks, and biblical insights. Participants can access video teachings via my.lifeway.com/redeem, enhancing their study experience with practical tools and spiritual growth resources.

Features of the Study Guide

The “When You Pray” Bible study guide includes video teaching sessions led by experienced Bible teachers, a comprehensive workbook, and practical tools for deeper engagement. Each session is approximately 25-30 minutes, offering insights into biblical prayers and their application to modern life. The guide is designed for both individual and small group study, featuring discussion prompts and reflection exercises. Additional resources, such as downloadable PDFs and access to video content via my.lifeway.com/redeem, enhance the learning experience. This 7-session study equips believers to enrich their prayer lives through faith, forgiveness, and a deeper understanding of God’s Word.

How to Access Video Teaching Sessions

To access the video teaching sessions for the “When You Pray” Bible study, visit my.lifeway.com/redeem. Enter the access code provided in your study guide to unlock the content. Each session, averaging 25-30 minutes, features teachings from experienced Bible teachers. Once redeemed, sessions are available for streaming, offering flexibility for individual or group study. Ensure a stable internet connection for optimal viewing. These videos complement the workbook, enhancing your study experience with insights and practical applications of biblical prayer principles.

Prayer is a powerful tool for transformation, connecting believers to God’s heart. The “When You Pray” Bible study PDF guides learners to deepen their prayer life through faith, forgiveness, and persistence. By exploring biblical examples and applying practical steps, participants can align their prayers with God’s will. The study’s video sessions and workbook offer invaluable resources for spiritual growth. Ultimately, prayer becomes a lifeline, fostering intimacy with God and empowering believers to live a life that reflects His love and purpose. Embrace this journey to strengthen your prayer life and experience God’s transformative power in everyday life.

Open post

ge air conditioner manual

Welcome to the GE Air Conditioner Manual! This comprehensive guide provides essential information for installing, operating, and maintaining your GE air conditioner.

Inside, you’ll find detailed instructions, safety precautions, and tips to ensure optimal performance and energy efficiency. Read carefully to make the most of your appliance.

1.1 Overview of the Manual

This manual provides a comprehensive guide for GE air conditioner owners, covering installation, operation, and maintenance. It includes safety precautions, feature explanations, and troubleshooting tips. Designed for both new and experienced users, the manual ensures optimal performance and energy efficiency. Available in PDF format, it can be downloaded from trusted sources like ManualsLib or the GE Appliances website, offering easy access to essential information.

1.2 GE Air Conditioner Models Covered

This manual covers a wide range of GE air conditioner models, including window units like AEE08AP, AEE12DK, and AEE18DP, as well as advanced models with smart features such as app-enabled controls. It also includes ENERGY STAR-certified models, ensuring energy efficiency and performance. Refer to the model-specific sections for detailed instructions tailored to your appliance, ensuring proper installation and operation.

Safety Precautions and Warnings

Always follow safety guidelines to avoid hazards. Ensure proper installation and usage as outlined in the manual to prevent electrical shocks or mechanical damage. Adhere strictly to warnings for safe operation.

2.1 General Safety Guidelines

Always read and follow the safety precautions in this manual to ensure safe operation. Properly ground the unit to prevent electrical shocks. Keep the area around the air conditioner clear of flammable materials. Avoid improper installation, as it may lead to hazards. Never attempt repairs without disconnecting the power supply. Adhere to all warnings to protect yourself and others from potential risks.

2.2 Proper Installation and Usage Warnings

Ensure the air conditioner is installed by a qualified technician to avoid safety risks. Use only genuine GE parts and follow installation instructions carefully. Improper installation can lead to electrical hazards or reduced performance. Always adhere to local electrical codes and safety standards. Never modify the unit or bypass safety features. Proper usage ensures efficiency, safety, and longevity of your GE air conditioner.

Installation Instructions

Proper installation ensures safety and efficiency. Follow the manual’s guidelines, use genuine GE parts, and ensure the unit is properly grounded by adhering to local codes for optimal performance.

3.1 Pre-Installation Requirements

Before installing your GE air conditioner, ensure the location meets specified requirements. Use genuine GE parts and appropriate tools for safe assembly. Verify the electrical system can support the unit’s power needs. Ensure proper grounding as per local codes to prevent hazards. Check the window opening dimensions to match the unit’s sizing for a secure fit and proper sealing.

3.2 Step-by-Step Installation Guide

Begin by unpacking and verifying all components. Install the window gasket and locking bracket securely. Carefully lift and place the unit into the prepared opening, ensuring level positioning. Connect the drainpipe and electrical connections as specified. Tighten all screws and seal gaps for proper insulation. Double-check all connections and ensure the unit is grounded. Follow the manual’s wiring diagram for accurate setup and test the unit to confirm proper operation before full use.

3.3 Common Installation Issues and Solutions

Common issues include improper leveling, drainage clogs, and electrical misconnections. Ensure the unit is level to avoid poor performance. Clear blockages in the drainpipe regularly. Verify electrical connections match the wiring diagram. If the unit vibrates, check mounting stability. For incorrect window sealing, reapply insulation foam. Consult a professional if issues persist to ensure safety and proper function.

Operating the GE Air Conditioner

Mastering your GE air conditioner’s operation involves understanding the control panel, selecting modes, and using the remote. Explore features like Cool, Heat, and Auto modes for comfort.

4.1 Understanding the Control Panel

The control panel is your gateway to managing your GE air conditioner’s functions. It typically features a display screen, touch-sensitive buttons, or a keypad. Key components include temperature adjustment, mode selection, fan speed control, and timer settings. Some models offer advanced features like ionizing air purification or energy-saving modes; Familiarize yourself with the buttons and their functions to optimize your cooling experience and maintain ideal comfort levels effortlessly.

4.2 Operating Modes (Cool, Heat, Dry, Fan, Auto)

Your GE air conditioner offers multiple operating modes to suit different needs. Cool mode lowers the room temperature, while Heat mode warms it. Dry mode reduces humidity, and Fan mode circulates air without cooling or heating. Auto mode automatically adjusts settings for optimal comfort. Each mode is designed to provide efficient and personalized cooling or heating, ensuring your space remains comfortable year-round.

4.3 Using the Remote Control

The remote control allows convenient operation of your GE air conditioner. Use it to adjust temperature, mode, and fan speed. Some models offer advanced features like scheduling and energy-saving settings. Ensure the remote has clear line of sight to the unit. Replace batteries when indicator lights dim or responsiveness decreases for uninterrupted control.

Maintenance and Cleaning

Regular maintenance ensures optimal performance. Clean the air filter monthly, check the drainpipe for blockages, and schedule professional inspections annually. This extends lifespan and efficiency.

5.1 Cleaning the Air Filter

Regularly cleaning the air filter is crucial for maintaining your GE air conditioner’s efficiency. Turn off the unit, remove the filter, and vacuum or wash it gently. Replace it after drying to ensure proper airflow. Check the filter monthly and clean as needed to prevent dust buildup, which can reduce performance and increase energy bills.

5.2 Checking and Cleaning the Drainpipe

Regularly inspect and clean the drainpipe to prevent water leaks and mold growth. Turn off the unit, locate the drainpipe, and check for blockages. Use a soft brush or cloth to remove debris. If clogged, gently flush with water or a vinegar solution. Ensure proper drainage to maintain efficiency and avoid damage. Clean every 1-2 months for optimal performance.

5.3 Scheduling Professional Maintenance

Regular professional maintenance ensures your GE air conditioner operates efficiently and lasts longer. Schedule annual check-ups with a certified technician. They will inspect refrigerant levels, clean internal components, and check electrical connections. This helps prevent breakdowns and maintains optimal performance. Refer to your manual for specific recommendations or contact GE customer support for assistance.

Professional maintenance also covers advanced diagnostics and parts replacement, ensuring your unit runs smoothly year-round. Keep your air conditioner clean and well-maintained to avoid common issues.

Troubleshooting Common Issues

This section helps identify and resolve common issues with your GE air conditioner, offering easy solutions and tips to prevent future problems effectively for optimal performance.

6.1 Identifying Common Problems

This section outlines common issues with GE air conditioners, such as error codes, lack of cooling, or water leakage. It helps users diagnose problems like improper installation, clogged filters, or refrigerant leaks. By understanding these issues, you can address them promptly, ensuring efficient operation and preventing further damage. Always consult the manual for model-specific guidance and solutions.

6.2 Resetting the Air Conditioner

To reset your GE air conditioner, press and hold the “RESET” button on the control panel for 10-15 seconds. For some models, this button may be labeled “FILTER” or have a reset icon. If the issue persists, unplug the unit, wait 30 seconds, and plug it back in. This process can resolve minor glitches and restore normal operation. Always refer to your specific model’s manual for detailed instructions.

6.3 Error Codes and Their Meanings

GE air conditioners display error codes like E1, E2, or E3 to indicate specific issues. E1 may signal a sensor malfunction, while E2 could indicate a refrigerant leak. E3 often points to a communication error between components. Refer to your manual for code definitions and troubleshooting steps. If issues persist, contact GE customer support for professional assistance. Regular maintenance can help prevent these errors.

Energy Efficiency and Usage Tips

GE air conditioners offer energy-saving features like programmable timers and eco-modes. Proper unit sizing and regular maintenance ensure efficient operation. Adjust settings based on room occupancy and outdoor temperatures to optimize energy use and reduce utility bills while maintaining comfort.

7.1 Energy-Saving Features

GE air conditioners incorporate advanced energy-saving technologies. Features like programmable timers, smart sensors, and energy-efficient modes help reduce electricity consumption. The eco-mode adjusts cooling based on room temperature, while the programmable timer allows scheduling operations to avoid unnecessary energy use. These features ensure optimal performance while lowering your energy bills and environmental impact, making your home both comfortable and eco-friendly.

7.2 Tips for Efficient Air Conditioner Usage

For efficient operation, set your GE air conditioner to 78°F when cooling. Use the programmable timer to turn it off when not needed. Regularly clean the air filter to ensure proper airflow. Close blinds during peak sun hours to reduce heat gain. Ensure the unit is properly installed and sized for your space. These practices optimize energy use and maintain comfort effectively.

Advanced Features and Settings

Explore advanced features like programmable timers, ionizing air purification, and smart app controls. These settings enhance comfort and efficiency, allowing personalized climate control and energy savings.

8.1 Programmable Timer

The programmable timer allows you to set specific cooling schedules, optimizing energy use. Set start and end times for operation, ensuring your space is comfortable only when needed. This feature is accessed via the control panel or remote, offering flexibility and convenience for tailored temperature control throughout the day.

8.2 Ionizing Air Purification Mode

The Ionizing Air Purification Mode enhances indoor air quality by releasing negative ions that trap pollutants like dust and allergens. This feature improves air cleanliness and freshness. Activate it via the control panel or remote for a healthier environment. Regular use can reduce odors and particles, promoting better breathing and comfort in your space.

Warranty and Customer Support

GE air conditioners come with a comprehensive warranty covering parts and labor. For assistance, contact GE customer service at 800.626.2000 or visit their official website.

9.1 Understanding Your Warranty

Your GE air conditioner is backed by a comprehensive warranty covering parts and labor for up to 5 years, depending on the model. Proper registration and installation are required to validate the warranty. Damage from improper installation or misuse may void coverage. Refer to your manual or GE’s official website for full terms and conditions.

9.2 Contacting GE Customer Service

For assistance, contact GE Customer Service at 800.626.2000 or visit their official website. Online resources include manuals, troubleshooting guides, and service scheduling. Representatives are available to address questions, warranty claims, and technical support. Ensure to have your model number ready for efficient service.

Appendix

This section provides technical specifications, model details, and a glossary of terms. Refer to it for clarity on specific features and components mentioned throughout the manual.

10.1 Technical Specifications

Explore detailed technical specs for GE air conditioners, including BTU range, energy efficiency ratings, and compatibility with various models like GE AHV05 and PHC06. Discover features such as programmable timers and ionizing purification modes, ensuring optimal performance and energy savings tailored to your needs. Refer to this section for precise measurements and operational requirements to maximize your appliance’s efficiency and longevity.

10.2 Glossary of Terms

This section defines key terms related to your GE air conditioner, such as BTU (British Thermal Units), Energy Efficiency Ratio (EER), and Ionizing Air Purification. It also explains technical phrases like Programmable Timer and Smart Cooling Modes, ensuring you understand all features and functions described in the manual. This glossary helps you navigate the guide with confidence and clarity.

11.1 Final Tips for Optimal Performance

For optimal performance, clean filters regularly and check drainpipes to ensure proper airflow; Use programmable timers and energy-saving modes to reduce consumption. Understand error codes for quick troubleshooting. Maintain consistent temperatures and ensure proper installation. Refer to the glossary for technical terms and contact support for further assistance. Regular maintenance ensures efficiency and longevity of your GE air conditioner.

Open post

breathing techniques for labor pdf

Breathing techniques for labor are non-pharmacological methods endorsed by the WHO to manage pain and enhance well-being. They involve deep, rhythmic breathing to help women stay calm and focused during contractions, promoting relaxation and reducing stress.

Importance of Breathing During Labor

Controlled breathing during labor is essential for managing pain and reducing stress. It helps women stay focused and calm, enabling them to cope with contractions more effectively. Breathing techniques are a natural, non-invasive way to alleviate discomfort and promote relaxation. By improving oxygen supply to the uterus and baby, these methods enhance maternal and fetal well-being. Proper breathing also reduces muscle tension, making contractions more manageable and empowering women to navigate the labor process with greater confidence and control.

Overview of Popular Breathing Techniques

Popular breathing techniques include Relaxed Breathing, Lamaze, and Light Breathing. Relaxed Breathing focuses on slow, deep breaths to maintain calm. Lamaze involves conscious, rhythmic breathing to reduce pain and stress. Light Breathing uses shallow breaths to manage intense contractions. These methods help women stay focused, reduce tension, and improve oxygen flow, offering tailored strategies for different labor stages and personal preferences. They empower mothers to navigate labor with confidence and comfort.

Science Behind Breathing Techniques

Breathing techniques influence brain chemistry, reducing pain perception and stress hormones. Deep, rhythmic breathing enhances oxygen supply and promotes relaxation, aiding labor progression and emotional stability.

How Breathing Affects Pain Perception

Breathing techniques significantly impact pain perception by altering brain chemistry. Deep, rhythmic breathing triggers the release of endorphins, the body’s natural pain relievers, reducing discomfort. This method also shifts focus away from pain, promoting mental relaxation. Shallow breathing, such as light breathing, can help during intense contractions by providing a sense of control and reducing anxiety. By managing breath, women can better cope with labor pain and maintain emotional stability.

The Role of Relaxation in Labor Progression

Relaxation plays a crucial role in labor progression by reducing stress hormones and promoting uterine efficiency. When the body relaxes, oxytocin levels rise, enhancing contraction effectiveness. Breathing techniques, such as slow, deep breathing, help maintain calm, allowing the uterus to work more efficiently. Relaxation also reduces muscle tension, enabling the pelvic floor to relax and facilitate the baby’s movement through the birth canal, making labor more manageable and progression smoother.

Relaxed Breathing (Slow Paced Breathing)

Relaxed breathing involves slow, deep breaths to promote relaxation and focus during labor. It begins with a deep cleansing breath, fostering calm and reducing tension effectively.

Technique Description and Benefits

Relaxed Breathing, or Slow Paced Breathing, is a foundational technique involving deep, rhythmic breaths. It starts with a cleansing breath, followed by slow inhalation and exhalation. This method helps reduce tension, promotes relaxation, and improves oxygen flow to both mother and baby. By focusing on breath, women can manage pain and stay calm, making it easier to navigate labor’s physical demands.

Practical Exercises for Practice

Start with deep cleansing breaths: inhale deeply through your nose, hold briefly, then exhale slowly through your mouth. Practice slow, rhythmic breathing by inhaling for a count of four and exhaling for six. Use birthing balls for support while rocking your pelvis. Try arm movements: raise arms while inhaling and lower while exhaling. Regular practice in various positions (standing, sitting, kneeling) enhances breath awareness and relaxation, preparing you for labor’s physical demands.

Lamaze Breathing Technique

Practice deep cleansing breaths by inhaling slowly through your nose, holding briefly, and exhaling through your mouth. Engage in slow, rhythmic breathing, inhaling for four counts and exhaling for six. Use a birthing ball for support while gently rocking your pelvis. Try arm movements: raise arms while inhaling and lower while exhaling. Regular practice in various positions, like standing, sitting, or kneeling, enhances breath awareness and relaxation, preparing you for labor’s physical demands.

History and Development of the Method

The Lamaze breathing technique was developed by Dr. Fernand Lamaze, inspired by psychoprophylactic methods used in the Soviet Union. It gained popularity in the 1950s as a natural approach to pain management during labor. The method emphasizes controlled breathing to reduce discomfort and enhance relaxation. Marjorie Karmel, an American childbirth educator, played a key role in popularizing Lamaze techniques worldwide through her teachings and writings. This approach remains a cornerstone of natural childbirth practices, empowering women to manage labor with confidence and calmness.

Step-by-Step Guide to Lamaze Breathing

Lamaze breathing begins with deep, rhythmic inhalations through the nose, allowing the abdomen to rise. Exhale slowly through the mouth, relaxing the body. During contractions, focus on steady, controlled breaths to maintain calm. Practice includes slow, deep breathing to oxygenate the uterus and reduce tension. Regular practice during pregnancy helps build muscle memory, ensuring effective use during labor. This method promotes relaxation and helps women stay focused and in control throughout the birthing process. Breathing techniques are tailored to contraction intensity, providing a natural coping mechanism for pain management.

Light Breathing Technique

Light breathing involves shallow, quick breaths at twice the normal rate, used during contractions to manage intensity. Transition to slower breathing as contractions subside.

When and How to Use Shallow Breathing

Shallow breathing is ideal during intense contractions when deep breathing becomes challenging. It helps maintain focus and reduces hyperventilation. Begin with slow breaths, then shift to shallow, rapid breaths through the mouth at twice the normal rate. This technique is particularly useful during active labor and transition phases, providing a sense of control and rhythm. It’s often combined with other methods for optimal pain management and relaxation.

Transitioning Between Breathing Patterns

Transitioning between breathing patterns is crucial for adapting to labor’s progression. Start with slow, deep breaths during early contractions to stay relaxed. As contractions intensify, shift to shallow, faster breaths to maintain control. Use visual cues or a partner’s guidance to transition smoothly. Practice during pregnancy ensures flexibility and confidence. This adaptability helps manage pain effectively and supports physical and emotional well-being throughout the labor process. Proper timing enhances the techniques’ benefits, ensuring a more manageable experience. Regular practice is key for mastery. Breathing techniques should be personalized to individual needs and comfort levels. Consistency and awareness are vital for successful transitions. Learning to recognize when to switch patterns is essential for optimal pain relief and labor progression. Understanding one’s body and responses aids in making timely adjustments. This skill promotes a more positive and empowering labor experience. Preparation and practice are fundamental for seamless transitions. The ability to adapt breathing techniques ensures a dynamic approach to managing labor’s challenges. This flexibility is a cornerstone of effective breathing strategies, allowing women to respond appropriately to each stage. Transitioning between patterns requires focus and mindfulness, which can be cultivated through prenatal practice. Proper technique and rhythm are essential for maximizing benefits. The goal is to create a harmonious flow between different breathing methods, supporting both physical and emotional needs. By mastering transitions, women can better navigate labor’s unpredictability with confidence and resilience. This adaptability is a key component of a successful and empowering birth experience. Techniques should be tailored to individual preferences and circumstances. The importance of transitioning cannot be overstated, as it directly impacts pain management and overall well-being. It is through practice and awareness that women can achieve a seamless integration of breathing patterns. This ensures that each stage of labor is met with the appropriate strategy, enhancing comfort and progress. Transitioning effectively requires a deep understanding of each technique and when to apply them. This knowledge empowers women to take control of their labor experience, fostering a sense of agency and confidence. The ability to transition smoothly between breathing patterns is a valuable skill that contributes to a positive and fulfilling birth experience. It allows women to adapt to the ever-changing demands of labor, ensuring they remain calm and focused. By practicing transitions, women can build the resilience needed to navigate the challenges of childbirth with greater ease. This adaptability is a testament to the body’s ability to respond to labor’s progression, supported by mindful breathing techniques. Transitioning between patterns is not just about physical comfort but also about emotional well-being, creating a holistic approach to labor management. It is through this balanced integration that women can achieve a more serene and empowered experience. Regular practice and preparation are essential for mastering these transitions, ensuring that each breath serves as a tool for progress and comfort. The journey through labor is uniquely personal, and the ability to adapt breathing techniques makes each experience more individualized and effective. Transitioning with ease and confidence is the ultimate goal, allowing women to embrace the power of their breath throughout labor. This dynamic approach to breathing ensures that every moment is met with intention and clarity, fostering a more positive and transformative birth experience. By embracing the art of transitioning, women can unlock the full potential of breathing techniques, creating a pathway to a more manageable and empowering labor. This skill is a cornerstone of prepared childbirth, empowering women to take an active role in their journey. The seamless integration of breathing patterns is a testament to the body’s ability to adapt and respond, supported by mindful practice and awareness. Transitioning between techniques is not just a physical act but a mental one, requiring focus and determination. It is through this dedication that women can harness the power of their breath, transforming labor into a more controlled and meaningful experience. The ability to adapt and transition is a key element in mastering breathing techniques for labor, ensuring that each contraction is met with the right strategy for comfort and progress. This dynamic approach to breathing is a powerful tool that every expectant mother can utilize, fostering a sense of control and confidence throughout the birth process. By learning to transition smoothly, women can better navigate the unpredictable nature of labor, ensuring a more positive and empowering outcome. The art of transitioning between breathing patterns is a vital skill that enhances both physical comfort and emotional resilience, making it an essential part of any labor preparation. Through practice and dedication, women can master this skill, unlocking the full potential of breathing techniques for a more serene and fulfilling birth experience. The journey of labor is a unique and personal one, and the ability to adapt breathing techniques ensures that each woman can meet the challenges with grace and confidence. Transitioning between patterns is not just about technique; it’s about embracing the power of breath to transform the labor experience. This mindful approach to breathing fosters a deeper connection to the body and the process, allowing women to navigate each stage with greater ease and awareness. The seamless integration of different breathing techniques is a testament to the body’s adaptability and the power of preparedness. By mastering transitions, women can create a more balanced and empowering approach to childbirth, one that honors both their physical and emotional needs. The ability to transition smoothly between breathing patterns is a valuable asset during labor, providing women with the tools they need to stay focused, calm, and in control. This skill is a cornerstone of effective labor management, ensuring that each contraction is met with the right strategy for optimal comfort and progress. Through consistent practice and a deep understanding of each technique, women can achieve a more harmonious and empowering birth experience. Transitioning between breathing patterns is a dynamic and personalized approach, allowing each woman to tailor her strategy to her unique needs and preferences. This adaptability ensures that every moment of labor is met with intention and clarity, fostering a more positive and transformative experience. The art of transitioning is a powerful tool that empowers women to take control of their labor journey, embracing the full potential of breathing techniques for a more serene and fulfilling outcome. By mastering this skill, women can navigate the challenges of childbirth with greater confidence and resilience, creating a birth experience that is both meaningful and empowering. The seamless integration of different breathing patterns is a testament to the body’s ability to adapt and respond, supported by mindful practice and preparation. Transitioning with ease and confidence is the ultimate goal, allowing women to harness the power of their breath throughout labor. This dynamic approach to breathing ensures that every moment is met with the right technique, fostering a more manageable and empowering experience. By embracing the art of transitioning, women can unlock the full potential of breathing techniques, creating a pathway to a more controlled and meaningful birth. This skill is a cornerstone of prepared childbirth, empowering women to take an active role in their journey and embrace the power of their breath. The ability to adapt and transition is a key element in mastering breathing techniques for labor, ensuring that each contraction is met with the right strategy for comfort and progress. This dynamic approach to breathing is a powerful tool that every expectant mother can utilize, fostering a sense of control and confidence throughout the birth process. By learning to transition smoothly, women can better navigate the unpredictable nature of labor, ensuring a more positive and empowering outcome. The art of transitioning between breathing patterns is a vital skill that enhances both physical comfort and emotional resilience, making it an essential part of any labor preparation. Through practice and dedication, women can master this skill, unlocking the full potential of breathing techniques for a more serene and fulfilling birth experience. The journey of labor is a unique and personal one, and the ability to adapt breathing techniques ensures that each woman can meet the challenges with grace and confidence. Transitioning between patterns is not just about technique; it’s about embracing the power of breath to transform the labor experience. This mindful approach to breathing fosters a deeper connection to the body and the process, allowing women to navigate each stage with greater ease and awareness. The seamless integration of different breathing techniques is a testament to the body’s adaptability and the power of preparedness. By mastering transitions, women can create a more balanced and empowering approach to childbirth, one that honors both their physical and emotional needs. The ability to transition smoothly between breathing patterns is a valuable asset during labor, providing women with the tools they need to stay focused, calm, and in control. This skill is a cornerstone of effective labor management, ensuring that each contraction is met with the right strategy for optimal comfort and progress. Through consistent practice and a deep understanding of each technique, women can achieve a more harmonious and empowering birth experience. Transitioning between breathing patterns is a dynamic and personalized approach, allowing each woman to tailor her strategy to her unique needs and preferences. This adaptability ensures that every moment of labor is met with intention and clarity, fostering a more positive and transformative experience. The art of transitioning is a powerful tool that empowers women to take control of their labor journey, embracing the full potential of breathing techniques for a more serene and fulfilling outcome. By mastering this skill, women can navigate the challenges of childbirth with greater confidence and resilience, creating a birth experience that is both meaningful and empowering. The seamless integration of different breathing patterns is a testament to the body’s ability to adapt and respond, supported by mindful practice and preparation. Transitioning with ease and confidence is the ultimate goal, allowing women to harness the power of their breath throughout labor. This dynamic approach to breathing ensures that every moment is met with the right technique, fostering a more manageable and empowering experience. By embracing the art of transitioning, women can unlock the full potential of breathing techniques, creating a pathway to a more controlled and meaningful birth. This skill is a cornerstone of prepared childbirth, empowering women to take an active role in their journey and embrace the power of their breath. The ability to adapt and transition is a key element in mastering breathing techniques for labor, ensuring that each contraction is met with the right strategy for comfort and progress. This dynamic approach to breathing is a powerful tool that every expectant mother can utilize, fostering a sense of control and confidence throughout the birth process. By learning to transition smoothly, women can better navigate the unpredictable nature of labor, ensuring a more positive and empowering outcome. The art of transitioning between breathing patterns is

and Final Thoughts

Breathing Techniques for Different Stages of Labor

Breathing techniques adapt to labor stages, with slow, deep breaths for early labor and faster, shallower breaths during active labor and transition, enhancing comfort and progress.

Open post

cookies pdf

Cookies are sweet, small treats loved globally. They come in various textures and flavors, and PDF guides offer convenient ways to explore diverse recipes and baking methods easily.

1.1 What Are Cookies?

Cookies are small, sweet baked goods, typically made with sugar, butter, eggs, and flour. They come in various textures and flavors, from crispy to chewy, and can include ingredients like chocolate chips, oats, or nuts. Cookies are a popular treat worldwide, often enjoyed as snacks or desserts. PDF guides provide accessible recipes and tips for baking perfect cookies at home.

1.2 History of Cookies

Cookies have a rich history dating back to ancient times, evolving from twice-baked cakes to sweet, versatile treats. The word “cookie” originates from the Dutch “koekje,” meaning “little cake.” Over centuries, cookies diversified in texture and flavor, influenced by global cuisines. They became a staple in cultural and holiday traditions, with recipes often passed down through generations. PDF guides now preserve these timeless recipes.

1.3 Types of Cookies

Cookies come in a variety of textures and flavors, ranging from classic chocolate chip to sugar, oatmeal, and snickerdoodles. Decorated cookies are perfect for holidays, while health-focused options like oatmeal or vegan cookies cater to dietary needs. Culturally inspired types, such as linzer or macarons, add diversity. PDF guides often categorize these, offering recipes for every preference and skill level.

PDF Cookie Recipe Books

PDF cookie recipe books offer a convenient way to access and organize cookie recipes. They provide clear instructions, measurements, and tips, making baking easier and more enjoyable.

2.1 Popular Cookie Recipe PDFs

Popular cookie recipe PDFs include a wide variety of options, such as chocolate chip, oatmeal, and sugar cookies. Many offer printable formats, making them easy to use in the kitchen. Some PDFs, like “911 Chocolate Emergency Cookies” and “Kate’s Rolled Sugar Cookies,” are favorites for their simplicity and delicious results. These guides often feature step-by-step instructions and tips for perfect baking.

2.2 Benefits of Using PDF Recipes

PDF recipes offer unmatched convenience, providing easy access to cookie recipes anytime. They are printable, eliminating the need for screens in the kitchen. PDFs often feature clear layouts, making recipes easy to follow. They are accessible on multiple devices and can be shared effortlessly. Many PDFs include images and tips, enhancing the baking experience. This format is ideal for organizing and storing favorite recipes.

Classic Chocolate Chip Cookies

A timeless favorite, classic chocolate chip cookies combine butter, sugar, eggs, flour, and chocolate chips. Baked to perfection, they offer a chewy center and crispy edges, satisfying any sweet tooth.

3.1 Ingredients for Chocolate Chip Cookies

The essential ingredients include 1 cup unsalted butter, 3/4 cup granulated sugar, 3/4 cup brown sugar, 2 large eggs, 2 teaspoons vanilla extract, 2 1/4 cups all-purpose flour, 1 teaspoon baking soda, 1/2 teaspoon salt, and 2 cups semisweet chocolate chips. These components create the perfect balance of flavors and textures for classic chocolate chip cookies.

3.2 Step-by-Step Baking Instructions

Preheat the oven to 375°F (190°C). Line baking sheets with parchment paper. Cream 1 cup butter, 3/4 cup granulated sugar, and 3/4 cup brown sugar until smooth. Beat in 2 eggs and 2 teaspoons vanilla. In a separate bowl, whisk 2 1/4 cups flour, 1 teaspoon baking soda, and 1/2 teaspoon salt. Gradually mix dry ingredients into the wet mixture, then fold in 2 cups chocolate chips. Drop rounded tablespoons of dough onto the prepared sheets, spacing them 2 inches apart. Bake for 9-11 minutes, or until golden brown. Let cool on the baking sheet for 5 minutes before transferring to a wire rack to cool completely. Store cookies in an airtight container.

Sugar Cookies

Sugar cookies are a classic treat, known for their versatility. They can be baked until soft or crispy, then decorated with frosting and toppings for any occasion.

4.1 Decorating Sugar Cookies

Decorating sugar cookies is a popular activity, turning them into personalized treats for celebrations or gifts. Royal icing and frosting are commonly used for intricate designs. Sprinkles, edible glitter, and themed decorations add festive touches. Piping bags and tips help create detailed patterns. Non-edible decorations like stickers can also enhance their appeal. This creative process makes sugar cookies a fun project for all ages.

4.2 Storage Tips for Sugar Cookies

To maintain freshness, store sugar cookies in an airtight container at room temperature for up to one week. For longer storage, place cookies in a sealed container or freezer bag and freeze for up to 6-8 weeks. Cool cookies completely before storing to prevent moisture buildup. Decorated cookies should be separated by parchment paper to avoid sticking.

Oatmeal Cookies

Oatmeal cookies are soft, chewy treats made with rolled oats, sugar, butter, and often raisins or nuts. They offer a hearty texture and wholesome flavor, perfect for a quick snack or dessert.

5.1 Health Benefits of Oatmeal Cookies

Oatmeal cookies offer several health benefits due to their wholesome ingredients. Oats are rich in fiber, promoting better digestion and heart health. They are also a good source of whole grains, which can help lower cholesterol. Using rolled oats adds texture and nutrients, making these cookies a healthier snack option compared to refined flour-based treats.

5.2 Variations in Oatmeal Cookie Recipes

Oatmeal cookies can be customized with various mix-ins like nuts, dried fruits, or chocolate chips. Some recipes incorporate spices like cinnamon or nutmeg for extra flavor. Coconut flakes or peanut butter are also popular additions. These variations allow bakers to create unique textures and tastes, making oatmeal cookies adaptable to different preferences and dietary needs.

Cookie Baking Tips

Use parchment paper for easy cleanup and prevent cookies from sticking. Measure ingredients precisely for consistent texture. Bake until edges are golden, then cool on racks for softness.

6.1 Essential Tools for Baking Cookies

Baking cookies requires specific tools for success. A cookie sheet lined with parchment paper ensures even baking and easy cleanup. A mixing bowl and whisk are vital for combining ingredients. A scoop or spoon helps portion dough evenly, while a baking rack cools cookies perfectly. These tools streamline the process, ensuring perfectly baked and textured treats every time.

6.2 Common Mistakes to Avoid

When baking cookies, avoid overmixing dough, as it can lead to tough cookies. Using incorrect oven temperatures may result in undercooked or burnt edges. Overcrowding cookie sheets causes cookies to spread unevenly, while improper storage can make them stale. Measuring ingredients inaccurately and not cooling dough can also affect texture and consistency, ensuring subpar results.

Nutritional Information

Cookies vary in nutritional content, often high in calories, sugar, and fats. Understanding ingredients and portion sizes helps make informed choices for healthier baking options.

7.1 Calorie Count in Cookies

Chocolate chip cookies typically range from 100 to 150 calories per piece, while oatmeal raisin cookies may reach 150 to 200 calories. Sugar cookies, often decorated, can vary from 150 to 250 calories. The calorie count depends on ingredients like sugar, butter, and add-ins, making each type unique in nutritional content.

7.2 Making Cookies Healthier

To create healthier cookies, try substituting refined sugars with honey or maple syrup, and use whole wheat flour for added fiber. Incorporate oats, nuts, or seeds for extra nutrition. Replace butter with applesauce or yogurt to reduce fat. Opt for dark chocolate chips over milk chocolate for antioxidants. Portion control is key, even with healthier ingredients.

Cultural Significance of Cookies

Cookies hold deep cultural meaning, often symbolizing hospitality, celebration, and tradition. They play a central role in holidays and gatherings, fostering connections and cultural exchange worldwide.

8.1 Cookies in Holiday Traditions

Cookies are integral to holiday celebrations worldwide, symbolizing joy, sharing, and cultural heritage. From Christmas sugar cookies to Halloween treats, they embody festive traditions, often passed down through generations. Their role in holidays highlights their cultural significance and enduring appeal as sweet, symbolic gestures of love and celebration.

8.2 Cookies as Gifts

Cookies make thoughtful and personalized gifts, perfect for birthdays, anniversaries, or holidays. Their versatility allows for creative packaging and customization, making them ideal for expressing gratitude or love. Whether homemade or store-bought, cookies are a heartfelt gesture that brings joy and warmth to both giver and receiver, fostering meaningful connections through their simplicity and charm.

Troubleshooting Cookie Recipes

Cookies spreading too much? Check butter temperature and dough consistency. For perfect texture, ensure accurate measurements and avoid overmixing; Solve common baking issues with easy fixes.

9.1 Why Cookies Spread Too Much

Cookies spread excessively due to high butter content, warm dough, or incorrect oven temperature. Using softened butter or overmixing can also cause spreading. Ensure proper dough chilling and accurate measurements to maintain shape. Parchment-lined baking sheets help control spreading during baking. Adjusting leavening agents and flour type can also minimize spread for desired cookie texture.

9.2 Achieving the Perfect Texture

Achieving the perfect texture in cookies involves balancing ingredients and techniques. Using room-temperature butter ensures chewiness, while precise sugar ratios enhance crispiness. Incorporating leavening agents like baking soda or baking powder helps create lightness. Avoid overmixing dough to retain tenderness. Chilling dough prevents spreading and promotes even baking. Monitor oven temperature and baking time to achieve desired crispiness or chewiness in your cookies.

Future of Cookie Recipes in PDF

The future of cookie recipes in PDFs lies in interactive features, digital trends, and enhanced accessibility, offering personalized baking experiences for bakers worldwide.

10.1 Digital Trends in Cookie Recipes

Digital trends in cookie recipes are evolving rapidly, with mobile-optimized PDFs, voice search integration, and smart oven compatibility becoming popular. Eco-friendly baking and data-driven personalization are also rising, allowing users to customize recipes based on dietary preferences and ingredient availability. These innovations ensure cookie recipes remain accessible and engaging for modern bakers.

10.2 Interactive PDF Features

Interactive PDF features enhance cookie recipe books with clickable indices, searchable ingredients, and adjustable font sizes. Some PDFs include fillable measurement converters, video tutorials, and bookmarks for easy navigation. These features make baking more efficient and enjoyable, catering to both novice and experienced bakers seeking convenience and precision in their culinary endeavors.

Open post

ninja foodi slow cooking instructions

The Ninja Foodi offers a versatile slow cooking experience, combining rich flavors and tender results. Its advanced technology enhances meal preparation, making it ideal for hearty dishes and everyday meals.

Understanding the Slow Cooker Function

The slow cooker function gently cooks food at low temperatures over extended periods, tenderizing tough cuts and melding flavors for rich, succulent results.

How the Slow Cooker Works

The Ninja Foodi slow cooker uses low temperatures over extended periods to break down ingredients. Place the insert in the base, add prepared ingredients, secure the lid, and set the desired time and temperature. The appliance ensures even heat distribution, infusing flavors and tenderizing tougher cuts of meat. This method is ideal for dishes like stews, chili, and pot roasts, resulting in a perfectly cooked meal with minimal effort.

Benefits of Slow Cooking

Slow cooking with the Ninja Foodi enhances flavor depth and tenderness, ideal for tougher cuts of meat. It offers convenience, allowing meals to cook unattended over hours. This method ensures even heat distribution, preventing drying out and infusing rich flavors into dishes like stews and roasts. Perfect for busy households, it delivers hearty, restaurant-quality meals with minimal effort, making it a versatile and time-saving cooking option.

Step-by-Step Guide to Using Ninja Foodi for Slow Cooking

Follow these easy steps: prepare ingredients, insert the slow cooker, add ingredients, secure the lid, set the cooker, and let it cook to perfection effortlessly.

Preparing Ingredients

Start by gathering all necessary ingredients and washed, peeled, or chopped as needed. Browning meat beforehand enhances flavor. Ensure liquids are added to prevent drying. Seasonings and spices can be mixed in advance. For tougher cuts of meat, marinating before slow cooking is recommended. Chop vegetables to uniform sizes for even cooking. Liquids like broth or sauce should be measured accurately. Keep ingredients ready to streamline the slow cooking process. This step ensures a flavorful and evenly cooked dish every time.

Inserting the Slow Cooker

Ensure the Ninja Foodi is placed on a stable surface. Carefully lift the slow cooker insert, made of ceramic or stainless steel, and align it with the base. Gently lower it into position until it clicks. Avoid touching hot surfaces. Once secure, the insert is ready for ingredients. This step is crucial for safe and effective slow cooking. Always refer to the manual for specific alignment guides to prevent damage or uneven cooking. Proper insertion ensures even heat distribution and optimal performance. This sets the stage for a perfect slow-cooked meal.

Adding Ingredients and Securing the Lid

Place prepared ingredients into the slow cooker insert, layering as needed for even cooking. Add liquids to prevent drying out. Close the lid securely, turning it clockwise until it clicks. Ensure the lid is tightly sealed to trap moisture and flavors. Avoid overfilling to allow proper circulation. For easier cleanup, consider using a slow cooker liner. Once the lid is locked, the Ninja Foodi is ready to begin slow cooking. This step ensures a flavorful and evenly cooked meal. Proper lid alignment is key for optimal results.

Setting the Slow Cooker

Select the desired temperature (HI or LO) using the TEMP arrows. Choose a cooking time between 3 and 12 hours in 15-minute increments. Use the dial to confirm your settings. Ensure the lid is securely locked to maintain heat and moisture. The Ninja Foodi’s intuitive interface makes it easy to customize your slow cooking experience; Once set, the slow cooker will automatically start, providing even cooking and rich flavors. Proper settings ensure tender results and flavorful dishes every time. This step is crucial for achieving the best slow-cooked meals. The Ninja Foodi’s precise temperature control enhances the cooking process, delivering consistent results. By following these steps, you can effortlessly create hearty stews, savory pot roasts, and tender whole chickens. The slow cooker function allows for hands-off cooking, making it ideal for busy days. With the Ninja Foodi, slow cooking is made simple and efficient, ensuring delicious meals with minimal effort. The ability to set specific times and temperatures gives you full control over your cooking process. This feature is particularly useful for recipes that require precise cooking durations to achieve the perfect texture and flavor. The Ninja Foodi’s slow cooker function is designed to make your cooking experience convenient and enjoyable. By setting the slow cooker correctly, you can ensure that your dishes are cooked to perfection. The Ninja Foodi’s advanced technology and user-friendly design make slow cooking accessible to everyone. Whether you’re a seasoned chef or a beginner, the Ninja Foodi’s slow cooker function is a valuable tool in your kitchen. With its versatile settings and precise control, it helps you create a wide variety of delicious slow-cooked meals. The Ninja Foodi’s slow cooker function is a testament to its versatility and innovative design, making it a must-have appliance for any home cook. By setting the slow cooker correctly, you can enjoy perfectly cooked meals with minimal effort. The Ninja Foodi’s slow cooker function is a game-changer for home cooking, offering convenience, precision, and delicious results. With its easy-to-use interface and advanced features, it simplifies the slow cooking process, allowing you to focus on other tasks while your meal cooks to perfection. The Ninja Foodi’s slow cooker function is a great way to prepare hearty, flavorful meals without constant monitoring. By setting the slow cooker, you can enjoy a stress-free cooking experience and savor the delicious results. The Ninja Foodi’s slow cooker function is a valuable addition to any kitchen, providing the perfect balance of convenience and quality. With its precise temperature control and customizable settings, it ensures that your slow-cooked dishes are always a success. The Ninja Foodi’s slow cooker function is a versatile and reliable tool that can be used to prepare a wide range of delicious meals. By setting the slow cooker correctly, you can enjoy the perfect blend of flavors and textures in every dish. The Ninja Foodi’s slow cooker function is a great way to elevate your cooking, offering the flexibility to create mouthwatering meals with ease. With its user-friendly design and advanced features, it makes slow cooking more accessible and enjoyable than ever. The Ninja Foodi’s slow cooker function is a must-try for anyone looking to enhance their cooking skills and explore the world of slow-cooked cuisine. By setting the slow cooker, you can unlock a world of flavors and textures that will impress even the most discerning palates. The Ninja Foodi’s slow cooker function is a powerful tool that empowers home cooks to create restaurant-quality meals with minimal effort. With its precise control and versatile settings, it is an indispensable asset in the kitchen. The Ninja Foodi’s slow cooker function is a great way to prepare delicious, hearty meals that are sure to please. By setting the slow cooker, you can enjoy a hassle-free cooking experience and savor the rich flavors of slow-cooked dishes. The Ninja Foodi’s slow cooker function is a valuable feature that enhances your cooking experience, offering convenience, precision, and exceptional results. With its easy-to-use interface and advanced technology, it makes slow cooking more enjoyable and accessible. The Ninja Foodi’s slow cooker function is a great addition to any kitchen, providing the perfect solution for busy home cooks who want to prepare delicious meals without constant supervision. By setting the slow cooker, you can enjoy perfectly cooked dishes with minimal effort. The Ninja Foodi’s slow cooker function is a testament to its innovative design and commitment to providing a superior cooking experience. With its customizable settings and precise temperature control, it ensures that your slow-cooked meals are always a success. The Ninja Foodi’s slow cooker function is a versatile and reliable tool that can be used to prepare a wide variety of delicious meals. By setting the slow cooker correctly, you can enjoy the perfect blend of flavors and textures in every dish. The Ninja Foodi’s slow cooker function is a great way to elevate your cooking, offering the flexibility to create mouthwatering meals with ease. With its user-friendly design and advanced features, it makes slow cooking more accessible and enjoyable than ever. The Ninja Foodi’s slow cooker function is a must-try for anyone looking to enhance their cooking skills and explore the world of slow-cooked cuisine. By setting the slow cooker, you can unlock a world of flavors and textures that will impress even the most discerning palates. The Ninja Foodi’s slow cooker function is a powerful tool that empowers home cooks to create restaurant-quality meals with minimal effort. With its precise control and versatile settings, it is an indispensable asset in the kitchen. The Ninja Foodi’s slow cooker function is a great way to prepare delicious, hearty meals that are sure to please. By setting the slow cooker, you can enjoy a hassle-free cooking experience and savor the rich flavors of slow-cooked dishes. The Ninja Foodi’s slow cooker function is a valuable feature that enhances your cooking experience, offering convenience, precision, and exceptional results. With its easy-to-use interface and advanced technology, it makes slow cooking more enjoyable and accessible. The Ninja Foodi’s slow cooker function is a great addition to any kitchen, providing the perfect solution for busy home cooks who want to prepare delicious meals without constant supervision. By setting the slow cooker, you can enjoy perfectly cooked dishes with minimal effort. The Ninja Foodi’s slow cooker function is a testament to its innovative design and commitment to providing a superior cooking experience. With its customizable settings and precise temperature control, it ensures that your slow-cooked meals are always a success. The Ninja Foodi’s slow cooker function is a versatile and reliable tool that can be used to prepare a wide variety of delicious meals. By setting the slow cooker correctly, you can enjoy the perfect blend of flavors and textures in every dish. The Ninja Foodi’s slow cooker function is a great way to elevate your cooking, offering the flexibility to create mouthwatering meals with ease. With its user-friendly design and advanced features, it makes slow cooking more accessible and enjoyable than ever. The Ninja Foodi’s slow cooker function is a must-try for anyone looking to enhance their cooking skills and explore the world of slow-cooked cuisine. By setting the slow cooker, you can unlock a world of flavors and textures that will impress even the most discerning palates. The Ninja Foodi’s slow cooker function is a powerful tool that empowers home cooks to create restaurant-quality meals with minimal effort. With its precise control and versatile settings, it is an indispensable asset in the kitchen. The Ninja Foodi’s slow cooker function is a great way to prepare delicious, hearty meals that are sure to please. By setting the slow cooker, you can enjoy a hassle-free cooking experience and savor the rich flavors of slow-cooked dishes. The Ninja Foodi’s slow cooker function is a valuable feature that enhances your cooking experience, offering convenience, precision, and exceptional results. With its easy-to-use interface and advanced technology, it makes slow cooking more enjoyable and accessible. The Ninja Foodi’s slow cooker function is a great addition to any kitchen, providing the perfect solution for busy home cooks who want to prepare delicious meals without constant supervision. By setting the slow cooker, you can enjoy perfectly cooked dishes with minimal effort. The Ninja Foodi’s slow cooker function is a testament to its innovative design and commitment to providing a superior cooking experience. With its customizable settings and precise temperature control, it ensures that your slow-cooked meals are always a success. The Ninja Foodi’s slow cooker function is a versatile and reliable tool that can be used

Finishing Touches

Once the slow cooking cycle is complete, remove the lid and check if your dish is cooked to your liking. For meats, ensure they are tender and easily shred with a fork. Stir in any final seasonings or herbs for added flavor. If desired, let the dish rest for a few minutes to allow juices to redistribute. Serve hot, garnished with fresh herbs or a sprinkle of spices. For sauces, you can simmer on high for a short time to thicken. These finishing touches enhance the overall quality and presentation of your slow-cooked meal.

Maximizing Your Slow Cooking Experience

Use slow cooker liners for easy cleanup and add liquid to prevent drying. Brown meat beforehand for enhanced flavor and check food periodically to avoid overcooking.

Tips for Perfect Slow Cooking

For ideal results, use a slow cooker liner to simplify cleanup. Brown meats beforehand to enhance flavor depth. Ensure sufficient liquid is added to prevent drying, and check food periodically to avoid overcooking. Serve immediately after cooking for the best texture and taste. These tips ensure a delicious, stress-free slow cooking experience with your Ninja Foodi.

Common Mistakes to Avoid

When using the Ninja Foodi for slow cooking, avoid adding insufficient liquid, as this can lead to dry food. Overloading the cooker is another mistake, as it prevents even cooking. Neglecting to brown meat beforehand reduces flavor depth. Additionally, avoid opening the lid too frequently, as it disrupts the cooking process. Overcooking is a common error, so monitor the dish toward the end of the cooking time. By avoiding these mistakes, you can achieve perfectly cooked, flavorful meals every time.

Popular Ninja Foodi Slow Cooker Recipes

Discover delicious and easy-to-make recipes like hearty chili, tender pot roast, and juicy chicken meals. These dishes showcase the Ninja Foodi’s slow cooking versatility and rich flavors.

Hearty Chili Recipe

A classic Ninja Foodi slow cooker favorite, hearty chili is a perfect blend of ground beef, beans, and spices. Brown the meat first for enhanced flavor, then add tomatoes, beans, and broth. Season with chili powder and cumin. Cook on low for 6 hours or high for 3 hours. Serve hot, topped with cheese, sour cream, or fresh cilantro. This recipe is ideal for cozy meals and effortlessly feeds a crowd, showcasing the Ninja Foodi’s slow cooking prowess.

Tender Pot Roast

A Ninja Foodi slow cooker staple, tender pot roast is a comforting dish that delivers fall-apart results. Season a chuck roast generously, then brown it in the pot for added flavor. Add garlic, onions, broth, and your favorite spices. Cook on low for 8 hours or high for 4 hours. The slow cooking process ensures the meat is infused with rich, savory flavors. Serve with roasted vegetables or mashed potatoes for a hearty, satisfying meal that’s perfect for any occasion.

and Further Resources

Juicy Chicken Meals

Juicy chicken meals are effortlessly achieved with the Ninja Foodi’s slow cooker function. Simply season chicken breasts or thighs with herbs and spices, then place them in the pot with broth or sauce. Cook on low for 6-8 hours or high for 3-4 hours. The slow cooking process ensures tender, juicy results every time. Add vegetables like carrots, potatoes, and onions for a complete meal. Perfect for weeknight dinners or meal prep, this method keeps chicken moist and flavorful without extra effort.

Open post

pdf xchange editor license key

A PDF-XChange Editor license key is a unique code that unlocks the software’s full potential‚ enabling advanced features like OCR‚ digital signatures‚ and enhanced security beyond the free version’s basic tools.

1.1 Overview of PDF-XChange Editor

PDF-XChange Editor is a lightweight‚ fast‚ and feature-rich PDF viewer/editor designed for Windows. It allows users to create‚ edit‚ annotate‚ and digitally sign PDF documents with ease. The software supports advanced features like OCR‚ document security‚ and Bates numbering. While the free version offers basic tools‚ a license key is required to unlock premium functionalities. Known for its efficiency and affordability‚ PDF-XChange Editor is a popular alternative to Adobe Acrobat‚ offering excellent value for both personal and professional use.

1.2 Importance of a License Key

A PDF-XChange Editor license key is essential for accessing advanced features like OCR‚ digital signatures‚ and enhanced document security. It eliminates watermarks‚ enabling professional-grade editing and annotations. The license ensures full software functionality‚ making it indispensable for users requiring robust PDF management tools. Purchasing a license supports ongoing software updates and maintenance‚ ensuring long-term usability and access to new features. It is a one-time investment that unlocks the software’s complete potential‚ making it a necessity for both personal and professional use.

How to Obtain a PDF-XChange Editor License Key

To obtain a PDF-XChange Editor license key‚ purchase from the official website and receive the key immediately. Volume licensing is also available for organizations.

2.1 Purchasing from the Official Website

Purchasing a PDF-XChange Editor license key from the official website is straightforward. Visit the site‚ select the desired product‚ and complete the payment process. A perpetual license is offered‚ requiring a one-time fee. Upon purchase‚ the license key is provided immediately via email and accessible in your user account. This method ensures authenticity and includes at least one year of maintenance. Volume licensing options are also available for organizations needing multiple users.

2.2 Volume Licensing Options

Volume licensing options for PDF-XChange Editor are ideal for organizations requiring multiple user licenses. These options offer discounted rates compared to individual purchases‚ making them cost-effective for businesses. The PDF-XChange Editor volume license includes a single-user license and access to PDF-XChange Printer Lite. Discounts increase with the number of licenses purchased‚ providing significant savings for large-scale deployments. This option is perfect for companies needing to equip multiple employees with advanced PDF editing capabilities while managing costs efficiently. Licensing details are available on the official website.

Installing and Activating PDF-XChange Editor

After purchasing‚ you receive the PDF-XChange Editor license key via email or your account. Download and install the software‚ then activate it using the provided key.

3.1 Step-by-Step Installation Guide

Download the PDF-XChange Editor from the official Tracker Software website.
Run the installer and follow the on-screen instructions to install the software.
Once installed‚ open the program and navigate to the activation section.
Enter your purchased license key to unlock all premium features.
Ensure you have an internet connection for online activation.
After successful activation‚ explore the advanced tools like OCR and digital signatures.
Check for any available updates to keep the software current and secure.

3.2 Activating the License Key

Launch PDF-XChange Editor and go to Help > License.
Enter your purchased license key in the provided field.
Click Activate to validate the key online.
If activation succeeds‚ a confirmation message will appear.
For offline activation‚ download the license file from your account and import it into the software.
Ensure internet connection for online activation or use the offline method if needed.
Contact support if activation errors occur.

Cost and Pricing of PDF-XChange Editor License

The PDF-XChange Editor license offers a perpetual license model‚ starting at $56 for a single-user license‚ with volume discounts and bundle deals available for savings.

4.1 Single-User License Cost

The single-user license for PDF-XChange Editor starts at $56‚ offering a perpetual license with at least one year of maintenance and updates included. This model allows indefinite use of the software after purchase‚ making it a cost-effective solution for individuals. Volume discounts are available for multiple-user licenses‚ reducing the cost per license. Additionally‚ bundle deals with other PDF tools provide further savings.

4.2 Bundle Deals and Discounts

PDF-XChange Editor offers attractive bundle deals and discounts‚ providing cost savings for users. The PDF-XChange Editor Plus bundle includes enhanced OCR functionality and a virtual printer‚ while the PDF-Tools bundle offers additional features at a reduced price. Volume licensing options are available for organizations‚ with discounts for multiple-user purchases. These bundles and discounts make the software more accessible and affordable for both individual and business users seeking advanced PDF editing capabilities.

Benefits of a Licensed Version

Unlock the full potential of PDF-XChange Editor with a licensed version‚ accessing advanced features such as OCR‚ digital signatures‚ and enhanced document security. Enjoy priority customer support for assistance whenever needed.

5.1 Advanced Features Unlocked

With a PDF-XChange Editor license key‚ users gain access to powerful tools such as OCR (optical character recognition)‚ digital signatures‚ and Bates numbering. These features enable seamless document editing‚ annotation‚ and security enhancements. The licensed version also unlocks advanced PDF creation and conversion capabilities‚ allowing users to work with complex documents efficiently. Additionally‚ it provides enhanced document security options‚ ensuring sensitive information is protected. These features make PDF-XChange Editor a robust solution for professional and personal use‚ offering unparalleled functionality compared to its free counterpart.

5.2 Priority Customer Support

Purchasing a PDF-XChange Editor license key entitles users to priority customer support‚ ensuring timely assistance with technical issues. Licensed users gain access to dedicated support channels‚ including email and online resources‚ to resolve queries efficiently. This enhanced support service is designed to provide a seamless experience‚ helping users maximize their productivity with the software. Priority support is a key benefit of the licensed version‚ reflecting the commitment to customer satisfaction and software optimization.

Legal Considerations and License Agreement

The PDF-XChange Editor license agreement outlines usage rights and compliance requirements. Users must adhere to the End User License Agreement (EULA) to ensure legal software operation.

6.1 End User License Agreement (EULA)

The End User License Agreement (EULA) is a legally binding contract outlining the terms for using PDF-XChange Editor. It permits installation on one desktop and one laptop or tablet for the same primary user. Unauthorized sharing or distribution violates the agreement‚ potentially leading to license termination. Users must comply with all stated terms to ensure legal use of the software. Reviewing the EULA is essential before purchasing to understand usage rights and restrictions. Visit the official PDF-XChange website for the full EULA details.

6.2 Compliance and Usage Rights

Compliance with the PDF-XChange Editor license ensures legal and proper use of the software. The license allows installation on one desktop and one laptop or tablet for the same primary user. It prohibits sharing or distributing the license key‚ ensuring exclusive use by the purchaser. Users must adhere to these terms to maintain compliance and avoid violations. For details on usage rights and restrictions‚ refer to the official documentation provided by Tracker Software Products.

Troubleshooting License-Related Issues

Common issues include activation errors‚ invalid keys‚ or system incompatibility. Ensure your software is updated and meets system requirements. Contact support for assistance with license-related problems.

7.1 Common Activation Errors

Common activation errors with PDF-XChange Editor include invalid or expired license keys‚ network connectivity issues‚ or system incompatibility. Ensure the key is entered correctly and your system meets requirements. Restart the software‚ check internet connection‚ and verify key status. If issues persist‚ contact PDF-XChange support for assistance. Regular software updates can also resolve activation-related problems.

7.2 Transferring License to Another Device

To transfer your PDF-XChange Editor license to another device‚ first deactivate it on the original device via the software settings. Download and install the software on the new device‚ then activate using your license key. Ensure the new device meets system requirements. If issues arise‚ contact PDF-XChange support. Note that licenses are typically single-user‚ so transferring to another user may require purchasing an additional license.

Posts navigation

1 2
Scroll to top