Open post

lamona washing machine instruction manual

Welcome to the Lamona washing machine instruction manual. This guide provides essential information for safe operation‚ maintenance‚ and troubleshooting your appliance‚ ensuring optimal performance and longevity.

Overview of the Manual

This manual provides a comprehensive guide to understanding and using your Lamona washing machine. It covers essential information‚ including safety precautions‚ installation requirements‚ and operating instructions. The manual also details maintenance tips‚ troubleshooting common issues‚ and warranty details. Designed to ensure optimal performance‚ it includes step-by-step instructions for various wash programs and error code resolution. Available for multiple models like LAM8740 and HJA8514‚ the manual is rated highly by users for its clarity and usefulness. Refer to this guide for a seamless experience with your Lamona appliance.

Importance of Following the Instructions

Following the instructions in the Lamona washing machine manual is crucial for ensuring safety‚ optimal performance‚ and longevity of the appliance. Proper installation and operation prevent damage and potential hazards. Adhering to guidelines helps maintain energy efficiency and reduces wear and tear. Incorrect usage can void the warranty and lead to costly repairs. By following the manual‚ you ensure compliance with safety standards and manufacturer recommendations. This also helps in troubleshooting common issues effectively. Always refer to the manual for specific instructions tailored to your model‚ such as LAM8740 or HJA8514‚ to enjoy reliable and efficient laundry cleaning.

Safety Precautions and Installation

Ensure correct installation to prevent hazards and ensure efficient operation. Follow guidelines to avoid moisture exposure and maintain proper electrical connections for optimal performance and safety.

General Safety Information

Always read the manual before using your Lamona washing machine. Ensure the appliance is installed correctly to avoid hazards. Keep children away from the machine while it is in operation. Never overload the machine or use excessive detergent. Avoid reaching into the machine during operation. Regularly inspect hoses and connections for damage. Ensure the area around the machine is dry to prevent slipping. Follow all safety guidelines to protect yourself and maintain the appliance’s performance. Proper installation and usage will ensure safe and efficient operation of your Lamona washing machine.

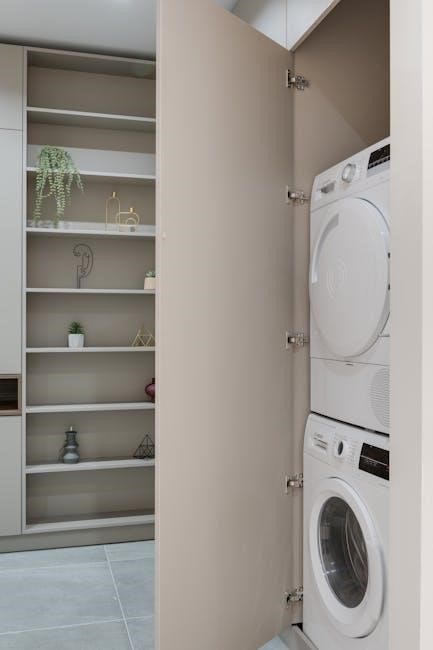
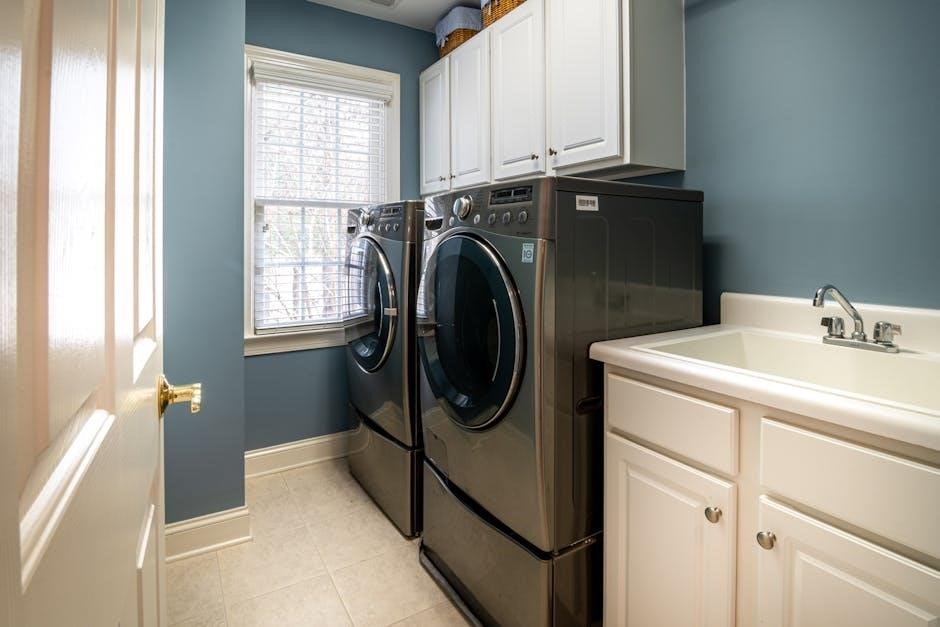
Installation Requirements and Guidelines

Ensure the Lamona washing machine is installed on a level‚ stable surface to prevent vibration and noise. Connect the water supply hoses securely to avoid leaks. Place the machine in a well-ventilated area‚ away from direct sunlight and moisture. Follow the manufacturer’s guidelines for electrical connections‚ ensuring the power supply matches the machine’s requirements. Check for any damage to the hoses or connections before use. Proper installation is crucial for safe and efficient operation. Refer to the installation manual for specific instructions‚ and ensure all safety precautions are followed to avoid hazards and maintain warranty validity.

Operating the Lamona Washing Machine

Start by selecting the appropriate wash program based on fabric type. Ensure the lid is closed securely before starting a cycle. The machine features 15 programs‚ including cotton and delicate settings‚ with a spin speed of 1400 rpm for efficient water extraction. Always follow the detergent dosage guidelines to optimize cleaning performance and maintain machine longevity. Regularly check and clean the detergent drawer and gasket to prevent residue buildup and ensure fresh wash results. Proper operation ensures reliable performance and extends the lifespan of your Lamona washing machine‚ providing consistent and satisfactory laundry outcomes.

Starting a Wash Cycle

To start a wash cycle on your Lamona washing machine‚ ensure the appliance is properly connected to a power supply. Select the desired wash program based on the fabric type of your laundry. Load the machine with clothes‚ avoiding overloading. Close the lid securely to ensure proper sealing. Use the control panel to choose additional settings‚ such as temperature or spin speed‚ if needed. Press the start button to begin the cycle. The machine will automatically handle water intake‚ washing‚ rinsing‚ and spinning. Always follow the detergent dosage instructions for optimal cleaning results and to maintain the machine’s performance. Ensure the detergent drawer is clean and free of blockages before starting. For best results‚ refer to the program guide in the manual to match the cycle with your laundry needs. Proper operation ensures efficient and effective washing while maintaining the longevity of your appliance.

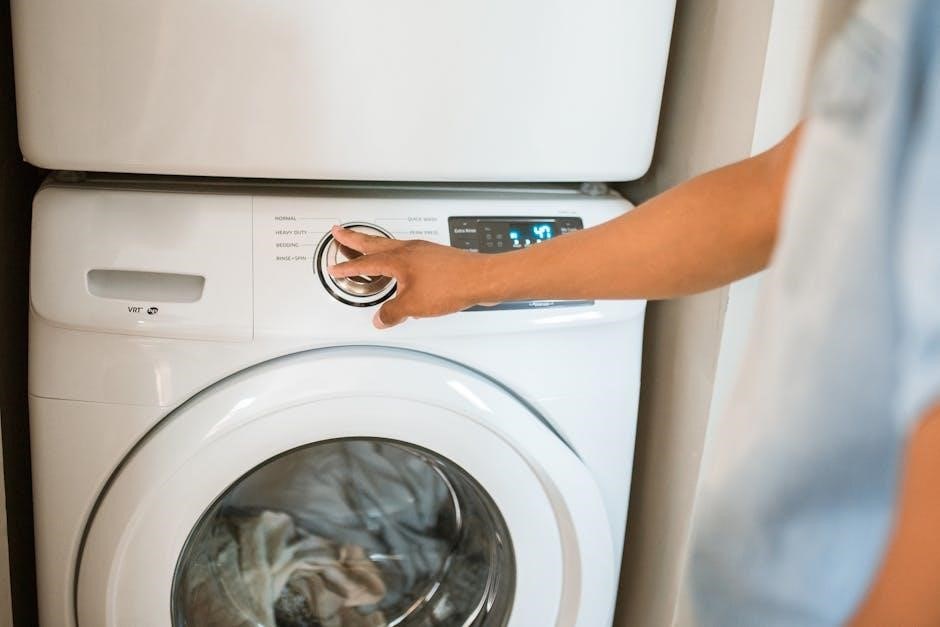
Understanding the Control Panel and Programs

The control panel on your Lamona washing machine is designed for easy operation. It features buttons for selecting wash programs‚ adjusting temperature‚ and setting spin speed. The LCD display shows the selected program and remaining time. Choose from 15 preset programs‚ including cotton‚ synthetic‚ delicate‚ quick wash‚ and eco modes. Additional options like pre-wash‚ extra rinse‚ and child lock can be activated for specific needs. Use the dial or buttons to navigate and select settings. Always refer to the program guide in the manual to ensure the best results for your laundry type. Proper use of programs and settings optimizes cleaning and appliance performance.

Maintenance and Cleaning

Regularly clean the detergent drawer and gasket to prevent mold and odors. Run a cleaning cycle or hot wash without detergent to maintain hygiene and efficiency.

Cleaning the Detergent Drawer and Gasket

Regular cleaning of the detergent drawer and gasket is essential to prevent mold‚ odors‚ and detergent residue buildup. Remove the detergent drawer and rinse it under warm water to eliminate any leftover detergent. Check for blockages in the drawer compartments and ensure they are free from debris. For the gasket‚ wipe it with a soft cloth or sponge to remove any mildew or residue. Running a cleaning cycle or a hot water wash without detergent can also help maintain hygiene. Regular maintenance ensures optimal performance and fresh laundry results.

Regular Maintenance Tips

Regular maintenance ensures your Lamona washing machine operates efficiently and lasts longer. Check and clean the detergent drawer and gasket frequently to prevent mold and residue buildup. Leave the door open after use to allow the interior to dry‚ reducing moisture and odors. Inspect and clean the filter regularly to ensure proper drainage and prevent blockages. Run a cleaning cycle or hot water wash without detergent periodically to remove buildup. Balanced installation is crucial to avoid vibrations; adjust the feet if necessary. Proper care will help maintain performance‚ prevent issues‚ and keep your laundry fresh and clean. Refer to the manual for specific guidance.

Troubleshooting Common Issues

Welcome to the troubleshooting section of the Lamona washing machine manual. Identify common issues like error codes‚ machine not starting‚ or poor drainage. Refer to the manual for solutions and basic checks to resolve problems quickly and effectively.

Identifying and Resolving Error Codes

Modern Lamona washing machines are equipped with error codes to help diagnose issues quickly. These codes‚ such as E01 or E02‚ indicate specific problems like sensor malfunctions or drainage issues. Always refer to your user manual to understand the meaning of each code. If an error occurs‚ restart the machine or check for blockages in the drain pump or hoses. For persistent issues‚ contact Lamona customer support for professional assistance. Regular maintenance‚ such as cleaning filters‚ can prevent many common errors. Detailed troubleshooting steps are provided in the manual to ensure your machine runs smoothly and efficiently.

What to Do If the Machine Stops Working

If your Lamona washing machine stops working‚ first check the power supply and ensure the plug is securely connected. Verify that the child lock feature is not activated. Check for any error codes on the display‚ as these can indicate specific issues like drainage problems or sensor malfunctions. Restart the machine and ensure the detergent drawer is properly closed. If the issue persists‚ inspect the drain pump filter for blockages and clean it if necessary. For unresolved problems‚ refer to the troubleshooting section in the manual or contact Lamona customer support. Regular maintenance can help prevent such issues.

Warranty and Customer Support

Lamona offers a comprehensive warranty program‚ ensuring coverage for parts and labor. For assistance‚ contact their dedicated customer service team or visit the official website for support.

Understanding the Warranty Coverage

Lamona washing machines are backed by a comprehensive warranty program‚ typically covering parts and labor for a specified period‚ usually one year from purchase. This warranty ensures repair or replacement of defective components‚ providing peace of mind. Proper installation and adherence to the manual’s guidelines are essential to maintain warranty validity. For detailed coverage terms‚ refer to the manual or contact Lamona’s customer support. Understanding your warranty helps maximize protection and ensures optimal appliance performance throughout its lifespan.

Contacting Lamona Customer Service

For assistance with your Lamona washing machine‚ contact their customer service team via phone at 0333 010 0009 or visit their official website at www.howdens.com. Additionally‚ you can register your product online to receive important updates and recalls. Their support team is available to address queries‚ troubleshoot issues‚ and provide maintenance advice. Ensure to have your appliance model number ready for efficient service. Lamona’s customer service is committed to resolving concerns promptly‚ ensuring your washing machine operates smoothly and efficiently throughout its lifespan.

By following this manual‚ you’ll ensure optimal performance and longevity of your Lamona washing machine. Regular maintenance and proper usage will enhance your laundry experience.

Final Tips for Optimal Performance

For the best results‚ run cleaning cycles regularly to maintain hygiene. Check detergent dosage and fabric softener levels. Ensure balanced loads to prevent vibration. After use‚ leave the door slightly open to dry the interior. Clean the detergent drawer and gasket periodically. Avoid overloading‚ as this can damage clothes and the machine. Check filters and hoses for blockages. Use appropriate wash programs for fabric types. Schedule professional maintenance annually. These simple practices will extend the life of your Lamona washing machine and ensure efficient laundry cleaning.

Open post

marks and spencers size guide

Marks and Spencer’s size guide helps ensure the best fit for all clothing categories‚ offering detailed measurements‚ fabric considerations‚ and specialized guides for plus-size and underwear.

Understanding the Importance of Proper Sizing

Proper sizing is essential for comfort‚ confidence‚ and style. Marks and Spencer’s size guide ensures a perfect fit by considering body measurements‚ fabric types‚ and garment styles. Accurate sizing enhances the shopping experience‚ reducing the need for returns and exchanges. It also helps customers feel assured about their purchases‚ whether shopping online or in-store. By understanding how garments fit‚ shoppers can make informed decisions‚ ensuring their clothing looks and feels great. Proper sizing is a cornerstone of M&S’s commitment to quality and customer satisfaction‚ making it easier to find the right fit for every occasion.

Overview of Marks and Spencer Clothing Categories

Marks and Spencer offers a diverse range of clothing categories‚ including tops‚ dresses‚ outerwear‚ and accessories. Their collections cater to both men and women‚ ensuring a variety of styles for work‚ leisure‚ and special occasions. Each category is designed with quality and comfort in mind‚ featuring a mix of casual and formal pieces. The brand also provides specialized options such as plus-size clothing and tailored suits‚ ensuring inclusivity and versatility. By organizing their clothing into clear categories‚ M&S makes it easy for customers to navigate and find the perfect garment to suit their needs and preferences.

Clothing Categories and Their Size Guides

M&S provides detailed size guides for each clothing category‚ including Tops‚ Bottoms‚ Dresses‚ and Outerwear‚ ensuring accurate measurements and fit for every style and comfort preference.

Tops and Shirts

Marks and Spencer offers a wide range of tops and shirts‚ including polo shirts‚ T-shirts‚ casual shirts‚ and knitwear. Each category features detailed size guides to ensure the perfect fit. Measurements are taken across the chest‚ with options catering to various body types. Fabric type and style‚ such as relaxed or slim-fit designs‚ also influence sizing. To determine your size‚ measure around the fullest part of your bust and compare it to the size chart. M&S provides tips for accurate measurements‚ ensuring comfort and confidence in your choice; Their size charts are available online‚ making it easy to select the right size for your preferred style‚ whether for casual wear or formal occasions.

Bottoms and Shorts

Marks and Spencer offers a diverse range of bottoms and shorts‚ including jeans‚ trousers‚ chinos‚ and shorts. Their size guide provides detailed measurements to ensure a perfect fit. Key measurements include waist and hip circumference‚ with sizes catering to various body types. Fabric type and style‚ such as stretch denim or tailored trousers‚ influence the fit. To determine your size‚ measure your natural waistline and compare it to the size chart. M&S also offers tips for accurate measurements‚ ensuring comfort and confidence in your choice. Whether you prefer classic styles or trendy designs‚ their size guide helps you find the ideal fit for any occasion‚ from casual to formal wear.

Dresses and Skirts

Marks and Spencer’s size guide for dresses and skirts ensures a flattering fit for all body types. Key measurements include chest‚ waist‚ hips‚ and inside leg. The guide offers detailed sizing charts to help you choose the perfect dress or skirt‚ whether it’s a fitted‚ A-line‚ or pencil style. Fabric type and design‚ such as stretch or tailored fits‚ are also considered to ensure comfort and confidence. By following the guide‚ you can determine your ideal size and enjoy a seamless shopping experience for both casual and formal occasions‚ with styles designed to flatter every figure.

Outerwear and Jackets

Marks and Spencer’s outerwear and jackets size guide provides precise measurements for a tailored fit. Consider chest‚ shoulder‚ and length for accurate sizing. The guide caters to various styles‚ from slim-fit blazers to oversized coats‚ ensuring comfort and style. Fabric type‚ such as wool or waterproof materials‚ may affect fit‚ so measurements are adjusted accordingly. Whether for formal events or everyday wear‚ the guide helps you select the perfect jacket or coat‚ ensuring a flattering and functional choice that meets your needs and preferences.

Understanding Measurements and Fit

Accurate body measurements‚ including chest‚ wrist‚ and hips‚ ensure the best fit. Fabric type and garment style also influence sizing‚ making precise measurements essential for optimal comfort and appearance.

How to Measure Yourself Accurately

To ensure the best fit‚ take precise body measurements using a flexible tape measure. Measure your chest under your arms at the fullest point‚ keeping the tape level. For your waist‚ measure at the narrowest point‚ and for hips‚ around the widest part‚ about 7-9 inches below your waistline. When measuring your inside leg‚ stand barefoot and measure from the top of your inner thigh to the bottom of your ankle. Always keep the tape measure level and not too tight or loose. For the most accurate results‚ measure over a thin garment or underwear to reflect how clothes will fit.

Key Body Measurements for Sizing

The key body measurements for sizing include chest‚ waist‚ hips‚ and inside leg. For women‚ the chest is measured around the fullest part under the arms‚ waist at the narrowest point‚ and hips at the widest part‚ approximately 7-9 inches below the waistline. Men’s measurements focus on chest and waist‚ with optional hips for certain styles. Inside leg is crucial for pants and skirts‚ measured from the top of the inner thigh to the ankle. Marks & Spencer’s standard fit assumes a woman’s height of 168cm (5ft 6in) and an inside leg of 79cm. Accurate measurements ensure the best fit‚ aligning with M&S sizing standards.

How Fabric and Style Affect Fit

Fabric and style significantly influence how garments fit. Stretch fabrics‚ like jersey knits‚ provide flexibility‚ while non-stretch materials‚ such as cotton‚ require precise measurements. Loose styles‚ such as relaxed-fit dresses‚ offer a comfortable fit‚ whereas tailored designs hug the body closely. Fabric weight also plays a role‚ with heavier materials like denim fitting differently than lightweight fabrics. Understanding these factors helps in selecting the right size‚ ensuring comfort and confidence. Marks & Spencer considers these elements in their sizing guides‚ ensuring a flattering fit across their range of clothing options.

Size Charts and Conversions

Marks & Spencer provides detailed size charts for men and women‚ including international conversions‚ helping customers find their perfect fit across different regions and clothing styles.

Men’s Size Chart

Marks & Spencer’s men’s size chart offers a comprehensive guide to help determine the perfect fit. Ranging from small to 5XL‚ the chart includes measurements for chest‚ waist‚ and inside leg. Designed to accommodate various body types‚ it ensures accuracy for casual wear‚ workwear‚ and formal attire. International conversions are also provided‚ making it easy for global customers to shop confidently. The chart is regularly updated to reflect current sizing standards‚ ensuring consistency across all clothing lines. By referring to these measurements‚ customers can make informed choices and enjoy a seamless shopping experience both online and in-store.

Women’s Size Chart

Marks & Spencer’s women’s size chart offers a detailed guide to help customers find their perfect fit. Sizes range from 8 to 26‚ with measurements for bust‚ waist‚ and hips provided. The chart is designed to accommodate various body types‚ ensuring a comfortable and flattering fit. It includes standard sizing for tops‚ bottoms‚ and dresses‚ as well as guidance for plus-size options. The chart also considers the average height and inside leg length for a tailored fit. Regular updates ensure sizing remains consistent and accurate. By following the chart‚ customers can confidently select the right size for their preferred style‚ making their shopping experience seamless and enjoyable.

International Size Conversions

Marks & Spencer provides international size conversions to cater to a global audience. Their size charts include UK‚ EU‚ and US/CA standards‚ ensuring customers worldwide can find their perfect fit. The conversions are based on standard body measurements‚ allowing for consistency across different regions. For example‚ a UK size 12 corresponds to a US size 8 and an EU size 38. This feature is particularly useful for online shoppers who may be familiar with different sizing systems. Detailed charts are available on their website‚ making it easy to compare and choose the correct size for any garment‚ regardless of location or sizing standards.

Specialized Size Guides

Marks & Spencer offers tailored size guides for plus-size clothing and lingerie‚ ensuring accurate fits for diverse body types and preferences‚ with detailed measurements for comfort and style.

Plus-Size Clothing Options

Marks & Spencer provides an extensive range of plus-size clothing‚ offering sizes from 18 to 32. Their collection includes stylish tops‚ bottoms‚ dresses‚ and outerwear designed to flatter diverse figures. With a focus on comfort and fashion‚ the plus-size range ensures a perfect fit for every body type. The size guide includes detailed measurements‚ helping customers choose the right size effortlessly. Additionally‚ the clothing is crafted from high-quality fabrics that ensure both durability and a comfortable wear. Marks & Spencer’s commitment to inclusivity allows everyone to enjoy trendy and well-fitting garments‚ making shopping a seamless experience for all sizes.

Bra and Underwear Size Guide

Marks & Spencer offers a comprehensive bra and underwear size guide to ensure a perfect fit. The guide includes detailed measurements for bra sizes‚ ranging from 32A to 42G‚ and underwear sizes from S to XXL. Customers are advised to measure around the bust and under the arms for accurate bra sizing. The fit may vary based on fabric and style‚ so the guide helps users choose the right size for comfort and support. With a wide range of styles‚ including everyday bras‚ sports bras‚ and lace options‚ Marks & Spencer caters to diverse preferences and body types‚ ensuring confidence and comfort in every piece.

Additional Tips for the Best Fit

Measure accurately‚ consider fabric stretch‚ and check size guides for style-specific fits. Use online size converters and customer reviews for insights to ensure the perfect fit every time.

How to Choose the Right Size for Different Styles

Choosing the right size for different styles ensures optimal comfort and fit. For tailored pieces‚ consider your chest and waist measurements‚ while relaxed fits may offer more flexibility. Use Marks & Spencer’s detailed size guides to match your body measurements with the garment’s specifications. Pay attention to fabric types‚ as stretch materials may fit differently than structured fabrics. Refer to customer reviews for insights on how specific styles fit. For international shoppers‚ use the size conversion charts to find your equivalent size. Double-checking measurements and styles helps ensure the perfect fit‚ making your shopping experience seamless and satisfying.

Using the Size Guide for Online Shopping

Utilizing Marks & Spencer’s size guide enhances your online shopping experience by ensuring accurate fits. Start by measuring yourself to match your dimensions with the chart. Filter products by size to view available options. Check fabric descriptions‚ as stretch materials may offer flexibility. Refer to customer reviews for real-world fit insights. Use the international conversion tool if shopping from abroad. Double-check your measurements before checkout to minimize returns. This streamlined process helps you confidently select the right size‚ making online shopping efficient and hassle-free‚ ensuring you receive garments that fit perfectly every time‚ tailored to your unique needs and preferences.

Open post

it band syndrome stretches pdf

IT Band Syndrome (ITBS) is a common overuse injury affecting cyclists and runners, caused by repetitive knee flexion. It leads to pain and swelling on the knee’s outside. Stretching and strengthening exercises are key to treatment and prevention, focusing on the hip and core muscles to reduce tension on the IT band.

1.1 Definition and Prevalence

IT Band Syndrome (ITBS) is an overuse injury caused by repetitive friction and inflammation of the iliotibial band near the knee. It’s highly prevalent among runners, cyclists, and athletes with repetitive knee movements. Studies show it affects up to 12% of long-distance runners annually. Early diagnosis and stretching exercises are crucial for effective management and prevention of this common condition.

1.2 Importance of Stretching in Treatment

Stretching is a cornerstone in treating IT Band Syndrome, as it reduces tension and inflammation in the iliotibial band. Regular stretches improve flexibility, alleviate pain, and restore range of motion. Targeted exercises, such as cross-leg stretches and side-lying stretches, are effective in managing symptoms and preventing recurrence, making them essential for both recovery and long-term management of ITBS.

Causes and Risk Factors of IT Band Syndrome

IT Band Syndrome often results from overuse, repetitive motion, and biomechanical issues. Activities like cycling and running, which involve repetitive knee flexion, increase the risk significantly.

2.1 Overuse and Repetitive Motion

Overuse and repetitive motion are primary contributors to IT Band Syndrome. Activities like cycling and running, involving repeated knee flexion, cause friction and irritation of the IT band. This consistent stress leads to inflammation and pain, especially in athletes who suddenly increase their training intensity or mileage without proper recovery.

2.2 Biomechanical Factors

Biomechanical factors, such as hip weakness and improper gait, significantly contribute to IT Band Syndrome. Weak hip muscles can lead to poor running form, increasing stress on the knee. Additionally, issues like overpronation or leg length discrepancies can alter movement patterns, causing repetitive friction on the IT band and leading to inflammation and pain during physical activity.

2.3 Weakness in Hip and Core Muscles

Weakness in the hip and core muscles is a major contributor to IT Band Syndrome. Poor hip strength disrupts running form, causing increased stress on the knee. Weak core muscles fail to stabilize the body, leading to improper movement patterns. Strengthening these areas is essential to reduce IT band tension and prevent recurrence of the injury during physical activities like cycling or running.

Symptoms of IT Band Syndrome

Common symptoms include pain on the outside of the knee, swelling, and tenderness. It often worsens with activity, impacting running, cycling, or repetitive knee movements, causing discomfort and limited mobility in athletes and active individuals.

3.1 Pain on the Outside of the Knee

Pain on the lateral side of the knee is a hallmark symptom of IT Band Syndrome. This discomfort often intensifies during activities like running or cycling, particularly when the knee bends. It may radiate along the IT band, from the hip to the knee, and can be sharp or dull, depending on the severity of inflammation or irritation present.

3.2 Swelling and Tenderness

Swelling and tenderness around the knee are common symptoms of IT Band Syndrome, often accompanying lateral knee pain. These symptoms arise from inflammation of the IT band and surrounding tissues. Tenderness may be palpable along the band’s edge, worsening with activity. Swelling can vary in severity, impacting mobility and comfort, especially during repetitive motions like running or cycling.

3.4 Impact on Athletic Performance

IT Band Syndrome significantly disrupts athletic performance, particularly in sports requiring repetitive knee movements. Pain and inflammation hinder running, cycling, and other activities, reducing speed, endurance, and overall efficiency. Athletes may experience frustration due to interrupted training and competition schedules, emphasizing the need for effective management strategies to restore functionality and resume peak performance levels.

Diagnosis of IT Band Syndrome

Diagnosis involves a physical exam, review of medical history, and imaging studies to confirm ITBS, ruling out other knee issues like meniscal tears or arthritis.

4.1 Physical Examination and History

A physical exam for ITBS involves palpation to identify tenderness along the IT band and assessment of knee range of motion. A thorough medical history focuses on activity levels, running or cycling habits, and repetitive motions. Pain during specific movements, like knee flexion, helps confirm the diagnosis.

4.2 Imaging Studies

Imaging studies like X-rays, MRIs, or ultrasounds are used to confirm ITBS diagnosis. X-rays rule out fractures, while MRIs detect inflammation or swelling in the IT band. Ultrasound provides real-time images of the tendon and surrounding tissues, aiding in precise evaluation of the condition and guiding treatment effectively.

Treatment Options for IT Band Syndrome

Treatment for IT Band Syndrome involves rest, ice, and physical therapy. Exercises, orthotics, and stretching are often recommended to alleviate symptoms and promote recovery effectively.

5.1 Rest and Ice Therapy

Rest and ice therapy are crucial initial steps in treating ITBS. Reducing activity minimizes further irritation, while icing the affected area helps reduce inflammation and alleviate pain. This approach is often combined with stretching exercises to promote healing and restore mobility without causing additional strain on the IT band.

5.2 Physical Therapy and Exercise

Physical therapy and targeted exercises play a vital role in treating ITBS by addressing weak hip and core muscles. Gentle stretching, strengthening exercises, and improving flexibility help reduce tension on the IT band. A structured program focusing on hip abductions, glute strengthening, and core stability can alleviate symptoms and prevent recurrence. Consistency and gradual progression are key to recovery.

5.3 Orthotics and Footwear Modifications

Orthotics and proper footwear can significantly aid in managing ITBS by correcting biomechanical issues such as overpronation. Custom orthotics and shoes with adequate arch support can reduce stress on the IT band, while cushioning helps absorb impact during activities. Modifying footwear to suit individual gait patterns can prevent further irritation and promote recovery.

Stretching Exercises for IT Band Syndrome

Stretching exercises are essential for IT Band Syndrome relief. Common stretches include the cross-leg stretch and leaning exercises to reduce tension and prevent further irritation on the IT band.

6.1 Standing IT Band Stretch

The standing IT band stretch targets the outer thigh and hip. Stand with feet shoulder-width apart, cross the affected leg behind the other, and lean away from the stretch. Hold for 30 seconds, feeling a gentle pull along the IT band. Repeat 2-3 times to improve flexibility and reduce tightness effectively.

6.2 Cross-Leg Stretch

The cross-leg stretch is a simple yet effective way to target the IT band. Sit with the affected leg crossed behind the unaffected leg, placing the ankle on the knee. Gently lean forward until a stretch is felt on the outer thigh. Hold for 30 seconds and repeat 2-3 times to relieve tightness and improve flexibility in the IT band and surrounding muscles.

6.3 Side-Lying IT Band Stretch

Lie on your side with the unaffected leg bent and the affected leg extended. Place the foot of the extended leg on the ground in front of the unaffected knee. Gently bend the knee of the affected leg, keeping the foot flexed, until a stretch is felt along the outer thigh. Hold for 30 seconds and repeat 2-3 times to alleviate IT band tightness.

Strengthening Exercises for IT Band Syndrome

Strengthening exercises for IT Band Syndrome focus on hip abduction, glute, and core muscles to improve stability and reduce tension on the IT band, aiding recovery and prevention.

7.1 Hip Abduction Exercises

Hip abduction exercises target the muscles responsible for hip stability, reducing IT band strain. Side-lying leg lifts and resistance band exercises are effective, enhancing strength and improving running or cycling performance by addressing hip weakness linked to ITBS. Consistent practice helps alleviate symptoms and prevents recurrence, making them a cornerstone of IT band syndrome management.

7.2 Glute Strengthening Exercises

Glute strengthening exercises are crucial for addressing ITBS, as weak glutes can lead to poor hip and knee alignment. Clamshells, bridges, and donkey kicks are effective for building strength. These exercises improve hip stability, reducing IT band tension during movement. Perform them with controlled form to avoid pain and enhance athletic performance, aiding in both recovery and prevention of future episodes.

7.3 Core Strengthening Exercises

Core strengthening exercises, such as planks, bird dogs, and side planks, are essential for improving stability and reducing IT band strain. A strong core enhances pelvic alignment and reduces hip and knee instability. Incorporate exercises like Russian twists and leg raises to target abdominal muscles. Consistent core work helps prevent ITBS by promoting better movement patterns and overall lower limb stability.

Foam Rolling for IT Band Syndrome

Foam rolling is a self-myofascial release technique that reduces IT band tension and promotes recovery. It helps alleviate tightness and improves circulation, aiding in symptom relief.

8.1 Techniques for Foam Rolling the IT Band

Foam rolling the IT band involves rolling from the hip to the knee, applying moderate pressure. Use slow, controlled movements to target tight areas. Focus on consistent, repetitive strokes to release tension. Avoid bouncing or applying excessive force, which can cause discomfort. Regular foam rolling helps reduce muscle tightness and improves circulation, complementing stretching and strengthening exercises for ITBS recovery and prevention.

8.2 Benefits of Foam Rolling in Recovery

Foam rolling enhances recovery by reducing muscle tension and improving circulation around the IT band. Regular use helps break down scar tissue, alleviates pain, and restores flexibility. It complements stretching and strengthening exercises, promoting faster recovery and reducing the risk of re-injury. Consistent foam rolling can improve overall muscle function and support long-term management of ITBS symptoms effectively.

Prevention of IT Band Syndrome

Preventing ITBS involves proper training techniques, gradual increases in activity, and regular stretching and strengthening routines. Addressing biomechanical issues and wearing suitable footwear can also reduce risk.

9.1 Proper Training and Running Techniques

Adopting proper training and running techniques is crucial for preventing ITBS. Avoid overstriding and ensure a midfoot strike to reduce stress on the IT band. Incorporating strength training for hip and core muscles can improve running form and lower injury risk. Regular gait analysis and biomechanical assessments can help identify and correct improper movements early. Consistency in technique reduces repetitive strain, promoting long-term injury prevention and enhanced performance.

9;2 Gradual Increase in Activity

Avoiding sudden increases in activity is essential to prevent ITBS. Gradually increasing mileage, intensity, or duration allows the IT band to adapt without excessive stress. Sudden changes can lead to inflammation and pain. Incorporating rest days and slowly progressing workouts helps maintain joint health and reduces the risk of overuse injuries, promoting long-term athletic performance and injury prevention.

9.3 Regular Stretching and Strengthening Routine

Consistent stretching and strengthening exercises target the IT band and surrounding muscles, reducing tightness and improving flexibility. Focusing on hip abductors, glutes, and core muscles helps distribute force evenly, preventing ITBS. A daily routine including cross-leg stretches and foam rolling can maintain muscle balance, enhance athletic performance, and significantly lower the risk of injury recurrence and chronic pain development over time.

When to Seek Professional Help

Consult a professional if pain persists, mobility is limited, or self-treatment shows no improvement. Expert guidance is crucial for advanced therapies and personalized recovery plans.

10.1 Persistent Pain and Limited Mobility

If pain persists despite self-care measures and significantly limits daily activities or athletic performance, consult an orthopedic specialist or physical therapist. Persistent discomfort may indicate underlying issues requiring professional intervention to prevent further injury and promote recovery; Ignoring these symptoms can lead to prolonged distress and hinder effective rehabilitation, making timely medical advice essential.

10.2 No Improvement with Self-Treatment

If self-treatment measures like stretching, icing, and rest fail to alleviate symptoms, it is crucial to seek professional guidance. A lack of improvement may signal the need for targeted therapies, such as physical therapy or advanced treatments, to address underlying issues and restore function. Persistent symptoms can lead to chronic pain or further injury, making professional intervention essential for effective recovery.

Case Studies and Success Stories

Athletes with ITBS have successfully returned to their sports through targeted stretches, strengthening exercises, and proper recovery techniques, showcasing the effectiveness of these methods in overcoming the condition.

11.1 Athletes Who Overcame ITBS

Many athletes, including cyclists and runners, have successfully overcome ITBS by incorporating targeted stretches and strengthening exercises into their routines. These individuals often report significant pain reduction and restored mobility, allowing them to return to their sports. Their recoveries highlight the effectiveness of consistent stretching, proper recovery techniques, and physical therapy in managing ITBS and preventing recurrence.

11.2 Effective Treatment Outcomes

Effective treatment for ITBS often results in significant pain reduction, restored mobility, and a return to normal activity levels. Combining IT band stretches, physical therapy, and foam rolling has shown to improve symptoms and prevent recurrence. Many individuals report full recovery within weeks, allowing them to resume sports and activities without discomfort, highlighting the importance of a comprehensive treatment approach.

IT Band Syndrome can be effectively managed with proper stretching, strengthening, and foam rolling. Proactive care and consistent routines are essential for long-term relief and prevention.

12.1 Summary of Key Points

IT Band Syndrome is an overuse injury common among runners and cyclists, caused by repetitive knee flexion. Key treatments include rest, ice, and physical therapy. Stretching and strengthening exercises, particularly for the hips and core, are crucial. Prevention involves proper training techniques and gradual activity increases. Regular foam rolling aids in recovery and reduces muscle tension.

12.2 Encouragement for Proactive Management

Proactive management of ITBS is key to recovery and prevention. Incorporate regular stretching, strengthening, and foam rolling into your routine. Prioritize proper training techniques and gradual activity increases to reduce risk. Consistently addressing hip and core weakness can significantly improve symptoms and overall athletic performance. Stay committed to these practices to ensure long-term relief and prevent future flare-ups.

Open post

x rocker gaming chair instructions

Welcome to the ultimate guide for assembling and customizing your X Rocker gaming chair. This comprehensive manual covers everything from assembly to troubleshooting, ensuring optimal performance and comfort for an immersive gaming experience.

Overview of the Assembly Process

The assembly process for your X Rocker gaming chair is straightforward and methodical. It begins with unboxing and inventorying all components, followed by attaching the base and pedestal, assembling the chair frame, and installing armrests and controls. The process requires basic tools like an Allen wrench and ensures a secure, stable build. Step-by-step instructions guide you through each phase, making it easy to achieve a professional-level assembly.

Importance of Following the Manual

Following the manual ensures proper assembly, safety, and optimal functionality of your X Rocker gaming chair. It helps avoid common mistakes, such as misaligned parts or loose connections, which can lead to structural issues or compromised performance. The manual provides clear, step-by-step guidance to guarantee a secure and correct setup, maximizing comfort and longevity of the chair.

Tools and Materials Required

To assemble your X Rocker gaming chair, you’ll need an Allen wrench, screwdrivers, and bolts provided in the package. Ensure all components, such as the base, pedestal, and chair frame, are included. A flat, stable workspace is recommended for smooth assembly. Verify all tools and materials are present before starting to avoid delays and ensure a seamless setup process.

Unboxing and Inventory

Begin by carefully opening the box and inspecting for damage. Verify all components, including the chair frame, base, hardware bag, and manual, are present and undamaged before proceeding.

How to Unbox Your X Rocker Gaming Chair

Start by carefully cutting the packaging straps and lifting the flaps of the box. Gently remove the chair components, ensuring no parts are bent or damaged. Place the chair frame, base, and accessories on a flat surface. Open the hardware bag and organize the bolts, Allen wrench, and other tools. Refer to the manual for a detailed parts list and assembly sequence to ensure everything is accounted for before proceeding.

Checking the Parts and Accessories

After unboxing, carefully inspect all components for damage. Cross-reference the parts list in the manual to ensure everything is included, such as the chair frame, base, pedestal, armrests, and hardware bag. Organize the bolts, screws, and tools like the Allen wrench. Verify that accessories like the audio cables, wireless transmitter, and control panel are present and undamaged. This step ensures a smooth assembly process.

Understanding the Hardware and Components

Familiarize yourself with the hardware and components included in your X Rocker gaming chair. The package typically includes the chair frame, base, pedestal, armrests, and control panel. Tools like an Allen wrench are provided for assembly. Understand the role of each part, such as bolts for securing the structure and washers for stability. Additional components may include RGB lighting modules or speakers for enhanced functionality.

Assembly Instructions

Begin by carefully following the step-by-step guide to assemble your X Rocker gaming chair. Start with the base and pedestal, then move to the chair frame, ensuring all bolts are securely tightened. Use the provided tools like the Allen wrench for a smooth assembly process. Refer to the diagrams for proper alignment and hardware placement.

Step-by-Step Assembly Guide

Start by unboxing and organizing all parts. Use the provided Allen wrench to attach the base and pedestal. Align the chair frame carefully, ensuring all bolts are tightened securely. Next, install the armrests and control panel, followed by the audio system components. Refer to the diagrams for proper alignment. Finally, test all functions, including the massage and RGB lighting, to ensure everything works smoothly.

Preparing the Tools and Workspace

Clear a large, flat workspace and gather all tools, including the provided Allen wrench. Organize bolts and components by size and type. Ensure the floor is level to prevent uneven assembly. Lay out the instruction manual for easy reference. Cover the work surface with a cloth to protect parts and prevent scratches during assembly.

Attaching the Base and Pedestal

Assembling the Chair Frame

Attach the backrest to the seat by aligning the pre-drilled holes and securing with the provided bolts. Next, connect the side panels to the frame, ensuring proper alignment. Tighten all bolts firmly using the Allen wrench. Repeat for the armrests, making sure they are evenly spaced and securely fastened. Double-check the frame’s stability before proceeding to the next step for optimal safety and durability.

Installing the Armrests and Controls

Attach the armrests to the chair frame using the provided bolts, ensuring they are evenly spaced and aligned. Secure the control panel to the armrest or side of the chair, following the diagram for proper placement. Use the Allen wrench to tighten all connections firmly. Test the armrests and controls to ensure they function smoothly and are properly integrated with the chair’s systems.

Final Adjustments and Tightening

Once the chair is fully assembled, use the Allen wrench to tighten all bolts securely, ensuring stability and alignment. Double-check the base, frame, and armrests for proper fitment. Refer to the manual for specific torque requirements. Test the chair by gently rocking and adjusting the controls to ensure smooth operation. Make final adjustments for comfort and balance before use.

Connecting the Audio System

Set up your X Rocker’s audio system by connecting speakers and subwoofer using RCA cables. Ensure the control panel and wireless transmitter are on the same band for seamless sound.

Understanding the Audio Features

Your X Rocker gaming chair comes equipped with advanced audio features, including built-in speakers, a subwoofer, and wireless connectivity. These features provide immersive sound, enhancing your gaming and multimedia experiences. The system supports RCA and wireless connections, allowing seamless integration with various devices. Proper setup ensures optimal audio performance, making every game or movie session more engaging and enjoyable.

Connecting the Speakers and Subwoofer

Connect the speakers and subwoofer using the provided RCA or 3.5mm audio cables. Ensure the cables are securely plugged into the correct ports on the chair and the audio source. For wireless models, pair the transmitter with the chair by setting both to the same frequency band. Proper connections ensure high-quality sound output and an immersive gaming experience.

Setting Up the Wireless Transmitter

Plug the wireless transmitter into a power source and ensure it is turned on. Synchronize the transmitter with your X Rocker chair by setting both devices to the same frequency band (1, 2, or 3). Use the provided RCA or 3.5mm audio cable to connect the transmitter to your gaming console or PC. This setup ensures a stable wireless audio connection for an immersive experience. Test the audio to confirm proper functionality.

Testing the Audio System

After connecting the audio components, play a test audio source to ensure proper functionality. Verify that sound is clear and balanced from both speakers and the subwoofer. Adjust the volume control on the chair and source device to achieve optimal sound levels. Ensure synchronization between the chair and wireless transmitter to maintain a stable connection and immersive audio experience.

Customizing Your X Rocker Gaming Chair

Personalize your gaming experience by adjusting ergonomic settings, enabling RGB lighting, and utilizing the massage function for ultimate comfort. Explore features to tailor your chair to your preferences and enhance your gaming sessions with style and relaxation.

Adjusting the Chair for Comfort

Adjusting the Chair for Comfort

Ensure optimal comfort by adjusting the seat height, lumbar support, and armrests to fit your body. Tilt and recline features allow for customizable positioning, while the massage function provides relaxation. Fine-tune these settings to create a personalized fit, enhancing your gaming or work sessions with ergonomic support and tailored comfort.

Using the Massage Function

Activate the built-in massage function via the control panel to enjoy soothing vibrations. Choose from multiple modes and adjust intensity for personalized comfort. Perfect for long gaming sessions, this feature helps alleviate tension and enhances relaxation. Use it during breaks or while gaming to stay refreshed and focused, ensuring an immersive experience with added comfort.

Customizing the RGB Lighting

Personalize your X Rocker gaming chair with vibrant RGB lighting. Use the control panel or remote to cycle through color modes, adjust brightness, and select patterns. Synchronize the lighting with your gaming setup or choose a static color for a stylish look. Experiment with different effects to enhance your gaming ambiance and make your chair truly unique.

Troubleshooting Common Issues

Address common problems like connectivity issues, loose parts, or malfunctioning features. Refer to the manual for specific solutions or contact customer support for further assistance.

Common Assembly Mistakes

Common mistakes include using incorrect bolts, misaligning parts, or not tightening sufficiently. Ensure all components fit smoothly and refer to the manual for proper alignment and torque specifications to avoid structural issues.

Resolving Audio Connectivity Problems

If experiencing audio issues, ensure all cables are securely connected and the wireless transmitter is properly synced. Verify the control panel and transmitter are set to the same frequency band. Restart the system and check for firmware updates. If problems persist, consult the manual or contact customer support for further assistance.

Fixing Mechanical Issues

Inspect for loose bolts or misaligned parts and tighten as needed. Lubricate moving components if they feel stiff. If the chair wobbles, check the base for even distribution. Ensure all mechanical components are securely attached. If issues persist, consult the manual or contact customer support for replacement parts or further assistance.

Maintenance and Care

Regularly clean the chair with a soft cloth and gentle detergent to maintain its appearance. Protect the fabric from spills and wear, and inspect mechanical parts for optimal performance.

Cleaning the Chair

Regular cleaning ensures your X Rocker gaming chair remains in great condition. Use a soft, damp cloth to wipe down surfaces, avoiding harsh chemicals or abrasive materials. For fabric areas, gently blot spills with a mild detergent solution. Allow the chair to air dry completely to prevent moisture buildup. Regular cleaning prevents dust and dirt from affecting the chair’s functionality and appearance.

Protecting the Fabric and Materials

To maintain your X Rocker gaming chair’s fabric and materials, vacuum regularly to remove dirt and debris. Spot clean stains with a mild detergent solution, avoiding harsh chemicals. Avoid direct sunlight to prevent fading. Use fabric protectors to repel spills and stains. Regularly inspect and treat worn areas to ensure longevity. Proper care extends the life and appearance of your gaming chair.

Regular Maintenance Tips

Regularly inspect and tighten all bolts to ensure stability. Clean the chair using a soft cloth and mild detergent. Lubricate moving parts like swivels and tilt mechanisms to maintain smooth operation. Inspect audio cables and connections for damage. Avoid exposure to direct sunlight to prevent fading. Deep clean fabric cushions periodically and use fabric protectants to repel spills. For detailed care, consult the user manual.

Congratulations on completing the assembly of your X Rocker gaming chair! Enjoy immersive gaming experiences with premium comfort, stunning audio, and personalized settings. Happy gaming ahead!

Final Checks Before Use

Before using your X Rocker gaming chair, ensure all bolts are tightened securely and electronic components are connected properly. Test the chair’s adjustability, massage function, and RGB lighting to confirm they work seamlessly. Verify the audio system is functioning correctly and all cables are securely plugged in. Double-check for any loose parts or damage. Adjust the chair to your preferred comfort settings and refer to the manual if any issues arise during these checks.

Enjoying Your X Rocker Gaming Chair

Once assembled and calibrated, your X Rocker gaming chair is ready to elevate your gaming experience. Dive into immersive audio, ergonomic comfort, and customizable features like RGB lighting and massage functions. Adjust the chair to your preferred settings for optimal relaxation and focus during long gaming sessions. Experience enhanced performance and enjoyment in every game or movie with your new X Rocker setup.

Open post

instructions for indesit washer dryer

Welcome to the Indesit Washer-Dryer guide. This manual helps you understand and optimize your appliance’s features‚ ensuring efficient laundry care and troubleshooting common issues effectively for optimal performance.

1.1 Overview of the Indesit Washer Dryer

The Indesit Washer Dryer is a versatile appliance designed for both washing and drying clothes efficiently. Models like the IWDC6125 offer a 5 kg capacity for washing and drying‚ with a maximum spin speed of 1200 RPM for effective drying. The appliance features a user-friendly control panel with various wash and dry programs‚ allowing customization of cycles based on fabric type and load size. It also includes energy-saving options and maintenance tips to ensure longevity and optimal performance‚ making it a practical choice for household laundry needs.

1.2 Importance of Following the Instructions

Adhering to the Indesit Washer Dryer instructions is crucial for safe and efficient operation. Proper usage ensures optimal performance‚ prevents damage‚ and extends the appliance’s lifespan. Following guidelines helps avoid common issues like improper loading or incorrect program selection‚ which can lead to poor wash quality or machine malfunction. Additionally‚ adhering to maintenance recommendations‚ such as cleaning the detergent dispenser and checking the door seal‚ ensures reliability. Consulting the manual also aids in troubleshooting error codes and addressing operational problems effectively‚ guaranteeing a better laundry experience and maintaining warranty validity.

Understanding the Control Panel

The control panel features a program selector dial‚ start/pause button‚ and indicator lights‚ allowing easy operation and status monitoring for wash and dry cycles.

2.1 Description of the Control Panel Layout

The control panel is designed for intuitive operation. It includes a central program selector dial for choosing cycles‚ a start/pause button to control operations‚ and indicator lights that show the current cycle status. Additional buttons allow adjusting temperature‚ spin speed‚ and special options like delayed start. The layout ensures easy access to all functions‚ making it user-friendly for both wash and dry modes. This setup helps you navigate through settings efficiently‚ ensuring optimal use of your Indesit washer-dryer.

2.2 Explanation of Indicator Lights

The Indesit washer-dryer features indicator lights that provide essential feedback during operation. These lights display the status of the selected program‚ such as wash‚ dry‚ or spin modes. They also indicate when the cycle is paused or completed. Specific lights may flash to signal errors‚ such as improper loading or issues with water supply. For models like the IWDC6125‚ the lights also show maintenance reminders‚ like cleaning the detergent dispenser. Understanding these indicators helps you monitor progress and address issues promptly‚ ensuring smooth operation and efficient laundry care.

Preparing Your Laundry

Properly preparing your laundry ensures optimal results. Sort clothes by fabric type and color‚ handle delicate items with care‚ and use appropriate detergents for best outcomes.

3.1 Sorting Clothes for Washing

Sorting clothes is essential for effective washing. Separate delicate fabrics like silk and wool from heavier items to prevent damage. Use mesh bags for lingerie and fragile garments. Color-sort clothes to avoid dye bleeding‚ placing whites‚ brights‚ and darks in separate loads. Always check care labels for specific instructions. Avoid overloading the machine‚ as this can damage clothes and affect washing performance; Proper sorting ensures cleaner‚ undamaged laundry and extends the life of your garments. This step is crucial for maintaining fabric quality and achieving optimal wash results.

3.2 Handling Garments Requiring Special Care

For garments needing special care‚ place delicate items like lingerie or silk in mesh bags to protect them during washing. Always check the care labels for specific instructions. Delicates should be washed separately from heavier fabrics to prevent damage. Avoid overloading the machine‚ as this can cause wear and tear on sensitive fabrics. Use a gentle cycle with low spin speed to maintain fabric integrity. This ensures your special-care garments remain in excellent condition after each wash.

Starting a Wash Cycle

Select the desired program using the selector dial‚ then press the START/PAUSE button. Ensure the correct program is chosen for fabric type and load size.

4.1 Selecting the Appropriate Wash Program

Selecting the right wash program ensures optimal cleaning and fabric care. Choose programs based on fabric type‚ load size‚ and soil level. Delicates‚ wool‚ and heavy-duty cycles are available. For energy efficiency‚ select eco-friendly options. Always refer to the user manual for specific program details and adjustments. Proper program selection enhances cleaning performance and protects garments. Ensure the program matches the laundry load for best results. This step is crucial for maintaining fabric integrity and achieving desired wash outcomes consistently.

4.2 Setting the Temperature and Spin Speed

Setting the temperature and spin speed is crucial for effective washing and fabric care. Use lower temperatures for delicate fabrics and higher for heavily soiled items. Spin speed can be adjusted to minimize drying time or protect sensitive garments. Energy-efficient modes often use lower temperatures. For optimal results‚ match the spin speed to the fabric type and load size. Higher spin speeds reduce moisture‚ while lower speeds prevent fabric damage. Always refer to the user manual for specific guidance on temperature and spin settings for your Indesit washer-dryer model.

Drying Cycles

Set the drying cycle based on load size and fabric type. Choose modes like delicate‚ normal‚ or eco for optimal results. Adjust settings to ensure efficient drying and fabric protection.

5.1 How to Set the Drying Cycle

To set the drying cycle‚ start by selecting the appropriate program based on the fabric type and load size. Use the control panel to choose between modes like delicate‚ normal‚ or eco. Adjust the drying time or temperature if needed‚ ensuring it matches the care labels on your garments. Once settings are configured‚ press the START/PAUSE button to begin. For optimal results‚ ensure the drum isn’t overloaded and consider pre-selecting a higher spin speed during washing to reduce drying time. Always refer to the user manual for specific cycle recommendations.

Remember‚ proper drying cycle settings help protect fabrics and save energy. Avoid opening the door during drying unless necessary‚ as it can disrupt the process. Regularly cleaning the filter and ensuring good ventilation in the room also enhances drying efficiency.

5.2 Choosing the Right Drying Mode

Selecting the correct drying mode ensures optimal results for your laundry. Choose from options like delicate‚ normal‚ or eco‚ depending on fabric type and care instructions. For sensitive fabrics‚ use the delicate mode to prevent damage. Normal mode is ideal for everyday loads‚ while eco mode saves energy and is suitable for less soiled items. Adjust the drying time or temperature if needed‚ ensuring it aligns with the garment care labels. Proper ventilation and avoiding overloading the drum enhance drying efficiency. Always clean the filter after use to maintain performance and prevent lint buildup.

Maintenance and Cleaning

Regular maintenance ensures your Indesit Washer-Dryer operates efficiently. Clean the detergent dispenser and check for blockages in the door and drum. Refer to the manual for specific guidance.

6.1 Cleaning the Detergent Dispenser Drawer

To clean the detergent dispenser drawer‚ pull it out and rinse under warm water. Remove any detergent residue or debris to ensure proper dosage. Regular cleaning prevents clogs and maintains hygiene. Gently scrub stubborn stains with a soft brush. After cleaning‚ dry thoroughly and reinsert into the machine. This simple maintenance step ensures optimal performance and prevents issues during wash cycles. Regular checks and cleaning are essential for longevity and efficiency of your Indesit Washer-Dryer.

6.2 Maintaining the Door and Drum

Regularly inspect and clean the door and drum to ensure optimal performance. After each use‚ leave the door slightly ajar to prevent mold and mildew buildup. Wipe the door gasket and drum with a damp cloth to remove residue. Check for debris like lint or coins‚ which can damage clothes or the machine. For tough stains‚ mix water and white vinegar on a soft cloth and gently scrub. Avoid abrasive cleaners to maintain the drum’s finish. Proper maintenance extends the appliance’s lifespan and keeps your laundry fresh and clean.

Troubleshooting Common Issues

Identify and resolve errors using the error codes in your manual. Check for issues like malfunctioning program dials or blocked drains. Ensure proper installation and leveling to avoid operational problems.

7.1 Identifying and Resolving Error Codes

Error codes like E01‚ E02‚ E03‚ and E04 indicate specific issues. E01 often relates to water supply problems‚ while E02 may signal drainage issues. E03 could indicate overheating‚ and E04 might point to door locking faults. Refer to your manual for code meanings. Restarting the appliance or checking connections often resolves these issues. If problems persist‚ contact Indesit customer support for professional assistance. Regular maintenance‚ such as cleaning filters‚ can prevent errors and ensure smooth operation. Always follow the manual’s troubleshooting guide for effective solutions.

7.2 Addressing Common Operational Problems

Common issues include the washer-dryer not starting‚ excessive noise‚ or the program dial not stopping. Check if the child lock is activated or if power supply issues exist. For noise‚ ensure the appliance is level and balanced. If the drum is unbalanced‚ redistribute laundry. Clean filters regularly to prevent blockages. Restarting the machine often resolves software glitches. If problems persist‚ refer to the manual or contact Indesit support. Regular maintenance‚ like cleaning the detergent dispenser‚ helps prevent operational issues. Always ensure the appliance is installed correctly to avoid performance problems.

Safety Precautions

Ensure the washer-dryer is installed correctly and level to avoid vibrations. Keep children away and never open the door during drying. Follow manual guidelines for safe operation.

8.1 Ensuring Safe Operation

To ensure safe operation‚ always install the washer-dryer on a stable‚ level surface and check the water inlet hose for leaks. Never open the door during the drying cycle unless necessary‚ as high temperatures can cause burns; Keep the area around the appliance clear of flammable materials. Ensure children do not play with the controls or climb on the machine. Regularly inspect the power cord and plug for damage. Refer to the manual for specific safety guidelines tailored to your Indesit model to prevent accidents and maintain optimal performance.

8.2 Avoiding Potential Hazards

To avoid potential hazards‚ never overload the washer-dryer beyond its capacity‚ as this can cause imbalance and damage. Use only recommended detergents to prevent chemical overflows or residues. Keep the appliance away from direct sunlight and flammable materials. Ensure proper ventilation in the room to avoid moisture buildup. Never leave the machine unattended during operation‚ especially with children nearby. Regularly check and clean filters to prevent blockages. Always unplug the appliance during maintenance to avoid electrical shocks. Follow the manual’s guidelines for safe usage and troubleshooting to minimize risks and ensure reliable performance over time.

Energy Efficiency Tips

Optimize energy use by selecting eco-friendly settings and lower temperatures. Use the right detergent amounts and ensure proper ventilation for efficient drying. Regularly clean filters to maintain performance.

9.1 Optimizing Energy Consumption

Optimizing energy consumption with your Indesit washer-dryer involves selecting eco-friendly settings and lower temperatures. Using the right detergent amounts ensures efficient cleaning without excess energy use. Additionally‚ choosing high spin speeds reduces drying time‚ lowering overall energy consumption. Regularly cleaning the detergent dispenser and filters also improves efficiency. Proper ventilation during drying cycles prevents moisture buildup‚ reducing the need for extended heating. By following these tips‚ you can significantly lower your energy usage while maintaining effective laundry results.

9.2 Using Eco-Friendly Settings

Using eco-friendly settings on your Indesit washer-dryer helps reduce energy and water consumption. Select the eco mode for lower temperature washes‚ which is gentler on clothes and the environment. This setting uses less energy while maintaining effective cleaning. Additionally‚ choosing shorter wash cycles and lower spin speeds can further minimize energy use. Always ensure you’re using the correct detergent dosage‚ as overdosing can reduce the efficiency of eco modes. By utilizing these eco-friendly options‚ you can significantly lower your energy bills while contributing to a more sustainable household.

Scroll to top