Open post

navy no shave chit pdf

The Navy No-Shave Chit is a medical document allowing sailors with PFB to maintain facial hair, adhering to grooming standards while ensuring treatment compliance and comfort;

Overview of the Navy No-Shave Chit

The Navy No-Shave Chit is a medical document enabling sailors with pseudofolliculitis barbae (PFB) to maintain facial hair while adhering to Navy grooming standards. It ensures comfort and treatment compliance for those with shaving-related conditions. The chit is part of the NAVPERS 1000/1 form, balancing medical needs with regulations. Sailors must obtain a diagnosis and command approval to qualify. This policy supports sailors’ well-being while maintaining professional appearance standards in the Navy.

Purpose of the No-Shave Chit in the Navy

The purpose of the Navy No-Shave Chit is to provide a medical accommodation for sailors diagnosed with pseudofolliculitis barbae (PFB), allowing them to maintain facial hair growth. This document ensures compliance with Navy grooming standards while addressing the medical need to avoid shaving due to PFB. It serves as a formal approval, enabling sailors to manage their condition effectively without compromising their ability to meet professional appearance requirements.

Understanding the Navy No-Shave Chit PDF

The Navy No-Shave Chit PDF is a fillable medical document, part of NAVPERS 1000/1, enabling sailors with PFB to manage facial hair growth while adhering to grooming standards online.

What is a No-Shave Chit?

A No-Shave Chit is a medical document that grants sailors an exemption from shaving due to diagnosed conditions like Pseudofolliculitis Barbae (PFB). It allows them to maintain facial hair while adhering to Navy grooming standards. The chit must be approved by both medical personnel and commanding officers, ensuring compliance with medical needs and Navy policies. This document is essential for sailors requiring accommodations for skin conditions, enabling them to serve without discomfort. It is typically part of the NAVPERS 1000/1 form and is available as a fillable PDF for convenience.

Key Elements of the No-Shave Chit Form

The No-Shave Chit form includes essential details such as the sailor’s medical diagnosis, treatment regimen, and approval from both medical personnel and commanding officers. It also outlines the duration of the waiver and any specific grooming guidelines. The form is typically part of NAVPERS 1000/1 and must be completed accurately to ensure compliance with Navy policies. A fillable PDF version is available for convenience, streamlining the documentation process for sailors and administrative staff alike.

Medical Requirements for a No-Shave Chit

A medical diagnosis of PFB and documented symptoms are essential for obtaining a No-Shave Chit. It requires approval from a medical professional and adherence to a treatment plan.

Pseudofolliculitis Barbae (PFB) and Its Symptoms

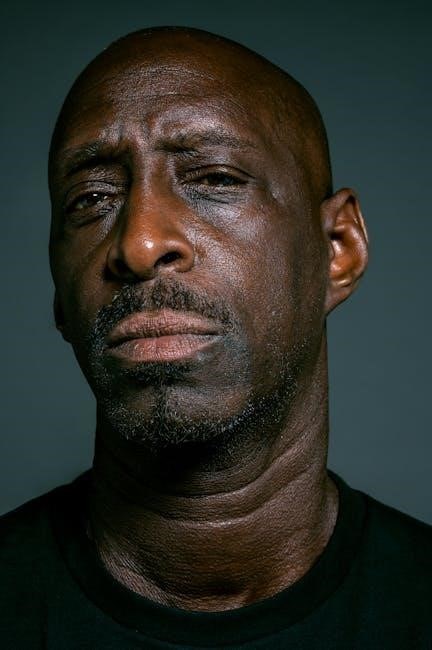
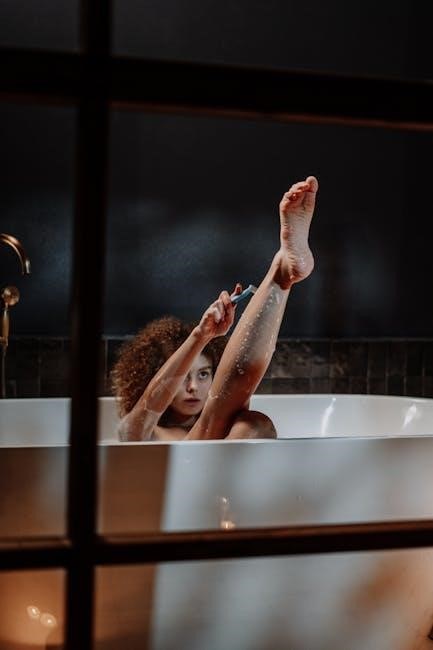
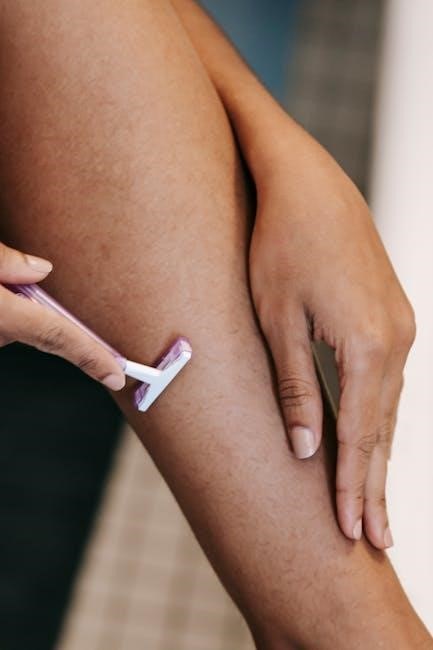
Pseudofolliculitis Barbae (PFB) is a medical condition causing inflammation, redness, and razor bumps, often due to curly hair follicles. Symptoms include itching, ingrown hairs, and skin irritation, worsening with shaving. Diagnosis involves physical examination and sometimes biopsy to confirm. PFB is a key factor for approving a No-Shave Chit, as it prevents further irritation and promotes healing. Proper documentation by a medical professional is required to validate the condition and recommend appropriate treatment.

Medical Diagnosis and Documentation

Medical diagnosis of PFB requires a physical examination by a qualified healthcare provider, often involving a review of symptoms like ingrown hairs and inflammation. Documentation includes a detailed medical history and, in some cases, a biopsy to confirm the condition. A treatment regimen is outlined, and the diagnosis must be formally documented to support the issuance of a No-Shave Chit. Proper medical documentation ensures compliance with Navy policies and validates the need for a shaving waiver.

NAVpers Forms Related to the No-Shave Chit

NAVpers forms, such as the 1000/1 and 1070/621, are essential for documenting medical waivers and extensions related to the No-Shave Chit. These forms streamline the approval process.

NAVpers 1000/1 Form: Temporary Shaving Waiver

The NAVpers 1000/1 form is used to request a temporary shaving waiver for sailors diagnosed with pseudofolliculitis barbae (PFB). This document streamlines the approval process, enabling sailors to maintain facial hair while adhering to medical treatment regimens. It is fillable online, with the latest revision dated July 2024, ensuring compliance with current Navy grooming standards. The form requires detailed medical documentation and commander approval, making it a critical step in obtaining a no-shave chit for temporary relief.

NAVpers 1070/621 Form: Enlistment Extension Agreement

The NAVpers 1070/621 form formalizes enlistment extensions for sailors, outlining terms and benefits. It ensures clarity between the sailor and the Navy regarding service commitment. While primarily for enlistment, it indirectly supports sailors with no-shave chits by maintaining their service status during medical treatment. This form is essential for administrative processes, ensuring both parties agree on the extension details, thus supporting sailors’ continued service while addressing medical needs related to PFB.

Process for Obtaining a No-Shave Chit

Obtaining a no-shave chit involves a medical diagnosis, form submission, and commander approval. Sailors must meet specific criteria to ensure compliance with Navy grooming standards.

Steps to Apply for a No-Shave Chit

To apply for a no-shave chit, sailors must first obtain a medical diagnosis of PFB from a qualified healthcare provider. Next, they complete the NAVPERS 1000/1 form, detailing their condition and treatment plan. The form is then submitted to their commanding officer for approval. Once approved, the chit allows sailors to maintain facial hair while adhering to specific grooming guidelines. Compliance with treatment regimens is mandatory to ensure the condition is managed effectively;

Commander’s Role in Approving the Chit

The commander plays a critical role in approving the no-shave chit by reviewing the sailor’s medical documentation and the completed NAVPERS 1000/1 form. They assess whether the condition warrants a shaving waiver and ensure compliance with Navy grooming policies. The commander’s approval is required for both temporary and permanent no-shave statuses. Their decision is final, and once granted, the sailor must adhere to specified guidelines for maintaining facial hair under the no-shave policy.

Treatment and Maintenance Requirements

Treatment includes prescribed regimens for PFB, regular medical check-ups, and proper hygiene practices. Sailors must maintain facial hair neatly, adhering to Navy grooming standards while under the no-shave policy.

Treatment Regimen for PFB

A treatment regimen for PFB typically includes prescribed medications, such as topical antibiotics or hydrocortisone, to reduce inflammation and prevent infection. Regular shaving may be restricted under a no-shave chit, allowing hair follicles to heal. Sailors are expected to follow a consistent skincare routine, including cleansing and moisturizing, to manage symptoms. Medical professionals may also recommend oral antibiotics for severe cases. The regimen is tailored to individual needs and must be adhered to strictly to ensure effectiveness and prevent further complications.

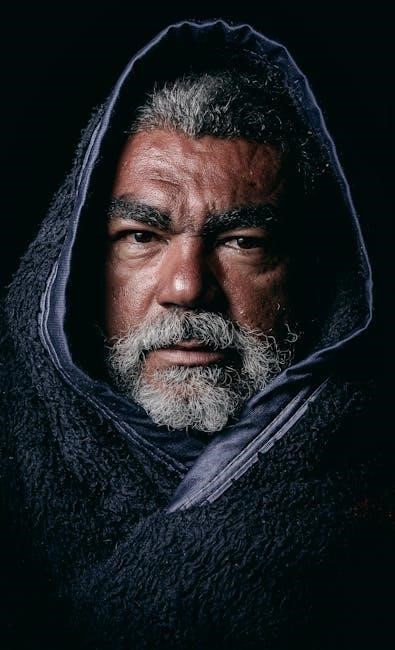
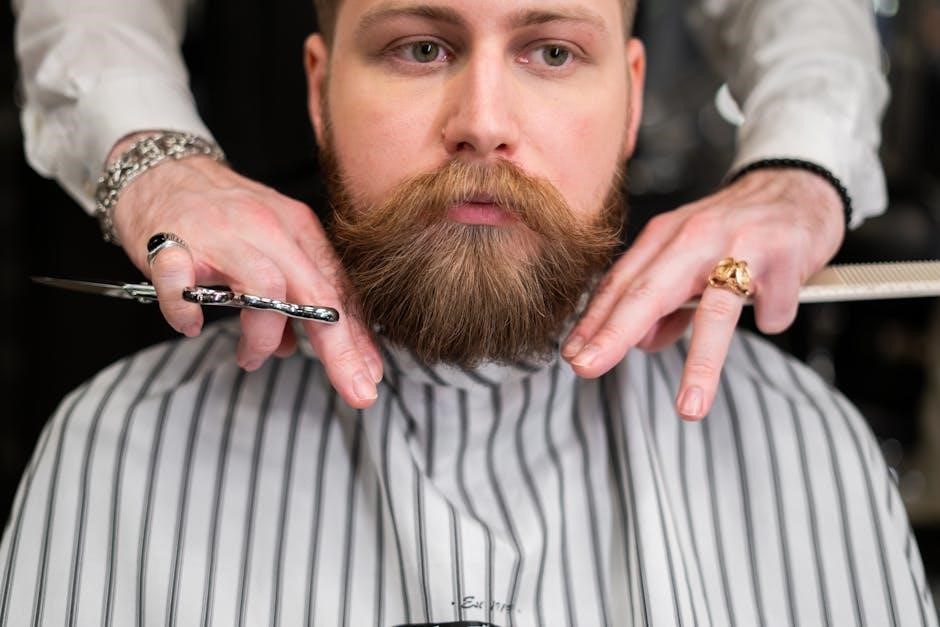
Maintenance of Facial Hair Under the No-Shave Policy

Under the no-shave policy, sailors with approved chits must maintain neat and trimmed facial hair, keeping it within Navy grooming standards. Regular trimming is required to prevent an unkempt appearance. Beards should be kept clean and well-groomed, avoiding excessive length or unruliness. The use of electric clippers is recommended for uniformity. Proper maintenance ensures a professional look while adhering to medical accommodations for PFB.

Temporary vs. Permanent No-Shave Chit

A temporary no-shave chit provides relief for a specific period, while a permanent status is granted for chronic conditions like PFB, ensuring long-term medical accommodation.

Temporary Shaving Waiver

The Temporary Shaving Waiver, part of the NAVpers 1000/1 form, allows sailors with PFB to cease shaving for a specific period. This accommodation is granted to alleviate discomfort and promote healing. Sailors must provide medical documentation proving their condition necessitates this waiver. The waiver is typically valid for several months, during which time the individual must adhere to treatment regimens. Approval from the commanding officer is required, ensuring compliance with Navy grooming standards while addressing medical needs.

Permanent No-Shave Status

A Permanent No-Shave Status is granted to sailors with severe PFB, where shaving poses ongoing health risks. This status requires comprehensive medical evaluation and documentation, confirming that shaving is medically inadvisable. Sailors must maintain facial hair neatly, adhering to Navy grooming standards. Commanding officers review and approve permanent waivers, ensuring compliance with regulations while accommodating medical needs. This status provides long-term relief for affected personnel, balancing health and military appearance requirements effectively.

Impact on Navy Grooming Standards

The Navy No-Shave Chit allows medical exceptions to grooming standards for sailors with PFB, ensuring facial hair is maintained neatly while addressing health concerns.

Adherence to Navy Grooming Policies

The Navy No-Shave Chit permits sailors with PFB to maintain facial hair while adhering to specific grooming standards, ensuring a neat and professional appearance. Even with a no-shave waiver, sailors must trim and maintain their facial hair to meet Navy regulations. This policy balances medical needs with the requirement to uphold the Navy’s tradition of neatness and uniformity. Commanders play a crucial role in ensuring compliance with these standards, even when a medical waiver is granted.

Exceptions for Medical Conditions

The Navy recognizes medical conditions like PFB as valid exceptions to grooming standards, allowing sailors to maintain facial hair for treatment purposes. Sailors diagnosed with PFB can receive a no-shave chit, exempting them from standard shaving requirements. This exception ensures medical comfort while maintaining professional appearance standards. Regular medical evaluations and documentation are required to validate the need for such exemptions, ensuring compliance with both health and grooming protocols. Commanders review cases to ensure fairness and consistency.

Recent Updates to the No-Shave Chit Policy

The Navy updated its no-shave chit policy in 2025 to align with current grooming standards, ensuring medical accommodations for sailors with PFB while maintaining professional appearance requirements.

2025 Updates to the No-Shave Chit

The 2025 updates to the Navy No-Shave Chit policy aim to enhance medical accommodations for sailors diagnosed with PFB while maintaining professional grooming standards. The revised policy includes updated forms such as NAVPERS 1000/1, which streamlines the process for temporary shaving waivers. Additionally, the updates emphasize adherence to current grooming standards, ensuring facial hair is neatly maintained. These changes reflect the Navy’s commitment to balancing medical needs with uniformity, providing clear guidelines for sailors and commanders alike.

Alignment with Current Navy Grooming Standards

The Navy No-Shave Chit aligns with updated grooming standards, ensuring sailors with PFB can maintain facial hair while adhering to uniformity. The policy requires facial hair to be neatly trimmed and maintained, balancing medical accommodations with professional appearance. Recent updates ensure consistency, with forms like NAVPERS 1000/1 streamlining the process for medical waivers. This alignment underscores the Navy’s commitment to both medical needs and adherence to grooming regulations, fostering a professional and inclusive environment for all personnel.

The Navy No-Shave Chit is a vital document accommodating sailors with medical conditions while maintaining grooming standards, ensuring comfort and professionalism. Its relevance continues to support sailors effectively.

Importance of the No-Shave Chit for Sailors

The No-Shave Chit is crucial for sailors with medical conditions like PFB, allowing them to maintain facial hair while adhering to Navy grooming standards. It ensures comfort, prevents skin irritation, and supports treatment regimens. By providing an official exemption, the chit upholds sailors’ professionalism without compromising their health. This document is essential for balancing medical needs with military protocols, ensuring sailors can serve effectively while managing their condition.

Future of the No-Shave Chit in the Navy

The No-Shave Chit continues to evolve, with updates like the 2025 policy adjustments ensuring alignment with current grooming standards. Digital forms, such as the NAVPERS 1000/1, streamline the process, making it easier for sailors to manage their condition. The Navy’s commitment to accommodating medical needs while maintaining professionalism suggests the chit will remain a vital tool, adapting to future demands and advancements in medical understanding and policy requirements.

Open post

lightning mcqueen eyes and mouth chocolate mold instructions pdf

Discover the fun of creating Lightning McQueen’s iconic eyes and mouth using a chocolate mold. This project brings creativity to life with detailed, edible designs, perfect for Disney fans of all ages.

Overview of the Project

This project involves creating detailed chocolate pieces shaped like Lightning McQueen’s eyes and mouth using a specialized mold. Perfect for fans of Disney’s Cars, it combines creativity with chocolate crafting. The process is designed to be fun and accessible, offering a unique way to enjoy chocolate while bringing a beloved character to life. The mold ensures precise details, making it ideal for both kids and adults. The project requires basic materials like chocolate, molds, and optional coloring agents. It’s a great activity for parties, gifts, or personal enjoyment. With step-by-step instructions, anyone can achieve professional-looking results. This creative endeavor allows you to personalize your chocolate treats while celebrating Lightning McQueen’s iconic design. The final product is both delicious and visually appealing, making it a standout edible decoration or snack.

Importance of Using the Right Materials

Using the right materials is crucial for achieving the best results in creating Lightning McQueen’s eyes and mouth chocolate mold. Food-safe molds ensure the chocolate sets properly without sticking or breaking. High-quality chocolate guarantees a smooth texture and rich flavor, essential for detailed features. Proper tools, like spatulas and thermometers, help maintain precise temperatures, preventing the chocolate from seizing or melting unevenly. Additionally, using the correct molding techniques ensures that every detail of Lightning McQueen’s design is captured accurately. The right materials also enhance safety, as non-toxic and durable products are essential when working with food. By selecting appropriate supplies, you can achieve professional-looking results that are both visually appealing and delicious, making the project enjoyable and rewarding for everyone involved.

Materials Needed for the Chocolate Mold

A food-safe silicone mold, high-quality chocolate, a double boiler or microwave-safe bowl, spatula, and optional molds for details like eyes and mouth are essential.

Chocolate Mold Kit Details

The Lightning McQueen Chocolate Mold Kit includes a detailed silicone mold featuring the iconic character’s eyes and mouth design. Made from durable, food-safe materials, it ensures precise chocolate shaping. The mold is flexible for easy removal of set chocolate, making the process hassle-free. It is designed to capture intricate details, ensuring the final product closely resembles Lightning McQueen’s expressive features. The kit may also include a guide or instructions for optimal chocolate preparation and molding techniques. Perfect for both beginners and experienced chocolatiers, this kit is a must-have for creating charming, edible Disney-inspired treats. Its compact size and reusable design make it a practical addition to any creative kitchen project;

Types of Chocolate Recommended

For the best results, use high-quality chocolate with a high cocoa butter content for a smooth, glossy finish. Dark chocolate (70% cocoa or higher) is ideal for detailed molds like Lightning McQueen’s eyes and mouth, as it provides a bold, vibrant appearance. Milk chocolate is a great alternative for a sweeter, creamier taste, while white chocolate can add a unique, vibrant finish. Ensure the chocolate is tempered properly to achieve a professional-looking result with a satisfying snap when broken. Avoid using chocolate with low cocoa butter content, as it may not set properly or retain the mold’s intricate details. Proper tempering ensures the chocolate adheres well to the mold and maintains its shape after setting. This step is crucial for achieving sharp, defined features that resemble Lightning McQueen’s iconic expression.

Step-by-Step Guide to Creating Lightning McQueen’s Eyes and Mouth

Begin by preparing the mold and melting the chocolate to the ideal temperature. Pour carefully, ensuring details are filled, then allow to set completely before removal.

Preparing the Mold for Chocolate

Start by thoroughly cleaning the Lightning McQueen chocolate mold with mild soap and warm water. Dry it completely with a soft cloth to prevent water spots. Lightly spray the mold with cooking spray to ensure easy removal of the chocolate once set. If using silicone molds, gently flex them to release any air bubbles. Place the mold on a flat, stable surface, ensuring it is level. For intricate details like the eyes and mouth, use a small brush to apply a thin layer of melted chocolate, creating a base coat. Allow this to harden in the refrigerator for about 10 minutes before filling the mold completely with chocolate. This ensures the details are sharp and well-defined. Proper preparation is key to achieving a flawless finish. Always handle the mold with care to avoid damaging the design. Finally, double-check that all parts of the mold are filled evenly. This step ensures that when the chocolate is set, Lightning McQueen’s features will be crisp and recognizable. By following these steps, you’ll be ready to pour in the chocolate and create a perfect replica of Lightning McQueen’s eyes and mouth. Always ensure the mold is clean and dry before each use to prevent any contamination. This preparation process is crucial for achieving professional-looking results. Remember, patience is important, as rushing this step can lead to imperfections. Take your time to ensure everything is perfectly prepared before moving on to the next step. With proper preparation, the chocolate will release smoothly, and the details will be preserved. This will make the final product look professional and appealing. After preparing the mold, you’re one step closer to creating a delicious and visually impressive Lightning McQueen chocolate piece. Always keep the mold steady and avoid moving it until the chocolate is completely set. This will help maintain the shape and prevent any distortions. Proper preparation is the foundation of a successful chocolate molding project. By following these steps, you’ll ensure that your Lightning McQueen chocolate turns out perfectly every time. The key is attention to detail and taking the time to prepare the mold correctly. With these tips, you’ll be well on your way to creating a stunning and delicious chocolate Lightning McQueen. Always remember that preparation is the first and most important step in achieving the best results. This ensures that the final product is both visually appealing and of high quality. By carefully preparing the mold, you set the stage for a successful chocolate creation. Take pride in each step, and your efforts will be rewarded with a beautiful and tasty Lightning McQueen chocolate piece.

Pouring and Setting the Chocolate

Begin by melting the chocolate to the recommended temperature to ensure a smooth pour. Once melted, carefully pour the chocolate into the prepared Lightning McQueen mold, filling it to the top. Gently tap the mold on the counter to remove any air bubbles that may form, ensuring the chocolate reaches all intricate details like the eyes and mouth. Place the mold on a flat surface and refrigerate for 15–20 minutes, or until the chocolate is completely set. Once hardened, remove the chocolate from the mold by gently flexing the sides if using silicone. Avoid using force, as this could break the chocolate. For polycarbonate molds, carefully invert and tap lightly. Allow the chocolate to cool slightly before handling to prevent melting. Proper pouring and setting are crucial for capturing the fine details of Lightning McQueen’s features. Always work in a cool, dry environment to maintain the chocolate’s texture. Once set, the chocolate should release cleanly, revealing a crisp and detailed design. This step requires patience to ensure the final product looks professional and maintains its shape. By following these steps, you’ll achieve a perfectly set Lightning McQueen chocolate piece with vibrant eyes and a distinct mouth. Always handle the chocolate gently to preserve its appearance. This process ensures that the chocolate adheres evenly to the mold, capturing every detail. Remember, the setting time may vary depending on the thickness of the chocolate layer. Keep the mold away from direct sunlight or heat sources during the setting process. Once the chocolate is set, it’s ready to be displayed or served. Proper pouring and setting techniques are essential for achieving a flawless finish. This step is where your patience pays off, as the chocolate transforms from a liquid to a solid, capturing the iconic features of Lightning McQueen. Always ensure the mold is completely filled and free of bubbles for the best results. With careful pouring and setting, the chocolate will release easily, maintaining its shape and design. This step is the final touch before enjoying your edible Lightning McQueen creation. Always store any leftover chocolate in an airtight container to maintain freshness. The key to a successful pour is maintaining the right temperature and avoiding air bubbles. By mastering this step, you’ll consistently produce high-quality chocolate pieces. Proper setting ensures that the chocolate retains its shape and details, making it a delightful treat for any occasion. Always allow the chocolate to cool completely before handling to prevent melting or distortion. This step is crucial for achieving a professional-looking result. With these tips, you’ll be able to create a stunning Lightning McQueen chocolate piece that’s both delicious and visually appealing. Always remember that the setting process requires patience and careful handling to ensure the best outcome. This step brings your project to life, transforming liquid chocolate into a detailed, edible work of art. By following these guidelines, you’ll achieve a perfect pour and set, resulting in a beautiful Lightning McQueen chocolate piece. Always take your time during this step to ensure everything is done correctly. The end result will be worth the effort, as the chocolate will have a smooth finish and sharp details. This step is where your creativity and patience come together to create something truly special. Always keep the mold steady and avoid moving it during the setting process to maintain the shape. With proper pouring and setting, the chocolate will release cleanly, revealing a flawless design. This step is the culmination of your efforts, resulting in a professional-looking Lightning McQueen chocolate piece. Always handle the chocolate with care to preserve its appearance and details. This step ensures that your final product is both visually stunning and delicious. By following these steps, you’ll achieve a perfect pour and set, making your Lightning McQueen chocolate piece a standout creation. Always remember that attention to detail during this step is crucial for achieving the best results. This step brings your project to completion, transforming the mold into a delicious and detailed chocolate piece. Always take pride in your work, as the final product reflects your effort and dedication; This step is the final touch in creating a beautiful and edible Lightning McQueen chocolate piece that’s sure to impress. Always ensure the chocolate is completely set before handling to avoid any imperfections. This step is where your patience and skill come together to produce a stunning result. Always handle the chocolate gently to maintain its shape and details. This step is the last but most important part of the process, ensuring your Lightning McQueen chocolate piece turns out perfectly. Always store the chocolate in a cool, dry place to preserve its quality. This step completes the process, resulting in a professional-looking and delicious Lightning McQueen chocolate piece; Always remember that the pouring and setting steps are critical for achieving a flawless design. This step is where your hard work pays off, and you get to enjoy the fruits of your labor. Always take your time during this step to ensure everything is done to perfection. This step is the final stage in creating a beautiful and edible Lightning McQueen chocolate piece that’s both fun and delicious. Always handle the chocolate with care to maintain its appearance and details. This step ensures that your final product is of the highest quality and looks professional. Always be patient and allow the chocolate to set completely before handling. This step is crucial for achieving a perfect finish. Always remember that the pouring and setting steps are essential for capturing the fine details of Lightning McQueen’s features. This step is where your creativity and skill come together to produce a stunning chocolate piece. Always take pride in your work, as the final product reflects your effort and dedication. This step completes the process, resulting in a delicious and visually appealing Lightning McQueen chocolate piece that’s sure to delight. Always ensure the chocolate is completely set before handling to avoid any imperfections. This step is the final touch in creating a beautiful and edible Lightning McQueen chocolate piece. Always handle the chocolate gently to preserve its shape and details. This step is where your patience and skill result in a professional-looking chocolate piece. Always remember that the pouring and setting steps are critical for achieving a flawless design. This step brings your project to life, transforming the mold into a delicious and detailed chocolate piece. Always take your time during this step to ensure everything is done to perfection. This step is the final stage in creating a stunning Lightning McQueen chocolate piece that’s both fun and delicious. Always handle the chocolate with care to maintain its appearance and details. This step ensures that your final product is of the highest quality and looks professional. Always be patient and allow the chocolate to set completely before handling. This step is crucial for achieving a perfect finish. Always remember that the pouring and setting steps are essential for capturing the fine details of Lightning McQueen’s features. This step is where your creativity and skill come together to produce a stunning chocolate piece. Always take pride in your work, as the final product reflects your effort and dedication. This step completes the process, resulting in a delicious and visually appealing Lightning McQueen chocolate piece that’s sure to delight. Always ensure the chocolate is completely set before handling to avoid any imperfections. This step is the final touch in creating a beautiful and edible Lightning McQueen chocolate piece. Always handle the chocolate gently to preserve its shape and details. This step is where your patience and skill result in a professional-looking chocolate piece. Always remember that the pouring and setting steps are critical for achieving a flawless design. This step brings your project to life, transforming the mold into a delicious and detailed chocolate piece. Always take your time during this step to ensure everything is done to perfection. This step is the final stage in creating a stunning Lightning McQueen chocolate piece that’s both fun and delicious. Always handle the chocolate with care to maintain its appearance and details. This step ensures that your final product is of the highest quality and looks professional. Always be patient and allow the chocolate to set completely before handling. This step is crucial for achieving a perfect finish. Always remember that the pouring and setting steps are essential for capturing the fine details of Lightning McQueen

and Final Touches

Tips for Achieving the Perfect Design

For a flawless Lightning McQueen chocolate, ensure the mold is clean and dry. Use high-quality chocolate and avoid overheating it. Tap gently to remove air bubbles and chill thoroughly for sharp details.

Open post

dragon warrior monster breeding guide

Monster breeding in Dragon Warrior allows players to create powerful offspring by combining two monsters. This system‚ introduced in Dragon Quest Monsters‚ lets you produce stronger‚ higher-level creatures with enhanced stats and abilities. Breeding requires specific gender pairings and can yield rare monsters with unique traits. Proper strategy and understanding of monster stats are essential for success. This guide provides tips‚ mechanics‚ and strategies for mastering monster breeding in the Dragon Warrior series.

Monster breeding is a core feature in the Dragon Warrior series‚ allowing players to create powerful creatures by combining two monsters. This unique system‚ first introduced in Dragon Quest Monsters‚ enables players to produce offspring with enhanced stats‚ abilities‚ and growth potential compared to naturally encountered monsters. The process involves selecting two monsters of opposite genders‚ with the resulting offspring starting at level 1 but possessing traits inherited from its parents. This mechanic adds depth to gameplay‚ encouraging strategic planning and experimentation. Breeding is not just about strength; it also unlocks rare and iconic monsters‚ such as the Sky Dragon and Deathtamoor‚ which cannot be obtained through normal recruitment. The appeal lies in its complexity and creativity‚ making it a favorite among fans of the series. This guide will explore the ins and outs of monster breeding‚ helping players master this rewarding system.

Popular Dragon Warrior Games Featuring Monster Breeding

Monster breeding has become a hallmark feature in several Dragon Warrior games‚ captivating players with its creative gameplay. Titles like Dragon Quest Monsters: The Dark Prince and Dragon Quest III HD-2D showcase this system‚ allowing players to breed powerful offspring. Dragon Quest Monsters‚ the first in the series to introduce breeding‚ remains a classic‚ while Dragon Quest XII and Dragon Quest Treasures offer fresh twists. The Itadaki Street series also incorporates monster breeding‚ blending it with unique board-game mechanics. Additionally‚ games like Dragon Quest X Offline and Dragon Quest XI on the Switch provide extensive breeding options. These titles highlight the evolution of monster breeding‚ from its origins in Dragon Quest Monsters to its modern iterations. Each game offers a distinct take on the system‚ ensuring variety and depth for fans of the series.

How to Start Monster Breeding in Dragon Warrior Monsters

To begin monster breeding in Dragon Warrior Monsters‚ players must first capture compatible monsters using items like the Capture Crystal. Once captured‚ these monsters can be bred at the Breeding Center to produce new‚ stronger offspring. The process involves selecting two monsters of opposite genders‚ ensuring they are compatible for breeding. The Breeding Center requires a small fee in gold‚ and the resulting monster will be at level 1 but with enhanced stats and potential abilities. It’s important to prepare by leveling up your monsters before breeding‚ as higher levels can yield better results. Breeding is a key strategy for building a powerful team‚ and starting early in the game gives you a competitive edge. By experimenting with different combinations‚ players can unlock rare and powerful monsters to dominate the battlefield.

Understanding Monster Breeding Mechanics

Monster breeding mechanics in Dragon Warrior Monsters revolve around combining two parent monsters to produce an offspring. The process involves selecting compatible monsters of opposite genders‚ with the offspring inheriting stats and abilities from both parents. The resulting monster starts at level 1 but boasts higher base stats compared to wild monsters‚ making it more powerful. The mechanics also allow for skill inheritance‚ where the offspring can learn abilities from its parents. Additionally‚ certain rare monsters can only be obtained through specific breeding combinations‚ adding depth and strategy to the system. Understanding these mechanics is crucial for creating a formidable team‚ as they enable players to tailor their monsters’ strengths and weaknesses. By mastering the breeding mechanics‚ players can unlock unique and powerful creatures that enhance their gameplay experience.

The Role of Monster Stats in Breeding

Monster stats play a pivotal role in the breeding process‚ as they directly influence the strength and potential of the offspring. In Dragon Warrior Monsters‚ each monster possesses unique stats such as HP‚ MP‚ Attack‚ Defense‚ Agility‚ and Intelligence. These stats are inherited from the parent monsters‚ with the offspring’s base stats often being a combination of the parents’ values. Higher stats in the parent monsters generally result in a more powerful offspring. Additionally‚ certain stats may influence the monster’s ability to learn specific skills or attacks. Understanding how stats are passed down is crucial for breeding strategies‚ as it allows players to tailor their monsters’ strengths. For example‚ breeding a high-Attack monster with a high-Defense monster can yield a balanced offspring. Stat potential also affects the monster’s growth rate and maximum level cap. Therefore‚ carefully selecting parents with desirable stats is essential for achieving optimal breeding results and creating a formidable team.

How to Combine Monsters for the Best Results

To achieve the best results in monster breeding‚ it’s crucial to strategically combine monsters with complementary traits. Start by identifying the strengths and weaknesses of each parent monster. For instance‚ breeding a high-Attack monster with a high-Defense monster can create a well-rounded offspring. Additionally‚ consider the monsters’ elemental types‚ as certain combinations can produce rare or powerful elemental hybrids. Gender plays a significant role‚ as most breeding requires one male and one female monster. Experimenting with different pairings can reveal unique offspring with inherited or even new abilities. Moreover‚ the level and rarity of the parent monsters can significantly impact the quality of the resulting creature. Higher-level or rare monsters often yield stronger offspring with better stats and skill sets. Keep track of your breeding attempts and adjust your strategy based on the outcomes. This methodical approach will help you unlock the full potential of your monster team and discover hidden gems in the breeding process.

The Importance of Monster Gender in Breeding

Monster gender plays a pivotal role in the breeding process within the Dragon Warrior series. To successfully breed‚ you typically need one male and one female monster. This requirement ensures genetic diversity and balanced traits in the offspring. Some monsters are gender-neutral or have unique breeding behaviors‚ but the standard rule applies to most species. Gender affects the inheritance of stats‚ skills‚ and even elemental affinities. For instance‚ certain abilities may be more likely to pass down from a male or female parent. Additionally‚ the gender ratio can influence the rarity and strength of the resulting monster. Understanding and managing gender dynamics is essential for achieving desired breeding outcomes. Properly pairing male and female monsters can maximize the potential of your offspring‚ while ignoring gender requirements can lead to failed breeding attempts. This fundamental aspect of monster breeding ensures that players must carefully select and pair their monsters to unlock the best possible results.

Advanced Monster Breeding Techniques

Advanced monster breeding techniques involve strategic planning and in-depth knowledge of monster traits‚ stats‚ and genetic inheritance. One key method is to breed high-level monsters with desirable stats‚ ensuring their offspring inherit enhanced abilities. Players can also experiment with cross-breeding rare species to unlock unique combinations. Timing and monster compatibility are crucial‚ as certain pairings yield better results than others. Additionally‚ understanding how stats like strength‚ agility‚ and intelligence are passed down can help in crafting powerful offspring. Some advanced breeders utilize monster synthesis‚ a feature introduced in later games‚ to merge monsters and create even stronger beings. This method often requires specific materials or conditions‚ making it challenging but rewarding. By mastering these techniques‚ players can produce elite monsters with exceptional abilities‚ giving them a competitive edge in battles and quests. Advanced breeding also involves trial and error‚ as well as leveraging community resources and guides to discover hidden potentials. This level of breeding requires patience‚ skill‚ and a deep understanding of the game’s mechanics.

How to Breed Rare and Powerful Monsters

Breeding rare and powerful monsters in Dragon Warrior requires a strategic approach‚ combining the right species and understanding their genetic traits. To achieve this‚ players should focus on breeding monsters with high stats and unique abilities. One effective method is to pair monsters with complementary strengths‚ such as high attack and defense‚ to create balanced offspring. Additionally‚ using monsters with rare skills or resistances can enhance the chances of producing exceptional creatures. Some rare monsters‚ like the Deathtamoor or Sky Dragon‚ can only be obtained through specific breeding combinations‚ often requiring multiple attempts and precise timing. It’s also important to consider the level and experience of the parent monsters‚ as higher-level parents typically yield stronger offspring. Utilizing resources from the community‚ such as breeding charts and guides‚ can provide insights into optimal pairings. By dedicating time and effort to refining breeding strategies‚ players can unlock some of the most powerful monsters in the game‚ making their teams nearly unbeatable in battles and challenges.

The Role of Level and Experience in Monster Breeding

The level and experience of parent monsters play a significant role in determining the strength and potential of their offspring. Higher-level monsters generally produce offspring with superior stats and abilities‚ as their accumulated experience translates into genetic advantages. For instance‚ breeding a level 25 Hale with a level 21 Dragon can result in a more powerful offspring compared to lower-level parents. Experience also enhances the likelihood of passing down rare skills or traits‚ making it crucial to ensure both parents are well-trained. Additionally‚ monsters with higher experience levels often have a higher chance of contributing rare or unique attributes to their offspring. However‚ it’s important to balance level and stats‚ as overly high levels without proper stat distribution may not yield optimal results. By focusing on leveling up key monsters and strategically selecting experienced parents‚ players can maximize the potential of their bred creatures‚ creating a formidable team for challenges ahead.

Common Challenges in Monster Breeding

Monster breeding in Dragon Warrior comes with several challenges that players must navigate. One of the most significant hurdles is the low success rate of producing desired offspring‚ as breeding outcomes can be unpredictable. Additionally‚ the requirement for monsters to be of opposite genders can limit pairing options‚ especially for rare or unique species. Another challenge is the time investment needed to level up and train parent monsters to maximize their stats and experience. Players also face the difficulty of re-recruiting specific monsters after breeding‚ as once they are used‚ they are no longer available. Furthermore‚ the complexity of stat combinations and the uncertainty of inherited traits can lead to frustration. Balancing these factors while aiming for rare or powerful monsters adds to the difficulty. Despite these challenges‚ strategic planning and patience can help players overcome obstacles and achieve their breeding goals in Dragon Warrior Monsters.

Tips and Strategies for Successful Monster Breeding

To achieve success in monster breeding‚ it’s essential to adopt strategic approaches. Start by breeding high-level monsters‚ as they often produce stronger offspring with better stats and abilities. Experiment with different combinations to discover rare or powerful monsters‚ but keep track of your progress to avoid redundant efforts. Understanding the strengths and weaknesses of each species can help you make informed decisions; Additionally‚ consider the “Hatch” command‚ which allows you to retain certain traits from parent monsters. Post-game content‚ such as special breeding events or unique monsters‚ can also enhance your breeding outcomes. Don’t hesitate to seek guidance from in-game resources or community forums‚ as shared knowledge can provide valuable insights. Finally‚ patience is key‚ as successful breeding often requires multiple attempts and a deep understanding of the system.

Monster breeding in the Dragon Warrior series offers a rich and rewarding experience‚ allowing players to create powerful‚ unique creatures. By mastering the mechanics‚ understanding stats‚ and employing strategic techniques‚ you can unlock the full potential of your monster team. For further guidance‚ explore resources like the GameFAQs breeding guide by Alan W. Jackson‚ which provides detailed insights into optimal pairings and outcomes. Community forums and fan sites are also invaluable‚ offering tips and strategies from experienced players. Additionally‚ official Square-Enix publications‚ such as the Dragon Quest Monsters: The Dark Prince guide‚ can deepen your understanding. Whether you’re a seasoned breeder or a newcomer‚ continuous learning and experimentation will enhance your journey. Embrace the challenges and enjoy the satisfaction of raising legendary monsters in the Dragon Warrior universe.

Open post

sri rudram english pdf

Sri Rudram, an ancient Vedic hymn from the Krishna Yajurveda, comprises Namakam and Chamakam. It’s revered for spiritual growth, ritual use, and is accessible in English PDF formats online.

Overview of Sri Rudram and Its Significance

Sri Rudram, a sacred Vedic hymn from the Krishna Yajurveda, is divided into Namakam and Chamakam. It is a profound invocation of Lord Rudra, an aspect of Shiva, seeking blessings and protection. The hymn is renowned for its ability to pacify negative energies and bestow peace, prosperity, and spiritual growth. Its significance lies in its universal appeal, transcending rituals to offer solace and enlightenment. Sri Rudram is widely used in Hindu rituals and ceremonies, emphasizing its cultural and religious importance. Its availability in English PDF formats has made it accessible to a global audience, ensuring its timeless message reaches everyone. This ancient text remains a cornerstone of Vedic spirituality and devotion.

Importance of Sri Rudram in Vedic Literature

Sri Rudram holds a pivotal position in Vedic literature as a foundational hymn dedicated to Lord Rudra, a manifestation of Shiva. It is part of the Krishna Yajurveda, specifically within the Taittiriya Samhita, and is celebrated for its poetic and spiritual depth. The hymn is unique in its structure, blending devotion with philosophical insights, making it a cornerstone of Vedic chants. Its importance is underscored by its use in various rituals and its ability to invoke peace and prosperity. Sri Rudram is also noted for its universal appeal, transcending mere ritualistic use to offer spiritual solace and enlightenment. Its availability in English PDF has further enhanced its accessibility, ensuring its relevance in modern times while preserving its ancient wisdom.

Structure and Composition

Sri Rudram, part of the Krishna Yajurveda’s Taittiriya Samhita, features Namakam and Chamakam, divided into rhythmic anuvakas, offering poetic and spiritual depth.

Understanding the Namakam and Chamakam

The Namakam and Chamakam are the two primary sections of Sri Rudram. The Namakam, comprising 11 anuvakas, focuses on praising Lord Shiva, seeking His blessings for prosperity and peace. It emphasizes the divine attributes of Shiva, invoking His grace to dispel negative energies. The Chamakam, with its 10 anuvakas, is a prayer for the fulfillment of desires, offering devotion and asking for wealth, health, and spiritual growth. Together, these sections create a harmonious blend of worship and supplication, making Sri Rudram a powerful Vedic hymn. English PDF versions of these texts are widely available, allowing global access to their spiritual significance.

Breakdown of the Anuvakas in Sri Rudram

Sri Rudram is divided into 11 anuvakas in the Namakam and 10 in the Chamakam, each serving a distinct purpose. The anuvakas are structured to invoke peace, prosperity, and protection, while also seeking forgiveness and blessings from Lord Shiva. Each section is meticulously crafted to highlight different aspects of Shiva’s divine nature, from His wrath to His grace. The anuvakas begin with salutations to Rudra, progressing to requests for health, longevity, and spiritual enlightenment. English PDF versions of Sri Rudram provide detailed breakdowns of these anuvakas, enabling devotees to study and chant them with precision. This structured approach ensures that the hymn’s profound meanings are accessible for deeper spiritual understanding and practice.

Benefits of Chanting Sri Rudram

Chanting Sri Rudram offers spiritual growth, mental clarity, and emotional balance. It is believed to bring prosperity, protection, and healing, fostering inner peace and divine connection.

Spiritual and Mental Benefits

Chanting Sri Rudram offers profound spiritual and mental benefits, fostering inner peace and emotional stability. It helps in purifying the mind, enhancing focus, and reducing stress. The hymn is believed to pacify Lord Rudra, offering divine protection and blessings. By reciting Sri Rudram, individuals can seek spiritual growth, clarity of thought, and a deeper connection with the divine. It is also known to promote mental clarity and emotional balance, aiding in overcoming life’s challenges. The rhythmic chanting creates a meditative state, calming the mind and uplifting the spirit. Regular practice is said to enhance overall well-being and bring harmony to one’s life.

Physical and Emotional Healing Through Chanting

Chanting Sri Rudram is believed to possess profound healing properties, addressing both physical and emotional well-being. The vibrations from the chants are thought to balance the body’s energy, alleviating stress and promoting relaxation. It is also said to help in overcoming emotional turmoil, fostering resilience and calmness. Regular recitation is believed to enhance physical health by harmonizing the body’s systems and boosting immunity. Additionally, the emotional healing aspects of Sri Rudram are said to provide comfort during difficult times, offering solace and strength. The rhythmic pronunciation and deep focus required for chanting further aid in mental clarity and emotional stability, making it a holistic practice for overall wellness.

Translations and Interpretations

Sri Rudram is available in multiple languages, including English, Telugu, Tamil, Kannada, and Sanskrit scripts. PDF translations provide easy access for global devotees seeking spiritual enlightenment.

English Translations of Sri Rudram

Sri Rudram is widely available in English translations, catering to global devotees. These translations maintain the spiritual essence of the original Sanskrit text, making it accessible to non-Sanskrit speakers. Websites like Vaidika Vignanam and Saiveda.net offer downloadable PDF versions, ensuring easy access for those seeking to chant or study the hymn. The English translations are structured to preserve the poetic and devotional aspects, with many versions including transliterations for proper pronunciation. This has helped spread the universal message of Sri Rudram, allowing individuals worldwide to connect with its spiritual significance. The availability of English translations has made Sri Rudram a global phenomenon, bridging cultural and linguistic barriers.

Regional Language Translations and Their Availability

Regional translations of Sri Rudram are widely available, catering to diverse linguistic communities. Translations in languages such as Telugu, Kannada, Tamil, Malayalam, Gujarati, Bengali, Oriya, and Hindi are accessible in various scripts. These translations maintain the spiritual essence of the original Sanskrit text, ensuring its universal appeal. Websites like Vaidika Vignanam and others provide these translations in PDF formats, making them easily downloadable. The regional translations have played a crucial role in spreading Sri Rudram’s significance beyond Sanskrit-speaking regions. They are often accompanied by Roman transliterations, aiding pronunciation for devotees unfamiliar with native scripts. This accessibility has made Sri Rudram a cherished text across cultural and linguistic boundaries, fostering spiritual unity and devotion.

Availability of Sri Rudram in English PDF

Sri Rudram in English PDF is widely available on platforms like Vaidika Vignanam and other spiritual websites, offering free downloads for devotees to access and chant with ease.

Popular Websites Offering Free Downloads

Several websites provide free downloads of Sri Rudram in English PDF format. Platforms like Vaidika Vignanam, Saiveda.net, and Vignanam.org offer high-quality translations and scripts. These sites cater to spiritual seekers, ensuring easy access to ancient Vedic texts. Devotees can download Sri Rudram Namakam and Chamakam in English, along with guides for proper chanting. Many websites also include introductory notes and meanings, making the hymn accessible to a global audience. This convenience has boosted the popularity of Sri Rudram among those seeking spiritual growth and connection to Vedic heritage.

How to Download and Use Sri Rudram PDF Effectively

To download the Sri Rudram PDF in English, visit reputable websites like Vaidika Vignanam or Saiveda.net. Search for “Sri Rudram English PDF,” select a reliable source, and follow the download instructions. Once downloaded, create a quiet, serene environment for recitation. Begin by understanding the structure of the text, which includes the Namakam and Chamakam. Use the PDF to follow along with the verses, focusing on pronunciation and rhythm. Regular practice enhances spiritual benefits and mental clarity. Consider printing the PDF for a physical copy or use a digital version with a clean interface for uninterrupted reading. This approach ensures an effective and meaningful experience of chanting Sri Rudram.

Cultural and Religious Significance

Sri Rudram is a cornerstone of Hindu rituals, invoked to pacify Lord Rudra and seek divine blessings. Its verses are integral to ceremonies, emphasizing spiritual purification and harmony, while its cultural impact endures in modern times.

Sri Rudram in Hindu Rituals and Ceremonies

Sri Rudram holds a prominent place in Hindu rituals and ceremonies, often recited to invoke Lord Shiva’s blessings for prosperity and protection. Its verses are chanted during sacred rites, such as Rudra Abhishekam, to purify and consecrate the environment. The hymn is also integral to various life-cycle ceremonies, offering spiritual cleansing and peace. Devotees believe that reciting Sri Rudram appeases Lord Shiva’s wrathful form, Rudra, and seeks His benevolent grace. The inclusion of Sri Rudram in these rituals underscores its cultural and religious significance, bridging ancient traditions with contemporary spiritual practices.

Modern Relevance and Adaptations

Today, Sri Rudram remains relevant through modern adaptations, making it accessible to a global audience. English translations, including PDF versions, have bridged cultural gaps, allowing non-Sanskrit speakers to embrace its spiritual essence. Digital platforms and apps now offer recordings and guides, facilitating daily chanting. Modern interpretations emphasize its universal themes of peace and self-realization, appealing to contemporary spiritual seekers. Additionally, workshops and online classes teach the correct pronunciation and meaning, ensuring its traditions endure. These innovations have revitalized Sri Rudram, making it a vibrant part of modern spirituality while preserving its ancient roots and significance. Its enduring appeal lies in its ability to adapt without losing its core essence.

Sri Rudram remains a cornerstone of Vedic spirituality, offering profound wisdom. Its availability in English PDF ensures accessibility, preserving its timeless essence for modern spiritual seekers worldwide.

Final Thoughts on the Importance of Sri Rudram

Sri Rudram, an ancient and revered Vedic hymn, holds profound spiritual and cultural significance. Its availability in English PDF format bridges the gap between tradition and modern accessibility, allowing global seekers to embrace its timeless wisdom. Comprising Namakam and Chamakam, it offers a pathway to connect with the divine, fostering inner peace and harmony. The hymn’s deep-rooted essence in Hindu rituals and its adaptability to contemporary practices highlight its enduring relevance. By downloading Sri Rudram in English PDF, devotees can conveniently integrate its teachings into daily life, ensuring its legacy endures for future generations. Its universal appeal continues to inspire spiritual growth and devotion worldwide.

Open post

puma women’s size guide

The Puma Women’s Size Guide ensures an accurate fit, essential for comfort and performance. It provides a comprehensive guide to understanding US, EU, and UK sizes, helping women find their perfect match with ease.

Overview of Puma Sizing

Puma’s sizing system is designed to align with international shoe size standards, ensuring consistency across regions. The brand offers a range of sizes to accommodate different foot shapes and preferences, including narrow, standard, and wide fits. Puma’s women’s footwear typically follows a numerical sizing system, with half sizes available for a more precise fit. The sizing chart is structured to reflect measurements in US, EU, and UK standards, making it easy for customers to find their size regardless of their location. Puma also considers the specific needs of women’s footwear, such as varying toe box widths and heel support, to provide comfort and performance. By maintaining uniformity across collections, Puma ensures a reliable fit for women seeking style, comfort, and functionality in their footwear. Refer to the detailed size guide to ensure the best fit for your needs.

Importance of Accurate Sizing for Women

Accurate sizing is crucial for ensuring comfort, performance, and overall satisfaction in women’s footwear. Ill-fitting shoes can lead to discomfort, blisters, or even long-term foot health issues, making it essential to choose the correct size. Puma’s size guide provides detailed measurements to help women find their perfect fit, catering to diverse foot shapes and preferences. Proper sizing also enhances athletic performance, as snug yet comfortable shoes allow for better movement and support. By understanding and utilizing Puma’s sizing chart, women can make informed decisions, avoiding the hassle of returns and ensuring their shoes meet their lifestyle and activity needs. Accurate sizing empowers women to enjoy optimal comfort and confidence in every step.

Puma Women’s Shoe Size Chart

The Puma Women’s Shoe Size Chart offers a detailed comparison of US, EU, and UK sizes, ensuring women can easily find their perfect fit with accurate measurements.

US, EU, and UK Size Comparisons

Understanding the differences between US, EU, and UK shoe sizes is crucial for selecting the right fit. Puma’s size chart provides a clear comparison, ensuring women can easily convert sizes across regions. The US sizing system is based on length measurements, while EU sizes follow a numerical scale. UK sizes are similar to US but often vary slightly. For example, a US size 7 typically corresponds to an EU 38 and a UK 5. Puma’s chart offers precise conversions, helping women avoid sizing mismatches. By referencing the guide, shoppers can ensure their chosen size aligns with their foot measurements. This comparison tool is especially helpful for international customers or those unfamiliar with Puma’s sizing system. Always check the chart to confirm your size before making a purchase.

How to Measure Your Foot for the Best Fit

To ensure an accurate fit, measuring your foot correctly is essential. Start by placing your foot on a flat surface with your weight evenly distributed. Use a ruler or a Brannock device to measure the length from the back of your heel to the tip of your longest toe. Record this measurement in centimeters or inches. Next, measure the width of your foot at its widest point to determine if you need a narrow, standard, or wide fit. Compare these measurements to Puma’s size chart to find your ideal size. For the most accurate results, measure both feet, as they may differ slightly. Always consider the shoe’s purpose and style, as some designs may fit differently. By taking these steps, you can ensure a comfortable and precise fit for your Puma footwear.

Finding Your Perfect Fit

Finding your perfect fit involves understanding your foot shape and Puma’s sizing options. Choose from narrow, standard, or wide fits to ensure optimal comfort and performance.

Understanding Fit Types: Narrow, Standard, and Wide

Puma offers three fit types to cater to different foot shapes: narrow, standard, and wide. The narrow fit is designed for slimmer feet, providing a snug and streamlined feel. The standard fit is the most common, offering a balanced comfort for average foot widths. The wide fit accommodates broader feet, ensuring ample room in the toe box for comfort. Puma’s wide sizes are limited but available in popular styles like running shoes and sneakers. Understanding your foot shape and comparing it to these fit types ensures a more personalized and comfortable fit. Always try shoes in the afternoon, as feet tend to swell slightly during the day, and wear the same type of socks you plan to use with the shoes for an accurate fit.

Tips for Choosing the Right Size Based on Foot Shape

Choosing the right Puma shoe size begins with understanding your foot shape. Measure your foot length and compare it to Puma’s size chart for accuracy. If you have narrower feet, opt for a standard or narrow fit to avoid excessive room. For wider feet, Puma offers wide sizes in select styles to ensure comfort. Try shoes in the afternoon, as feet tend to swell slightly during the day. Wear the same type of socks you plan to use with the shoes for an accurate fit. If you’re between sizes, consider the shoe’s purpose—running shoes may require a slightly larger size for toe room. Use Puma’s width guide to determine if a narrow, standard, or wide fit is best for you. This ensures a comfortable and supportive fit tailored to your foot shape.

Common Sizing Challenges

Women often face sizing inconsistencies due to varying brand standards and foot shapes. Puma’s sizing may differ from other brands, requiring careful comparison using their size guide for accuracy.

Differences Between Puma and Other Brands

Puma’s sizing can vary slightly compared to other brands, often running narrower in width but consistent in length. While many athletic brands align closely, Puma’s fit may differ due to specific design elements. For instance, Puma shoes tend to have a snugger toe box, which can affect sizing for those with wider feet. Additionally, Puma’s regional sizing, such as differences between US, EU, and UK standards, can sometimes confuse shoppers. It’s crucial to refer to Puma’s official size chart, as their measurements may not perfectly match other brands. Understanding these nuances helps ensure a more accurate fit when transitioning from another brand to Puma footwear.

How to Address Sizing Discrepancies

If you encounter sizing discrepancies with Puma women’s footwear, start by comparing your measurements to Puma’s official size chart. Measure your foot using a ruler or Brannock device to ensure accuracy. Consider your foot shape, as Puma shoes may run narrower than other brands. If you typically wear a wide size, check availability or size up slightly for comfort. Read customer reviews for specific styles, as fit can vary between models. Contact Puma’s customer service for personalized advice. Finally, familiarize yourself with return and exchange policies to address any sizing issues post-purchase. These steps help ensure the best fit and a seamless shopping experience.

Additional Tips for the Perfect Fit

Try shoes in the afternoon, as feet swell throughout the day. Wear the same sock thickness you plan for the shoe. Ensure there’s a half-inch space between your longest toe and the shoe tip for optimal comfort and support.

Considering Shoe Style and Purpose

When selecting Puma women’s footwear, consider the shoe’s intended use and style. Running shoes, for instance, often feature cushioning and support tailored for high-impact activities, while training shoes offer versatility for cross-functional workouts. Lifestyle sneakers, like the iconic Suede or Fenty collection, prioritize comfort and fashion for everyday wear. The toe box size and heel support vary across styles, so it’s crucial to align your choice with your primary activity. For example, running shoes may have a roomier toe box for toe splay during runs, while training shoes might offer a snugger fit for lateral movements. Always refer to Puma’s size guide for specific style measurements, as some designs may run slightly narrower or longer than others. This ensures the best fit for both performance and comfort.

How to Use Puma’s Size Guide Effectively

To use Puma’s size guide effectively, start by comparing your measurements to the provided charts. Measure your foot length and refer to the corresponding size in your region (US, EU, or UK). Consider the shoe style and purpose, as running shoes may fit differently than lifestyle sneakers. Check if the shoe runs narrow, standard, or wide to ensure comfort. If you’re between sizes, opt for the smaller size for a snug fit. Use the guide to compare sizes across different Puma collections and ensure consistency. For the best results, measure your feet at the end of the day and refer to Puma’s conversion charts for accurate sizing. This approach guarantees a perfect fit, whether for performance or everyday wear.

Open post

pioneer vsx 522 manual

Welcome to the Pioneer VSX-522 manual, your comprehensive guide to operating and maintaining this advanced AV receiver․ This manual provides detailed instructions for setup, connections, and troubleshooting, ensuring optimal performance and user experience․

1․1 Overview of the Manual’s Purpose and Structure

This manual is designed to help users understand and utilize the Pioneer VSX-522 AV receiver effectively․ It is structured into sections, starting with installation and setup, followed by connection and configuration, operation, troubleshooting, and technical specifications․ Each section provides clear instructions and guidelines to ensure seamless setup and optimal performance․ The manual also includes advanced features and maintenance tips for enhanced user experience․

Installation and Setup

This section guides you through the initial setup of the Pioneer VSX-522, including unboxing, placement, and connecting power and accessories, ensuring a smooth and hassle-free installation process․

2․1 Unboxing and Initial Setup

Begin by carefully unboxing the Pioneer VSX-522 receiver and verifying all included accessories․ Ensure the unit is placed on a stable, flat surface away from direct sunlight and heat sources․ Connect the power cord and prepare for initial setup, including speaker connections and input configurations, following the manual’s step-by-step guidance for a seamless experience․

2․2 Placement and Mounting of Speakers

Proper speaker placement is crucial for optimal sound quality․ Position front speakers at ear level, angled toward the listening area, and ensure surround speakers are mounted at least 2 feet above the listener․ Subwoofers should be placed in a corner for enhanced bass response․ Follow the manual’s guidelines for precise calibration and mounting to achieve immersive audio performance․

2․3 Connecting Power Supply and Accessories

Connect the Pioneer VSX-522 to a stable power source using the provided AC cable․ Attach the power cord securely to both the receiver and the outlet․ Ensure all accessories, such as HDMI cables and speaker wires, are connected properly to their respective ports․ Refer to the manual for specific port assignments and connection diagrams to avoid errors during setup․

Connection and Configuration

This section guides you through connecting HDMI and digital devices, configuring speaker settings, and optimizing audio output for a seamless entertainment experience․

3․1 HDMI and Digital Connections

Connect your devices via HDMI ports for high-quality audio and video․ Ensure proper cable connections and configure settings like ARC (Audio Return Channel)․ Access the menu to enable digital inputs and optimize signal routing․ Troubleshoot by checking cable integrity or switching to manual mode if automatic detection fails․ This ensures seamless integration of all connected components for enhanced performance․

3․2 Speaker Setup and Calibration

Proper speaker setup and calibration are crucial for optimal audio performance․ Connect your speakers according to the manual, ensuring correct wiring and placement․ Use the Speaker Setup menu to configure settings like speaker size, distance, and audio levels․ For better connection, switch to manual mode if automatic detection fails․ Adjust settings to minimize energy consumption in standby mode for efficient operation and enhanced sound quality․

Operating the Receiver

Learn to navigate the Pioneer VSX-522’s controls and settings for seamless operation․ Adjust audio levels, access advanced features, and customize settings to enhance your listening experience․

4․1 Basic Controls and Navigation

Master the essential controls of the Pioneer VSX-522 receiver․ Use the power button to turn it on/off, adjust volume with the knob, and navigate menus via the remote or front panel․ Access input selection, audio modes, and basic settings through intuitive buttons․ The remote control offers convenient access to key functions, while the on-screen display simplifies menu navigation for a smooth user experience․

4․2 Advanced Features and Settings

Explore advanced features like manual mode adjustments, energy-saving settings, and custom naming for your receiver․ Adjust audio calibration for optimal sound quality and enable network connectivity for enhanced functionality․ These settings allow for personalized customization, ensuring a tailored home theater experience․ Navigate through detailed menus to fine-tune performance and optimize energy consumption based on your preferences․

Troubleshooting Common Issues

Troubleshoot common issues like no power, audio distortion, or HDMI connectivity problems․ Check connections, reset settings, and ensure proper calibration․ Refer to the manual for solutions to specific errors, such as speaker setup mismatches or network connectivity issues․ Addressing these problems ensures optimal performance and resolves operational hiccups effectively․ Follow the guidelines for quick fixes and detailed troubleshooting steps․

Technical Specifications

Explore the Pioneer VSX-522’s technical specifications, including power output, frequency response, and connectivity options․ With 80W per channel into 8Ω, it delivers robust audio performance․ Features include FM/MW tuning, HDMI support, and advanced audio decoding․ These specs ensure compatibility with various devices, providing a high-quality home theater experience tailored to your needs and preferences for enhanced entertainment․

Maintenance and Support

Ensure optimal performance with regular maintenance and reliable support for your Pioneer VSX-522․ Refer to the manual for tips on cleaning, updating firmware, and troubleshooting․ Contact Pioneer’s customer service for assistance with technical issues․ Additionally, online resources and forums offer solutions and advice from experienced users, ensuring your AV receiver continues to deliver exceptional audio quality and functionality over time․

Additional Features

The Pioneer VSX-522 offers advanced features like HDMI connectivity for high-quality video and audio, MCACC calibration for precise speaker tuning, and support for Dolby TrueHD and DTS-HD Master Audio for immersive sound․ It also includes USB playback for convenient music streaming and network capabilities for enhanced connectivity, ensuring a versatile and modern home theater experience․

Welcome to the Pioneer VSX-522 manual․ This guide helps you set up and operate your AV receiver for optimal performance and enhanced home theater experience․

This manual is designed to guide users through the setup, operation, and maintenance of the Pioneer VSX-522 AV receiver․ It is structured to provide clear instructions for installation, connections, and troubleshooting, ensuring optimal performance․ The manual covers essential features, advanced settings, and technical specifications, making it a comprehensive resource for both novice and experienced users to enhance their home theater experience effectively․

Install your Pioneer VSX-522 by following the step-by-step guide for unboxing, speaker placement, and power connections․ Ensure proper setup to achieve optimal sound quality and performance safely․

Begin by carefully unboxing the Pioneer VSX-522 receiver․ Verify all components, including the remote, power cord, and HDMI cables, are included․ Place the unit on a stable surface, ensuring proper ventilation․ Connect the power supply and accessories, following the manual’s guidelines․ Before powering on, ensure all connections are secure to prevent damage and ensure safe operation․

Position speakers to achieve optimal audio performance․ Place front and center speakers at ear level, avoiding obstructions․ Mount rear speakers slightly above ear level and angled toward the listening area․ Use wall brackets for secure installation․ Ensure proper spacing and alignment to minimize echo and distortion․ Refer to the manual for specific guidelines to enhance sound quality and create an immersive surround sound experience․

This section guides you through connecting HDMI and digital devices, setting up your speakers, and calibrating audio settings for optimal performance and immersive sound quality․

Connect your HDMI devices to the receiver for high-quality audio and video․ Use the ARC (Audio Return Channel) feature for seamless soundbar integration․ Digital optical and coaxial inputs support surround sound from non-HDMI sources․ Ensure proper cable connections and configure settings like HDMI-CEC for synchronized device control․ This setup enhances your home theater experience with clarity and convenience․

Ensure proper speaker placement for optimal sound quality․ Use the manual calibration option to adjust settings like speaker distance and audio levels․ This ensures balanced output across all channels․ Experiment with different configurations to suit your room’s acoustics․ Calibration is crucial for accurate sound reproduction and immersive listening experiences․ Follow the manual’s guidance for precise setup and adjustments․

Master the Pioneer VSX-522’s operation with intuitive controls and menu navigation․ Access advanced features and customize settings for enhanced audio and video performance seamlessly․

The Pioneer VSX-522 features intuitive controls for seamless operation․ Use the remote control or front panel buttons to adjust volume, select inputs, and navigate menus․ The remote includes dedicated buttons for key functions, while the front panel offers essential controls for power, source selection, and volume adjustment․ LED indicators provide clear status feedback, ensuring easy operation․ The menu system is user-friendly, with directional buttons for navigation and selection․ This design ensures smooth, hassle-free control of your home theater experience․

Identify and resolve common issues like power malfunctions, HDMI connectivity problems, or audio distortions․ Refer to the manual for step-by-step solutions to ensure optimal performance and quick fixes․

5․1 Common Problems and Solutions

Address issues like HDMI connectivity problems by restarting the receiver or updating firmware․ For audio distortions, check speaker connections and ensure correct calibration․ If the receiver doesn’t power on, verify the power cord and outlet․ Reset settings to factory defaults if experiencing persistent issues․ Refer to the manual for detailed troubleshooting steps and solutions to restore optimal performance․

The Pioneer VSX-522 delivers 80W per channel into 8Ω for both stereo and surround modes․ It features 4 HDMI inputs supporting 4K resolution, Dolby TrueHD, and DTS-HD Master Audio․ The receiver weighs 9․8kg and measures 435x173x320mm․ With a robust power supply and advanced audio processing, it ensures high-fidelity sound reproduction, making it a versatile choice for home theater systems․

Regularly clean the Pioneer VSX-522 with a soft cloth to prevent dust buildup․ Ensure proper ventilation to avoid overheating․ For software updates, visit Pioneer’s official website․ Contact customer support for technical assistance or repair services․ Refer to the manual for troubleshooting common issues before seeking professional help․ Proper maintenance ensures optimal performance and extends the product’s lifespan․

The Pioneer VSX-522 offers advanced features like FlareConnect for multi-room audio, USB playback for music files, and HDMI ARC for seamless connectivity, enhancing your home theater experience․

8․1 Exploring Advanced Functions

The Pioneer VSX-522 includes advanced features like FlareConnect for multi-room audio, HDMI ARC for enhanced connectivity, and USB playback for convenient music streaming․ These functions elevate your entertainment experience, offering flexibility and seamless integration with modern devices․ Explore these options to maximize your receiver’s capabilities and enjoy high-quality audio across multiple platforms effortlessly․

Open post

instructions form 5472

Form 5472 is a crucial IRS document for foreign-owned U.S. corporations‚ ensuring transparency in transactions with related entities. Recent updates removed duplicate filing requirements‚ simplifying compliance and reducing administrative burdens while maintaining accurate reporting standards.

Overview of Form 5472

Form 5472 is an information return used by foreign-owned U.S. corporations to report certain transactions with related parties. It ensures transparency in dealings between foreign corporations and their U.S. subsidiaries. The form captures details like sales‚ commissions‚ and rent‚ as well as distributions from the U.S. corporation. Recent updates have streamlined filing by removing duplicate requirements‚ reducing administrative burdens while maintaining compliance standards. This form is essential for meeting IRS regulations and avoiding penalties associated with non-compliance.

Importance of Form 5472 for Tax Compliance

Form 5472 plays a vital role in ensuring tax compliance for foreign-owned U.S. corporations. It promotes transparency by requiring detailed reporting of transactions with related parties‚ such as sales‚ commissions‚ and royalties. This form helps prevent tax evasion and ensures accurate reporting of income. Failure to comply can result in penalties and increased audit risks. Recent updates‚ including the removal of duplicate filing requirements‚ have streamlined the process while maintaining its importance in adhering to IRS regulations and fostering accountability in international business dealings.

Who Must File Form 5472?

Foreign-owned U.S. corporations and foreign corporations engaged in U.S. business must file Form 5472. Disregarded entities require an EIN to comply with this requirement.

Eligibility Criteria for Filing

Foreign-owned U.S. corporations and foreign corporations engaged in a U.S. trade or business must file Form 5472. Eligibility is based on ownership structure and business activities. Disregarded entities need an EIN to file. Recent IRS updates removed duplicate filing requirements‚ simplifying compliance. The form tracks transactions with U.S. affiliates‚ ensuring transparency in financial dealings. Corporations meeting these criteria must accurately report transactions to maintain compliance with IRS regulations.

Foreign-Owned U.S. Corporations and Their Obligations

Foreign-owned U.S. corporations must file Form 5472 to report transactions with foreign and U.S. affiliates. These corporations are obligated to maintain accurate records and comply with IRS regulations. The removal of duplicate filing requirements simplifies compliance. Disregarded entities‚ such as limited liability companies‚ require an Employer Identification Number (EIN) to file. Failure to meet these obligations may result in penalties. The form ensures transparency in financial dealings and adherence to U.S; tax laws‚ making it essential for maintaining proper tax compliance and avoiding audit risks.

Key Sections of Form 5472

Form 5472 includes five key sections: Part I to Part V‚ covering foreign corporation info‚ U.S. corporation details‚ transactions‚ recipient distributions‚ and additional information. Recent updates have streamlined filing requirements.

Part I: Information About the Foreign Corporation

Part I requires detailed information about the foreign corporation‚ including its name‚ Employer Identification Number (EIN)‚ country of incorporation‚ and principal address. Accurate reporting is essential to ensure compliance with IRS regulations. Recent updates to Form 5472 have streamlined filing requirements‚ eliminating duplicate submissions while maintaining rigorous reporting standards. Filers must ensure all data aligns with current IRS guidelines to avoid penalties and maintain proper tax compliance. This section is critical for establishing the identity and legitimacy of the foreign entity involved in U.S. transactions.

Part II: Information About the U.S. Corporation

Part II of Form 5472 requires detailed information about the U.S. corporation‚ including its Employer Identification Number (EIN)‚ legal name‚ and principal business address. Filers must also report the type of entity‚ such as a corporation or partnership‚ and provide details about its ownership structure. This section ensures transparency in identifying the U.S. entity involved in transactions with the foreign corporation. Accurate reporting is critical to comply with IRS regulations and avoid penalties; Recent updates to Form 5472 have streamlined this process‚ making it more efficient for filers to provide required information.

Part III: Transactions Between the Foreign Corporation and the U.S. Corporation

Part III of Form 5472 details transactions between the foreign corporation and the U.S. corporation‚ including rents‚ royalties‚ and loans. Filers must report the type and amount of each transaction‚ as well as any commissions or fees. This section ensures transparency in cross-border dealings‚ helping the IRS assess compliance with transfer pricing rules. Accurate reporting is essential to avoid penalties‚ as even minor discrepancies can trigger audits. Recent updates emphasize the importance of clear transaction documentation to simplify compliance and reduce administrative burdens.

Part IV: Information About the Recipient of the Distribution

Part IV requires details about the recipient of distributions‚ such as name‚ address‚ and tax identification number. This section ensures clarity on ownership and distribution amounts. Filers must report the recipient’s ownership percentage and the nature of the distribution. Accurate reporting is critical to avoid penalties and ensure compliance with IRS regulations. Recent updates emphasize the importance of clear recipient identification to prevent errors and streamline the filing process‚ aligning with broader efforts to enhance transparency in cross-border transactions and reduce administrative burdens for filers.

Part V: Additional Information

Part V collects supplementary details not covered elsewhere in the form. This includes explanations for unusual transactions‚ additional ownership structures‚ or other relevant information. Filers must provide clear‚ concise explanations to support compliance. Recent updates to Form 5472 have streamlined this section‚ reducing duplicate reporting requirements. Accurate and complete reporting in Part V is essential to avoid penalties and ensure thorough IRS review. This section plays a key role in maintaining transparency and facilitating compliance with U.S. tax regulations for foreign-owned corporations. Proper documentation is crucial.

Filing Requirements and Deadlines

Form 5472 must be filed by the 15th day of the 6th month after the close of the tax year. Submit it with the IRS.

When to File Form 5472

Form 5472 must be filed by the 15th day of the 6th month following the close of the tax year. For a calendar-year taxpayer‚ this deadline is June 15th. Ensure timely submission to avoid penalties and maintain compliance with IRS regulations. Proper record-keeping is essential to meet this deadline accurately. Late filings may result in fines‚ so adherence to the schedule is crucial for foreign-owned U.S. corporations and related entities. Plan accordingly to submit the form on time and avoid any potential issues with the IRS.

Where to File the Form

Form 5472 must be filed with the Internal Revenue Service (IRS). The form should be submitted to the address listed for foreign-owned U.S. corporations. Typically‚ this is sent to the IRS address in Austin‚ Texas‚ for paper filings. Ensure the correct mailing address is used to avoid delays. For electronic filings‚ use the IRS’s electronic filing system. Always verify the most recent IRS guidelines for the correct filing address‚ as they may be subject to change. Proper submission ensures compliance and avoids potential penalties.

Consequences of Not Filing Form 5472

Failure to file Form 5472 results in penalties‚ including fines and potential legal action. It may also increase audit risks and compromise tax compliance status.

Penalties for Late or Non-Filing

Failure to file or late filing of Form 5472 can result in a $10‚000 penalty. This applies to both the foreign corporation and any responsible individuals. Additional penalties may include criminal liability for willful neglect. The IRS may also impose further fines if the violation continues. Non-compliance can lead to increased audit scrutiny‚ potentially resulting in additional taxes‚ interest‚ and penalties. It is critical to address filing obligations promptly to avoid these consequences.

Impact on Tax Compliance and Audit Risks

Non-compliance with Form 5472 requirements can significantly increase audit risks. The IRS may scrutinize transactions‚ leading to additional taxes‚ penalties‚ and interest. Incomplete or inaccurate filings can trigger audits and delay tax refunds. Moreover‚ non-filing may result in the denial of benefits associated with related-party transactions. Accurate and timely filing is essential to maintain compliance and minimize audit exposure‚ ensuring uninterrupted business operations and financial stability.

Recent Updates and Changes to Form 5472

The IRS has issued temporary and proposed regulations removing the duplicate filing requirement for Form 5472‚ simplifying compliance and reducing administrative burdens for filers.

Temporary and Proposed Regulations

The IRS has introduced temporary and proposed regulations to streamline Form 5472 filing. These updates eliminate the requirement for duplicate filings‚ reducing administrative burdens. The changes apply to foreign-owned U.S. corporations and foreign corporations engaged in U.S. trades or businesses. Filers must still accurately report transactions with related parties. Staying informed about these regulatory updates is crucial for ensuring compliance and avoiding penalties. The IRS continues to refine filing processes to enhance efficiency and clarity for taxpayers.

Removal of Duplicate Filing Requirements

The IRS has removed duplicate filing requirements for Form 5472‚ simplifying the process for foreign-owned U.S. corporations. Previously‚ filers had to submit the form with both their income tax return and separately‚ causing redundancy. This change reduces administrative burdens and potential errors. Filers must now only attach Form 5472 to their tax return‚ ensuring accurate and efficient reporting. This update aligns with efforts to modernize tax compliance and reduce unnecessary complexities‚ benefiting foreign corporations operating in the U.S. taxpayers must stay updated to adhere to new regulations.

Best Practices for Completing Form 5472

Ensure accuracy by thoroughly documenting all transactions and consulting a tax professional. Maintain organized records and review the form for completeness before submission to avoid errors.

Ensuring Accuracy and Compliance

To ensure accuracy and compliance‚ thoroughly understand the purpose of Form 5472 and maintain detailed records of all transactions. Consult a tax professional to verify completeness and adherence to IRS guidelines. Regularly review financial statements and ensure all data aligns with reported figures. Stay updated on IRS regulations‚ such as the removal of duplicate filing requirements‚ to avoid penalties. Accurate reporting is critical to comply with U.S. tax laws and maintain a strong financial standing for foreign-owned corporations operating in the U.S.

Record-Keeping and Documentation Tips

Maintain organized and detailed records of all transactions‚ including contracts and financial statements‚ to support Form 5472 filings. Use digital tools for secure storage and easy access. Ensure all documentation is dated and clearly labeled. Retain records for at least three years after filing‚ as required by IRS guidelines. Standardize your documentation process to avoid discrepancies and ensure compliance with reporting requirements. This organized approach helps streamline audits and ensures accurate submissions.

Open post

manual transmission driving lessons nyc

Top Driving Schools Offering Manual Transmission Lessons in NYC

Discover expert manual transmission lessons in NYC with top-rated schools like Drive Stick Shift‚ Ferrari Driving School‚ and CoreWay Driving School‚ offering personalized instruction and hands-on training․

1․1 Drive Stick Shift

Specializes in stick shift training with expert instructors‚ ensuring mastery of clutch control and smooth shifting in NYC’s challenging urban environment․

1․2 Ferrari Driving School

Provides comprehensive manual lessons tailored to all skill levels‚ emphasizing precision and confidence behind the wheel․

1․3 CoreWay Driving School

Offers a detailed stick shift training program‚ focusing on real-world scenarios and traffic conditions to build proficiency․

1․4 Professional Driving School

Known for its structured approach‚ offering expert guidance and flexible lesson packages for learners of manual transmission driving․

Drive Stick Shift offers comprehensive manual transmission lessons in NYC‚ specializing in hands-on training․ Their 3-hour lesson package provides detailed instruction on clutch control‚ smooth shifting‚ and real-world driving scenarios․ Expert instructors ensure learners gain confidence and proficiency in mastering stick shift driving in the city’s dynamic environment․

Ferrari Driving School offers expert manual transmission lessons in NYC‚ with strategically located centers for convenience․ Their comprehensive programs cater to all skill levels‚ focusing on precision and confidence․ Instructors provide tailored guidance‚ ensuring learners master clutch control and smooth shifting in the city’s challenging urban environment․

CoreWay Driving School specializes in manual transmission training‚ offering hands-on lessons tailored to individual needs․ Their expert instructors focus on real-world scenarios‚ ensuring learners gain confidence and proficiency in NYC’s dynamic traffic conditions․ The program emphasizes smooth shifting‚ clutch control‚ and practical skills for mastering stick shift driving effectively․

Professional Driving School offers structured manual transmission lessons with expert instructors‚ providing personalized guidance to master stick shift driving․ Their flexible lesson packages cater to diverse learner needs‚ ensuring confidence and proficiency in navigating NYC’s diverse road conditions effectively․

Benefits of Learning Manual Transmission Driving

Mastering manual driving enhances control‚ reduces fuel costs‚ and offers a more engaging experience․ It also saves on vehicle purchases and provides a sense of accomplishment and connection to the car․

2․1 Improved Control Over the Vehicle

Learners gain enhanced control by mastering clutch and gear coordination‚ enabling smoother acceleration and better handling‚ especially in NYC’s dense traffic and varied road conditions․

2․2 Cost-Effectiveness of Manual Cars

Manual cars are generally more affordable to purchase and maintain than automatics․ They often consume less fuel‚ reducing long-term costs․ Additionally‚ manual vehicles typically have lower insurance rates‚ making them a budget-friendly choice for NYC drivers seeking economical transportation options․

2․3 Enhanced Driving Experience

Mastering manual transmission driving offers a more engaging and rewarding experience․ Drivers gain better control over the vehicle‚ fostering a deeper connection with the road․ The ability to shift gears seamlessly enhances precision and confidence‚ making every drive more enjoyable and immersive‚ especially in NYC’s dynamic urban environment․

Choosing the Right Driving School

Selecting a reputable driving school in NYC for manual lessons ensures expert instruction․ Look for schools with experienced instructors‚ tailored lesson packages‚ and a focus on hands-on learning to master stick shift driving effectively․

3․1 Instructor Expertise

Ensure your instructors are highly skilled in manual transmission training․ Experienced teachers provide personalized feedback‚ helping you master clutch control and smooth shifting‚ crucial for NYC’s challenging urban driving environment․ Their expertise accelerates your learning process and builds confidence behind the wheel․

3․2 Lesson Packages

Driving schools in NYC offer flexible lesson packages for manual transmission training․ Options include 45-minute sessions‚ 3-hour packages‚ or extended courses․ Many schools provide one-on-one instruction‚ ensuring personalized attention․ Packages often include hands-on practice in real traffic conditions‚ helping learners master clutch control and smooth shifting․ Choose a package that fits your schedule and skill level for optimal results․

3․4 Hands-On Learning Approach

Top NYC driving schools emphasize practical‚ behind-the-wheel training for manual transmission․ Students practice clutch control‚ shifting gears‚ and navigating real traffic scenarios․ Interactive lessons ensure learners gain confidence and mastery through direct experience‚ with instructors providing immediate feedback to refine skills and build proficiency in stick shift driving․

Lesson Structure for Manual Transmission

Lessons typically start with basic clutch control and shifting techniques‚ progressing to real-world traffic scenarios to ensure practical mastery of manual driving skills in NYC․

4․1 Basic Clutch Control

Mastering clutch control is essential for manual driving․ Lessons focus on feathering the clutch‚ smooth engagement‚ and avoiding stalling․ Practice includes starting on inclines and in traffic‚ ensuring precise control․ Instructors emphasize proper pedal coordination and gradual acceleration․ This foundational skill builds confidence for more complex maneuvers like shifting gears and navigating urban conditions effectively in NYC․

4․2 Shifting Gears Smoothly

Shifting gears smoothly requires coordination between the clutch and accelerator․ Lessons focus on seamless transitions‚ minimizing jerking․ Practice includes upshifting‚ downshifting‚ and using the correct gear for speed․ Instructors teach how to listen to engine RPMs and adjust shifting techniques for city driving‚ uphill starts‚ and highway speeds‚ ensuring fluid and controlled gear changes in NYC traffic;

4․3 Practice in Real Traffic Conditions

Instructors guide students through NYC’s dynamic traffic‚ practicing stops‚ starts‚ and turns in real-world scenarios․ Lessons cover navigating hills‚ intersections‚ and heavy traffic‚ helping learners adapt to unpredictable urban conditions․ This hands-on approach builds situational awareness and confidence‚ ensuring smooth transitions between gears in challenging city driving environments․

Cost of Manual Transmission Driving Lessons

Manual lessons in NYC typically cost $70-$100 per session․ Prices vary based on location‚ instructor expertise‚ and lesson duration․ Package deals are often available․

5․1 Average Pricing in NYC

Manual transmission lessons in NYC typically range from $70 to $150 per session‚ depending on the driving school and lesson duration․ Many schools offer package deals‚ reducing the cost per lesson․ For example‚ a 45-minute session might cost $70‚ while a 1․5-hour lesson could be $150․ Prices reflect instructor expertise and location convenience․

5․2 Factors Affecting Lesson Costs

The cost of manual transmission lessons in NYC varies based on factors like school reputation‚ instructor expertise‚ and lesson duration․ Longer sessions or premium instructors may increase prices․ Location also plays a role‚ with schools in high-demand areas potentially charging more․ Customized lesson packages can further influence overall costs․

Duration of Manual Transmission Lessons

Manual transmission lessons in NYC typically last 45 minutes to 2 hours․ Most students require 5-10 lessons to master stick shift skills․

6․1 Typical Lesson Length

Manual transmission lessons in NYC typically range from 45 minutes to 2 hours․ Schools like Drive Stick Shift offer 45-minute sessions‚ while others provide 90-minute or 2-hour classes․ These structured time frames allow learners to gradually master clutch control‚ gear shifting‚ and real-world driving scenarios‚ ensuring a comprehensive learning experience tailored to individual progress․

6․2 Number of Lessons Required

The number of manual transmission lessons needed varies‚ typically ranging from 3 to 10 sessions․ Beginners may require more time to master clutch control and smooth shifting‚ while experienced drivers might need fewer lessons․ Schools like Drive Stick Shift offer packages starting with 3-hour lessons‚ allowing learners to progress at their own pace and build confidence behind the wheel․

Learning to Drive a Stick Shift in NYC

Mastering manual transmission in NYC’s challenging urban environment requires patience and practice․ Schools like Drive Stick Shift offer structured lessons to help learners build confidence and skill in tight traffic conditions․

7․1 Challenges of Urban Driving

Learning to drive a manual in NYC poses unique challenges‚ including heavy traffic‚ frequent stops‚ and narrow streets․ Mastering clutch control and quick shifts is essential to navigate congested areas smoothly․ Limited parking and aggressive drivers add to the difficulty‚ making urban environments demanding for new manual transmission learners․

7․2 Finding Safe Practice Areas

Finding safe spots to practice manual driving in NYC is crucial․ Start in empty parking lots or quiet side streets with minimal traffic․ Avoid busy areas initially and gradually move to more challenging locations․ Early morning or late evening practice sessions can provide ideal conditions․ Many driving schools recommend specific safe zones for learners to master clutch control and gear shifting confidently․

Prerequisites for Manual Transmission Lessons

Enrollment in manual transmission lessons in NYC generally requires being at least 16 years old and possessing a valid learner’s permit․ Some schools may have extra requirements․

8․1 Age Requirements

In New York City‚ students must be at least 16 years old to enroll in manual transmission lessons․ A valid learner’s permit is also required․ Some schools may offer instruction to younger learners with parental consent‚ though this varies by institution․ Always check with the driving school for specific age-related policies before booking lessons․

8․2 Learner’s Permit

A valid learner’s permit is mandatory to enroll in manual transmission lessons in NYC․ Students must pass a vision test and written exam to obtain it․ The permit allows practice under supervision․ Ensure the permit is valid for at least five years․ Check with your driving school for specific requirements before starting lessons․

Common Challenges When Learning Manual

Mastering manual transmission often involves overcoming stalling‚ coordinating clutch and accelerator‚ and achieving smooth gear shifts․ These challenges require patience‚ practice‚ and proper instruction․

9․1 Stalling the Car

Stalling is a common challenge when learning manual transmission․ It often occurs due to improper clutch and accelerator coordination․ Beginners may release the clutch too quickly or not provide enough acceleration‚ causing the engine to stall․ Practicing slow clutch release while pressing the accelerator is key to minimizing stalling and building confidence behind the wheel․

9․2 Smooth Acceleration

Smooth acceleration is crucial for mastering manual transmission․ It requires precise coordination between the clutch and accelerator․ Beginners often struggle with jerky starts‚ but consistent practice helps develop muscle memory․ Instructors emphasize gradual clutch release while applying gentle throttle to ensure seamless acceleration and maintain control‚ especially in NYC’s traffic conditions․

Booking Manual Transmission Lessons

Booking manual lessons in NYC is straightforward with online scheduling options․ Schools like Drive Stick Shift and Ferrari Driving School offer flexible appointment times and clear cancellation policies‚ ensuring convenience for learners․

10․1 Scheduling Options

Manual transmission schools in NYC offer flexible scheduling options‚ including online booking and phone appointments․ Lessons are available on weekends and evenings to accommodate busy schedules․ Most schools provide 45-minute sessions‚ with some offering extended hours for intensive practice․ Be sure to check individual school policies for specific time slots and availability․

10․2 Cancellation Policies

Most NYC driving schools require at least 24-hour notice for cancellations to avoid fees․ Some schools offer flexible rescheduling‚ while others may charge a portion of the lesson fee for late cancellations․ It’s important to review the specific cancellation policy of your chosen school before booking to avoid any penalties․

Open post

alto saxophone altissimo finger chart pdf

The alto saxophone altissimo finger chart is a detailed guide for mastering high notes beyond the standard range. It provides fingerings for notes above high F‚ enhancing technique and expanding musical possibilities for advanced players.

What is the Altissimo Range?

The altissimo range on the alto saxophone refers to the high notes above the standard playing range‚ typically extending beyond high F. These notes‚ often used in advanced solos and complex compositions‚ require precise fingerings and embouchure control. The altissimo range usually spans from high F-sharp up to high C or beyond‚ depending on the player’s skill and instrument setup. Mastering this range is challenging due to the need for accurate intonation and response. It is a key area of study for saxophonists aiming to expand their technical abilities and musical expression. The altissimo range is particularly valued in jazz and contemporary music‚ where these high notes add a unique brilliance and emotional impact to performances.

Why Learn Altissimo Fingerings?

Mastering altissimo fingerings expands your technical and musical capabilities on the alto saxophone. These advanced fingerings allow access to high notes beyond the standard range‚ enabling greater expressiveness and versatility in performance. Learning altissimo fingerings enhances your ability to play complex melodies‚ solos‚ and contemporary compositions with precision and control. It also improves overall technique‚ as the precise fingerings and embouchure adjustments required for altissimo notes strengthen your command of the instrument. Additionally‚ altissimo fingerings are essential for achieving the bright‚ powerful sound often demanded in jazz‚ classical‚ and experimental music. By dedicating time to this skill‚ you can unlock new creative possibilities and elevate your saxophone playing to a higher level of artistry and technical proficiency.

Overview of the Alto Saxophone Altissimo Finger Chart PDF

The Alto Saxophone Altissimo Finger Chart PDF is a comprehensive resource designed to help saxophonists master the high notes above the standard range. It provides detailed fingerings for notes from F-sharp up to high F and beyond‚ offering a clear visual guide for players. The chart includes both basic and alternate fingerings‚ allowing for flexibility and adaptability to different musical contexts. Many versions of this chart are available as free downloads‚ making it accessible to musicians of all levels. While specific fingerings may vary depending on the saxophone model‚ the chart serves as a foundational tool for improving altissimo technique. It is particularly useful for those seeking to expand their technical and musical capabilities in jazz‚ classical‚ and contemporary settings.

The Basics of Altissimo Fingerings

Altissimo fingerings involve specific techniques to produce high notes beyond the saxophone’s standard range. These fingerings require precise finger placement and embouchure control for accurate pitch and tone. A finger chart is essential for mastering these advanced notes‚ as fingerings vary by instrument model and player preference. Regular practice with a chart helps develop consistency and confidence in playing the altissimo range effectively.

Understanding the Normal Saxophone Fingering System

The standard saxophone fingering system is the foundation for learning altissimo techniques. It involves the use of keys and pads controlled by fingers and palms on both hands. For alto saxophones‚ the left hand typically covers the upper keys‚ while the right hand manages the lower keys and octave mechanism. Proper finger placement ensures accurate notes and smooth transitions. The normal range extends up to high F‚ with altissimo notes requiring additional fingerings and adjustments. Mastery of the standard system is crucial before advancing to altissimo‚ as it provides the technical proficiency needed for complex fingerings and precise intonation. Understanding this system allows players to build the necessary skills for higher-range exploration effectively.

Transitioning to Altissimo Fingerings

Transitioning to altissimo fingerings requires a strong foundation in standard saxophone technique and precise knowledge of finger placement. Altissimo notes‚ which extend beyond the high F in the standard range‚ demand specific fingerings that often involve alternative key combinations. Players must familiarize themselves with these unique fingerings‚ which can vary depending on the saxophone’s make and model. Testing different fingerings is essential to find those that produce clear‚ in-tune notes. The altissimo finger chart provides a visual guide to help navigate these complex fingerings‚ ensuring consistency and accuracy. By gradually incorporating altissimo techniques into practice‚ saxophonists can expand their musical expression and access higher registers with confidence.

Key Differences Between Standard and Altissimo Fingerings

The transition from standard to altissimo fingerings involves distinct differences in key combinations and finger placement. Altissimo fingerings often require alternative or additional keys to produce high notes beyond the standard range. Unlike standard fingerings‚ altissimo techniques may involve using the octave key in combination with other keys or unique fingerings that differ from conventional setups. Additionally‚ altissimo fingerings can vary significantly between saxophone models‚ making it essential to experiment and adapt fingerings to suit the specific instrument. These differences highlight the complexity and uniqueness of altissimo playing‚ emphasizing the need for precise technique and familiarity with the finger chart to achieve accurate and resonant high notes.

Advanced Altissimo Techniques

Mastery of high notes‚ alternate fingerings‚ and personalized systems enhances advanced altissimo playing. These techniques allow for precision‚ resonance‚ and musical versatility in the upper range.

Mastering High Notes Above High F

Mastery of notes above high F requires precise fingerings and embouchure control. The altissimo finger chart provides specific fingerings for these high notes‚ ensuring accuracy and pitch consistency. Players can achieve clear‚ resonant tones by practicing these fingerings regularly. The chart often includes alternate fingerings for passages requiring speed or tonal variety. Developing strength and flexibility in the embouchure is crucial for producing these high notes reliably. With consistent practice‚ saxophonists can expand their range and confidently perform complex musical pieces that utilize the upper register. The altissimo finger chart serves as an essential tool for advancing technical proficiency and musical expression;

Using Alternate Fingerings for Altissimo Notes

Alternate fingerings for altissimo notes offer flexibility in playing high register passages. These fingerings are particularly useful for fast passages‚ dynamic extremes‚ or tonal adjustments. For example‚ high G and above can be played using different finger combinations to suit the musical context. Some fingerings prioritize pitch accuracy‚ while others enhance playability in complex sequences. The altissimo finger chart often includes multiple options‚ allowing saxophonists to choose the most suitable fingering for their instrument and playing style. Experimenting with these alternatives helps develop a personalized approach‚ ensuring optimal performance in various musical genres. By mastering alternate fingerings‚ players can expand their technical and expressive capabilities‚ making the upper register more accessible and versatile.

Developing a Personalized Altissimo Fingering System

Creating a personalized altissimo fingering system involves adapting standard fingerings to suit your saxophone‚ reed strength‚ and playing style. While charts provide a foundation‚ experimentation is crucial. Different instruments and setups may require unique adjustments to achieve optimal pitch and tone. Players should test various fingerings‚ prioritizing those that offer the best intonation and ease of playability. Consistency is key‚ as frequent changes can hinder technical fluency. By tailoring fingerings to their specific needs‚ saxophonists can develop a reliable system for navigating the upper register. Regular practice and exploration ensure that the chosen fingerings become second nature‚ enhancing overall performance and musical expression in the altissimo range.

Practical Applications of the Altissimo Finger Chart

The altissimo finger chart is an essential tool for saxophonists‚ offering practical solutions for mastering high notes. It aids in refining technique‚ improving accuracy‚ and expanding musical versatility across genres.

Exercises for Improving Altissimo Technique

Mastering the altissimo range requires consistent practice and a structured approach. Start with long tones to build control and pitch accuracy in the upper register. Lip slurs and scales can help develop smooth transitions between notes. Arpeggios and melodic patterns are excellent for applying fingerings in musical contexts. Use the alto saxophone altissimo finger chart PDF to guide your practice‚ focusing on notes above high F. Begin with slower tempos and gradually increase speed as comfort improves. Incorporate exercises from trusted resources‚ such as those by Matt Olson or Ward Baxter‚ which provide detailed fingerings and strategies. Regularly practicing these exercises will enhance your technique‚ ensuring precise and resonant high-note performance across various musical genres.

Using the Chart in Various Musical Genres

The alto saxophone altissimo finger chart is a versatile tool applicable across multiple musical genres. In jazz‚ it enhances solos and improvisations with high-note flourishes. Classical pieces often require precise altissimo notes for complex compositions. For pop and rock‚ the chart helps deliver catchy‚ high-energy melodies. The fingerings provided in the PDF are adaptable to different styles‚ allowing saxophonists to explore various sounds and techniques. Whether performing in a band‚ orchestra‚ or as a soloist‚ the chart ensures consistency and accuracy in the upper range. By mastering these fingerings‚ musicians can seamlessly integrate altissimo notes into their performances‚ elevating their versatility and artistry across diverse musical settings.

Integrating Altissimo into Your Daily Practice Routine

Incorporating the alto saxophone altissimo finger chart into daily practice is essential for mastery. Begin with long tones to build accuracy and control in the upper range. Start with lower altissimo notes and gradually ascend. Use a tuner to ensure pitch accuracy. Practice scales and arpeggios using the fingerings from the chart to improve facility. Incorporate altissimo exercises into your warm-up routine‚ focusing on smooth transitions between notes. As you progress‚ introduce short melodies or etudes that utilize the altissimo range. Consistency is key; dedicate 10-15 minutes daily to altissimo-specific exercises. Over time‚ this focused practice will make high-note playing feel natural and effortless‚ allowing you to integrate altissimo seamlessly into your performances.

Congratulations on completing this guide! The alto saxophone altissimo finger chart is a valuable resource for mastering high notes. Consistent practice will enhance your technique and expand your musical possibilities. Embrace the challenge and enjoy the rewarding journey of altissimo exploration!

Final Thoughts on Mastering the Altissimo Range

Mastery of the altissimo range on the alto saxophone requires patience‚ dedication‚ and consistent practice. The altissimo finger chart serves as an invaluable tool‚ offering precise fingerings for high notes. Players should experiment with different fingerings to find what works best for their instrument and playing style. Regular practice of exercises and etudes will improve facility and confidence. Additionally‚ exploring various musical genres can provide inspiration and practical application of altissimo techniques. Remember‚ the altissimo range is not just about playing high notes but also about maintaining tone quality and musicality. With persistence and the right resources‚ you can unlock the full potential of the alto saxophone’s upper range and expand your artistic expression.

Encouragement for Continued Practice and Exploration

Embrace the journey of mastering the altissimo range with enthusiasm and curiosity. Each practice session brings you closer to unlocking new sonic possibilities. The alto saxophone altissimo finger chart is a valuable resource to guide your progress‚ but remember that exploration is key. Experiment with different fingerings and techniques to develop a personalized approach that suits your style and instrument. Don’t be discouraged by challenges—every great saxophonist has faced similar hurdles. Celebrate small victories‚ and let each achievement motivate you to push further. The altissimo range is not just a technical feat; it’s a gateway to expressive freedom. Stay inspired‚ stay committed‚ and enjoy the rewarding process of expanding your musical horizons.

Posts navigation

1 2
Scroll to top