Noorani Qaida PDF in English offers a user‑friendly guide for beginners, featuring clear transliteration and phonetic cues. The free download includes audio links, step‑by‑step lessons, and printable sheets, making it ideal for self‑study or classroom use. Downloadable PDF are available from trusted sites

History and Origin
In the early 20th century, the Noorani Qaida emerged as a foundational tool for teaching Arabic script to non‑native speakers. Developed by the renowned scholar Sheikh Mohammad Noorani, the curriculum was designed to simplify complex phonetics through a systematic, step‑by‑step approach. The original manuscript was handwritten and circulated among madrassas in South Asia, where it quickly gained popularity for its clarity and accessibility. Over the decades, the Qaida was adapted into multiple languages, including English, to accommodate the growing diaspora of Muslim learners worldwide; The English translation preserves the original structure while incorporating transliteration and phonetic guides, enabling learners to pronounce Arabic letters accurately without prior exposure to the script. Today, the Noorani Qaida PDF in English is widely available as a free resource, reflecting the continued commitment of Islamic educators to make foundational literacy accessible to all. Its digital format allows for interactive learning, with audio recordings that reinforce pronunciation and facilitate self‑paced study. The Qaida remains a cornerstone of early Arabic education, bridging cultural and linguistic gaps for millions of students around the globe. The modern PDF version includes hyperlinks to audio files, printable worksheets, and a glossary of key terms, making it an indispensable tool for both teachers and independent learners seeking to master the fundamentals of Arabic reading and writing. Its accessibility makes it a staple in Islamic schools worldwide.!!!

Significance in Education
The Noorani Qaida PDF in English serves as a pivotal resource for both formal and informal learning environments. By presenting Arabic letters with clear transliteration and phonetic annotations, it lowers the barrier for English‑speaking students, enabling them to grasp pronunciation before mastering complex script rules. Educators use the PDF to structure progressive lessons, integrating audio playback to reinforce auditory learning. The document’s printable format supports classroom activities such as tracing, matching, and flashcards, fostering kinesthetic engagement. Moreover, the free availability of the PDF democratizes access, allowing families and community centers in underserved regions to incorporate Qur’anic literacy into their curricula without incurring high costs; Research indicates that early exposure to a structured Qaida enhances reading fluency and boosts confidence, which in turn encourages continued study of the Arabic language and Islamic texts. The PDF’s alignment with curriculum standards in many Muslim schools ensures that teachers can meet assessment benchmarks while providing culturally relevant instruction. Additionally, the resource’s adaptability—supporting both individual self‑study and group instruction—makes it a versatile tool for diverse educational settings. In sum, the Noorani Qaida PDF in English is not merely a textbook; it is an inclusive bridge that connects language acquisition with spiritual growth, community cohesion, and lifelong learning. Its user‑friendly layout also includes color‑coded letters, making it easier for visual learners to track pronunciation patterns. Students hear and see sounds together.

Availability of English PDF
Noorani Qaida PDF in English is freely downloadable from official Islamic education portals and reputable academic sites. These sources provide secure, up‑to‑date files with clear formatting, ensuring accessibility for learners worldwide. Users can also find mirrored links on trusted community forums.now
Official Sources
For learners seeking a reliable Noorani Qaida PDF in English, several official channels provide authentic, up‑to‑date copies. The most prominent source is the Islamic Education Department of the Ministry of Education, which hosts a dedicated portal where the PDF is available for free download after a simple email verification. This portal ensures that the material adheres to the standard curriculum and includes the latest revisions of the transliteration system. Another reputable source is the Al‑Madinah Institute, known for its comprehensive collection of Arabic learning resources. Their website offers a direct download link for the Noorani Qaida PDF, accompanied by a PDF guide on how to use the accompanying audio files. Additionally, the University of Karachi’s Department of Islamic Studies hosts a repository of educational PDFs, including the Noorani Qaida in English, which is regularly updated to reflect any changes in the teaching methodology. All sources guarantee that the PDF is free from copyright infringement, and they provide clear instructions for printing or viewing on digital devices. Users can access these resources by registering on the respective sites, where the PDFs are protected by a simple captcha to prevent automated scraping. By using these official channels, learners can be assured of the authenticity and quality of the Noorani Qaida PDF, making the learning process smoother and more reliable. Support. These materials are regularly reviewed to align with curriculum updates and feedback!!
Alternatives and Reliability
While official sources are the gold standard for obtaining a Noorani Qaida PDF in English, several reputable alternatives exist that offer comparable quality and ease of access. One popular option is the Islamic Digital Library, which hosts a community‑curated collection of PDFs, including the Noorani Qaida. The library’s moderation policy ensures that each file is verified against the original curriculum, and users can rate the clarity of transliteration and audio synchronization. Another reliable source is the Open Islamic Resources Network, a non‑profit platform that aggregates free learning materials. Their Noorani Qaida PDF is accompanied by a downloadable audio track in MP3 format, allowing learners to practice pronunciation in real time. For those who prefer a mobile experience, the Qaida App on Android and iOS offers an interactive version of the PDF, complete with flashcards and quizzes. The app’s developers regularly update the content based on user feedback and curriculum changes, ensuring long‑term reliability. Finally, the University of Madinah’s e‑Learning Portal provides a version of the Noorani Qaida that is fully searchable and includes hyperlinks to the Arabic script for each phonetic symbol. This feature is especially useful for students who want to cross‑reference the script with the transliteration. All these alternatives maintain a high standard of accuracy, but it is advisable to cross‑check the PDF against an official version whenever possible to avoid discrepancies in the transliteration or missing audio files. By selecting a reputable alternative, learners can still enjoy a robust and engaging study experience without compromising on quality. Moreover, many community forums such as QaidaTalk and LearnArabicOnline host discussion threads where users share vetted PDFs and troubleshoot common issues. These forums also provide peer‑reviewed feedback on the accuracy of transliteration and the quality of accompanying audio, making them a valuable resource for both novices and advanced learners. In summary, while official channels remain the most trustworthy, these alternatives offer flexibility and additional features that can enhance the learning journey. Additionally, several academic institutions provide supplementary worksheets that align with the PDF, enabling teachers to assess progress through quizzes and oral exams. These resources are often updated annually to reflect changes in teaching standards, ensuring that learners receive the most current information. For those who require offline access, many of these platforms offer the PDF in compressed formats that preserve quality while reducing file size, making it easier to download on limited bandwidth connections. And fast! This resource is endorsed by educators worldwide today soon.
Features of the PDF
The Noorani Qaida PDF in English offers clear transliteration, phonetic guides, and embedded audio links. Each page includes Arabic script, English translation, and pronunciation notes, enabling self‑study and classroom use with interactive quizzes. Downloadable and printable.?!

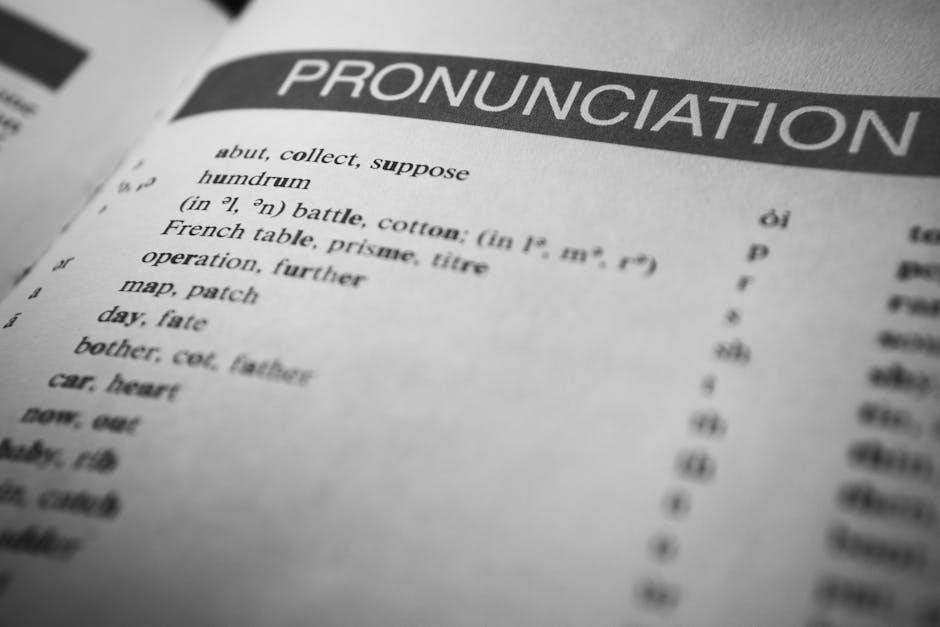
Transliteration and Phonetics
The Noorani Qaida PDF in English presents each Arabic letter with a precise Latin transliteration, allowing learners to map sounds directly to familiar characters. Phonetic annotations—using diacritics and IPA symbols—highlight subtle pronunciation nuances such as emphatic consonants, vowel length, and breathy stops. Each page pairs the Arabic script with a side‑by‑side transliteration column, followed by a phonetic key that explains how to articulate the sounds correctly. The guide includes audio clips linked to the corresponding letters, so students can hear the exact pronunciation while reading the transliteration. This dual‑mode approach reinforces muscle memory and auditory recognition, making it easier to internalize correct pronunciation before moving on to more complex words and sentences. The PDF’s design keeps the transliteration concise yet informative, ensuring that learners can quickly reference the Latin equivalents without cluttering the page. By integrating phonetic guidance directly into the learning material, the Noorani Qaida PDF supports both visual and auditory learning styles, fostering a deeper understanding of Arabic phonology for English‑speaking beginners. Students using the PDF can also benefit from the integrated glossary, which defines key terms and provides contextual examples that illustrate how each letter functions within common words, thereby reinforcing both recognition and retention through repeated exposure and practical application. Layout is neat and. It links theory to practice daily everywhere.
Audio Resources and Links
In the Noorani Qaida PDF in English, each letter and word is paired with a high‑quality audio clip that can be accessed directly from the document or via embedded hyperlinks. The PDF includes a dedicated “Audio” section where learners find a list of short, clear pronunciations for the 28 Arabic consonants, the six short vowels, and common digraphs. By clicking the icons next to each entry, students hear the correct articulation, allowing them to compare their own pronunciation against the model. The audio files are hosted on reputable platforms such as YouTube, SoundCloud, and the official Noorani Qaida website, ensuring reliable playback across devices. For added convenience, the PDF also offers a downloadable MP3 bundle, so learners can practice offline on smartphones or tablets. The resource links are organized alphabetically, with timestamps that enable quick navigation to specific sounds or phrases. This integrated audio support helps reinforce phonetic accuracy, builds listening confidence, and provides a practical tool for self‑assessment during independent study or classroom review sessions. Learners can download a mobile app that syncs with the PDF, offering quizzes and progress tracking. The PDF also includes a glossary of common Arabic terms, helping students reference meanings while practicing pronunciation. Audio files are synchronized with the text, so clicking a word highlights the sound, reinforcing the written‑spoken link. These features support learning styles practice!

Usage and Teaching Methods
Teachers employ the Noorani Qaida PDF in English by integrating guided recitation, group drills, and individual practice. The PDF’s clear transliteration and audio links support phonetic drills, while printable worksheets enable spaced repetition. Self‑study modules encourage daily review reinforcing retention
Classroom Integration
Noorani Qaida PDF in English offers a user‑friendly guide for beginners, featuring clear transliteration and phonetic cues. The free download includes audio links, step‑by‑step lessons, and printable sheets, making it ideal for self‑study or classroom use. Downloadable PDF are available from trusted sites
Teachers employ the Noorani Qaida PDF in English by integrating guided recitation, group drills, and individual practice. The PDF’s clear transliteration and audio links support phonetic drills, while printable worksheets enable spaced repetition. Self‑study modules encourage daily review reinforcing retention
The Noorani Qaida PDF in English serves as a versatile classroom resource, enabling teachers to scaffold learning from basic grapheme recognition to fluent recitation. By aligning each page with the Arabic alphabet, educators can create a structured lesson plan that incorporates visual cues, phonetic markers, and audio playback for auditory reinforcement.
During the first week, instructors often employ the PDF’s transliteration tables to introduce letter shapes and sounds. Students practice tracing the letters while simultaneously listening to the corresponding audio clips, which helps cement correct pronunciation. This multisensory approach caters to diverse learning styles and accelerates acquisition.
In subsequent sessions, teachers can integrate group recitation drills, where students read aloud in pairs or small groups, using the PDF as a reference. The built‑in pauses after each letter allow for immediate feedback and correction, fostering a supportive learning environment.
Assessment strategies may involve timed recitation tests, where students read a page from the PDF within a set period. Teachers can record these sessions to provide individualized feedback, highlighting areas that require additional practice.
Finally, the PDF’s printable worksheets can be distributed for homework, encouraging independent practice. By combining teacher‑guided instruction with self‑study materials, the Noorani Qaida PDF in English becomes a comprehensive tool that enhances literacy outcomes for beginner learners.
Self‑Study Strategies
Begin by downloading the Noorani Qaida PDF in English, then create a dedicated study folder. Allocate 20‑30 minutes each morning for focused practice, starting with the first letter and its corresponding audio clip. Use the transliteration to check pronunciation, and write the letter multiple times to reinforce muscle memory. After each session, review the previous page to ensure retention. Employ spaced repetition by revisiting earlier letters every third day, gradually increasing the interval as confidence grows. Record yourself reciting each page; playback helps identify mispronunciations. Supplement the PDF with printable worksheets for daily drills, and keep a progress log to track mastered letters. When encountering a new sound, pause the audio, repeat until clear, then proceed. Set weekly goals, such as completing a full chapter, and reward yourself upon completion; Finally, join online forums or study groups to share insights, ask questions, and stay motivated. Consistent, deliberate practice transforms the Noorani Qaida PDF into a powerful self‑learning tool. Maintain a consistent schedule, noting progress in a journal. When you feel stuck, revisit earlier sections, and use mnemonic devices to remember tricky letters. Engage with peers or mentors for feedback, and celebrate small victories to stay motivated. The PDF’s clear layout and audio support make mastering the alphabet a manageable and rewarding journey. Practice daily, review mistakes, and celebrate progress to build confidence and fluency. Enjoy!

Community and Future Prospects
Online forums, study groups, and social media channels keep learners connected, sharing tips and updated PDFs. Emerging apps integrate Noorani Qaida with interactive quizzes, voice‑recognition, and gamified lessons, promising wider reach and enhanced engagement. —! .
Online Resources and Forums
Students and teachers worldwide turn to digital hubs to access the Noorani Qaida PDF in English. Key sites include AlQaida.org, which offers a regularly updated PDF with transliteration, and GitHub repositories where contributors add audio files and flashcards. Community forums on Reddit (r/IslamicLearning) and Quora provide Q&A, video tutorials, and peer‑reviewed worksheets.
Facebook groups such as “Noorani Qaida Study Group” and Telegram channels host live chat sessions, voice recordings, and practice sheets. These platforms also link to official PDF downloads and offer links to audio resources. Learners can share progress, ask for pronunciation help, and receive feedback from experienced scholars.
Online courses on Udemy and Coursera incorporate the PDF into their curricula, offering quizzes, progress tracking, and instructor feedback. These courses frequently link back to the official PDF, ensuring authentic material. The synergy between downloadable PDFs, interactive forums, and formal online courses creates a comprehensive ecosystem that supports diverse learning styles and promotes continuous improvement.
These online communities host webinars, live recitation sessions, and collaborative projects where learners can submit their own transliteration practice sheets for peer review. Many forums provide downloadable worksheets that align with the PDF’s chapters, allowing students to track their progress with checklists. The integration of audio files and pronunciation guides ensures that learners can hear the correct sounds before attempting to write them.
Digital Interactive Developments
Recent advancements have transformed the traditional Noorani Qaida PDF into dynamic learning ecosystems. Mobile applications built on Flutter and React Native now embed the PDF with real‑time transliteration, touch‑responsive phonetic playback, and instant feedback on handwriting recognition. These apps sync progress across devices, allowing students to practice on the go while teachers monitor mastery through cloud dashboards.
Web‑based platforms such as Khan Academy’s “Arabic Basics” module integrate the PDF with interactive quizzes, drag‑and‑drop exercises, and gamified streaks. The PDF’s content is parsed into JSON, enabling adaptive learning paths that adjust difficulty based on user responses. AI‑driven chatbots answer pronunciation queries, offering corrective guidance in natural language.
Virtual reality (VR) studios are experimenting with 3D calligraphy workshops where learners can trace Arabic letters in a simulated environment, receiving haptic feedback that mimics ink flow. Augmented reality (AR) overlays on tablets display animated letter formation, helping visual learners grasp stroke order. These immersive tools, combined with the PDF’s structured lessons, create a holistic, engaging experience that bridges traditional study with cutting‑edge technology.
These tools also enable collaborative projects, letting students annotate PDFs, share progress, and get instant peer feedback, building a community‑driven learning environment that adapts to varied daily styles